
What’s one thing that’s most important after setting up a WordPress website?
Creating your first few web pages? Publishing a blog post? Installing security plugins?
While all these tasks are undoubtedly important, they’re not the first thing to do after your WordPress installation.
There’s something more important than that, which should have a higher priority on your list — taking a backup.
Because if you don’t back up your website regularly during the setup phase, you may lose your hard work if any of your themes/plugins turn out to be buggy.
That’s why it should be your topmost priority to back up your WordPress site and automate your backups.
- Frequently Asked Questions
- What You’ll Need to Back Up a WordPress Site
- How to Back Up a WordPress Site: Step-by-Step
- Step 1: Log in to your WordPress dashboard
- Step 2: Install and activate the UpdraftPlus backup plugin
- Step 3: Configure your backup settings
- Step 4: Automate your backups
- Step 5. Specify your backup location
- Step 6: Specify Exclusions
- Step 7: Save your changes and proceed to backup
- Step 8: Create your first backup
- Similar Tutorials to Check Out
- Wrapping Up
Frequently Asked Questions
Is There a Backup on WordPress?
WordPress doesn’t maintain any backup of your website by default. That’s something you need to do and set up yourself.
What is the Best WordPress Backup Plugin?
A WordPress backup plugin helps you take a backup of your website from within the ease of your WordPress dashboard.
It also helps you regulate, automate and restore from backups.
What You’ll Need to Back Up a WordPress Site
You need 3 things before you get started with the backup process of your WordPress site. They are:
- A WordPress backup plugin
- Your WordPress login credentials
- Your cloud storage account (i.e. Google Drive, OneDrive, Dropbox) credentials if you want your backup to be uploaded to any of them.
How to Back Up a WordPress Site: Step-by-Step
The easiest method to back up your WordPress website is by using a backup plugin.
There are many plugins available for the task, but we shall use UpdraftPlus for this tutorial because it’s one of the best-rated and most reliable options out there.
Here’s how to use it for backing up your WordPress website:
Step 1: Log in to your WordPress dashboard
First of all, log in to your WordPress admin account if you’re not logged in already.
Navigate to yourdomain.com/wp-admin, and sign in with your admin account.
Note: ‘admin’ is the keyword here as only a user with administrative privileges can install or uninstall plugins.
Step 2: Install and activate the UpdraftPlus backup plugin
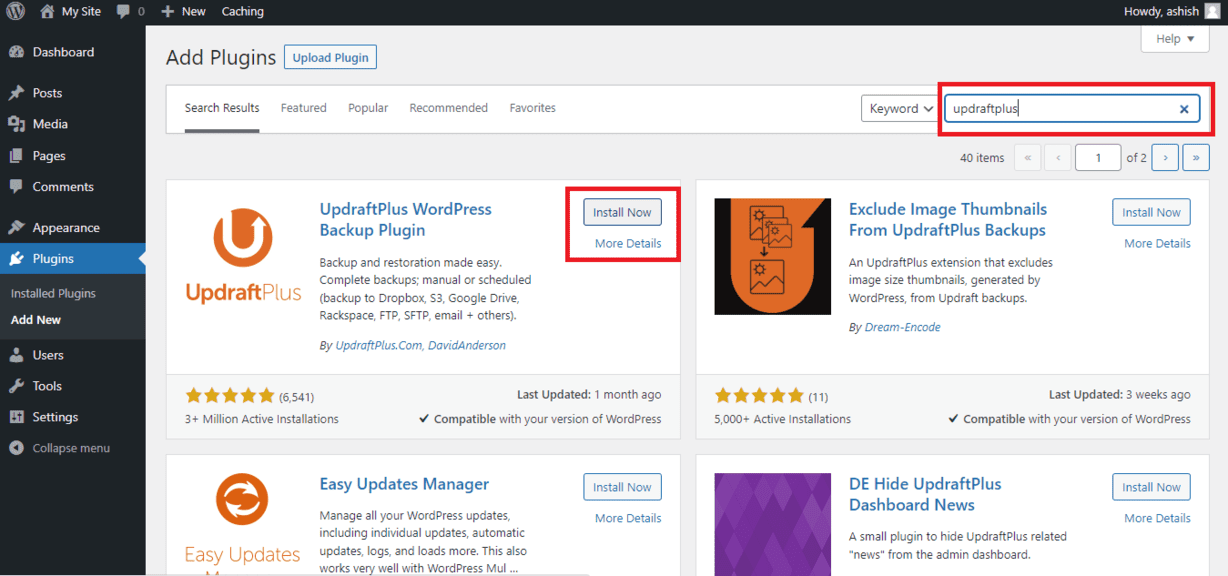
Navigate to Plugins >> Add New page from your WordPress dashboard.
Once you land on the Add New plugins page, search for UpdraftPlus.
This should bring you to a page like the one shown below.
From here, you can install and activate the UpdraftPlus plugin.
Step 3: Configure your backup settings
After you install and activate the UpdraftPlus plugin, you’ll see a screen like the one shown below:
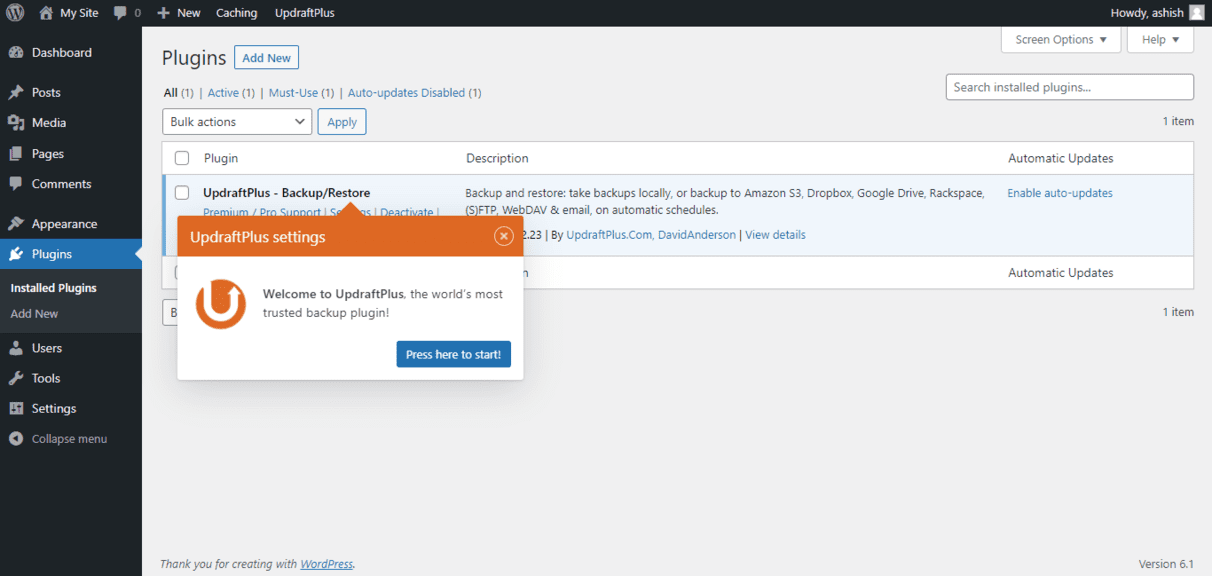
As you can see, this is the Plugins page of your WordPress dashboard.
And UpdraftPlus smartly takes you through a tour of the plugin, guiding you to create your first backup.
If you click on the ‘Press here to start!’ button, you’re quickly taken to the UpdraftPlus Backups page (the one shown below).
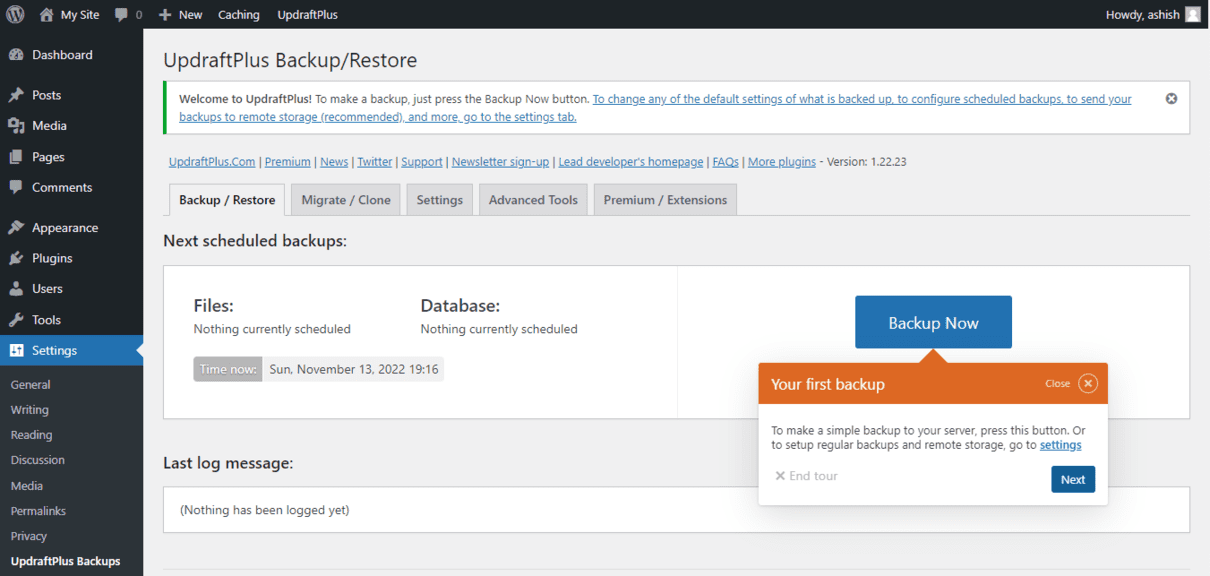
Then on this page, you can click either the ‘Settings’ tab or the ‘Next’ button to configure your backup settings.
Step 4: Automate your backups
The Settings tab of UpdraftPlus looks something like this:
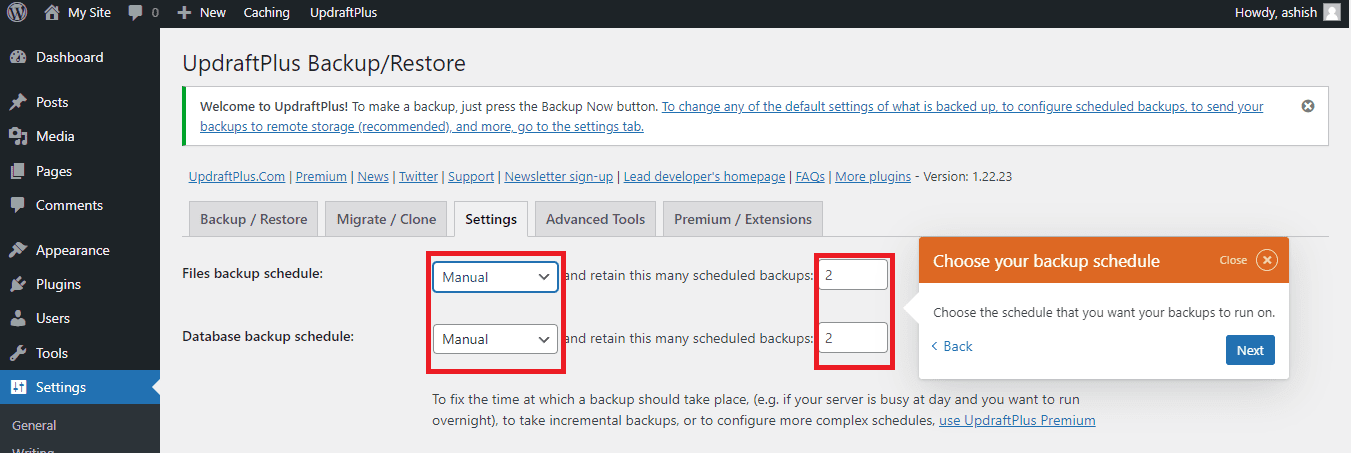
On this page, you can define the various attributes related to your backup.
The first one among them allows you to schedule your backups — you can define various schedules for the backup of your files as well as your database.
You can schedule backups to happen automatically at the following intervals:
- Manual (No automatic backups take place and you need to backup manually)
- Every 2 hours
- Every 4 hours
- Every 8 hours
- Every 12 hours
- Daily
- Weekly
- Fortnightly
- Monthly.
Either of these backup frequencies can be selected for your files and your database.
Then after you select the frequencies, you can select the number of backups you want to retain for both your files and your database.
By default it retains 2 backups for each, but you can enter any number of your choice.
Step 5. Specify your backup location
Now you need to specify a location where your backup files will be stored.
UpdraftPlus provides a generous choice in this regard, as you can see in the backup locations shown below:
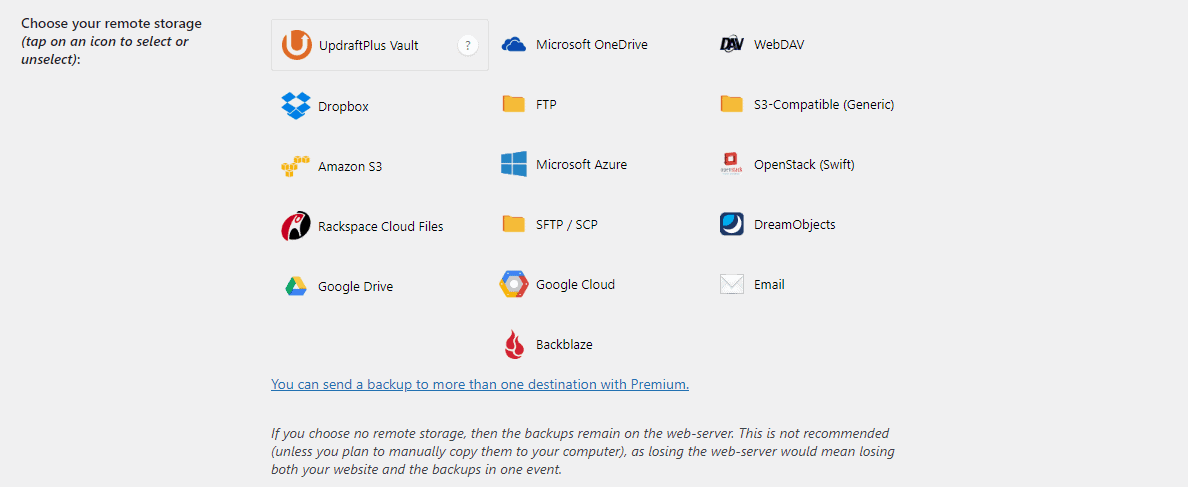
Specify your storage location, and if you’re choosing a remote location like Microsoft OneDrive, Dropbox, or Google Drive, then authenticate with your account on those services.
After authentication UpdraftPlus will send the backups straight to your storage accounts on these sites.
If you want to retain a local backup, then you can select the FTP option.
Selecting it will open a form like below, where you will have to enter the FTP login details of your server.
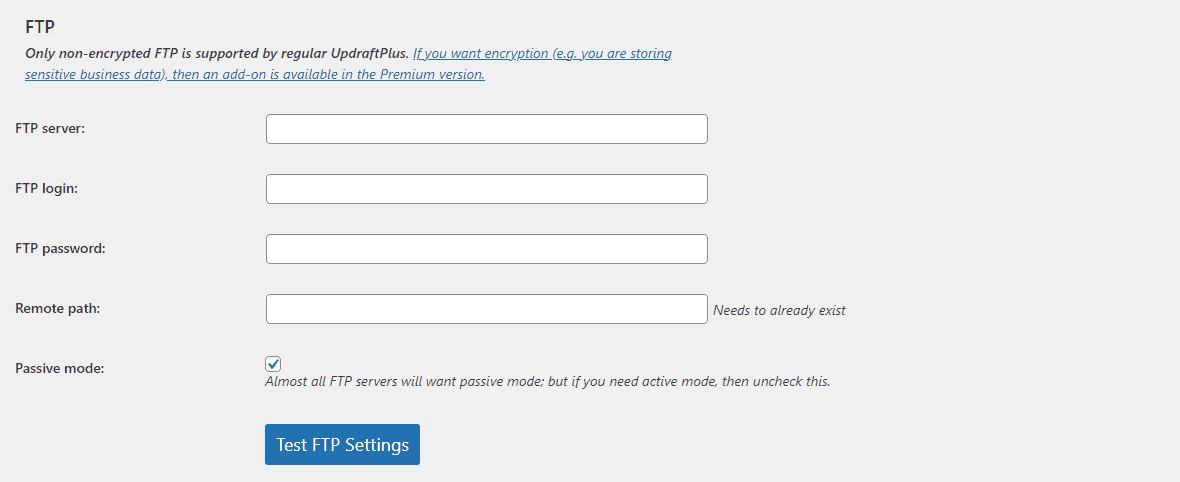
Once you enter those details correctly, the backups would be pushed to your specified Remote directory on the server.
Step 6: Specify Exclusions
Not everything is meant to be in the backup. Some files only increase the size of the backup file and don’t add any real value.
Even if you lost them, it won’t be much of an issue.
These files include other backups, upgrade files of plugins and other software, and in some cases, even uploads.
UpdraftPlus allows you to specify which files you want to include and which ones you want to exclude from your backup. Here are the options for that:
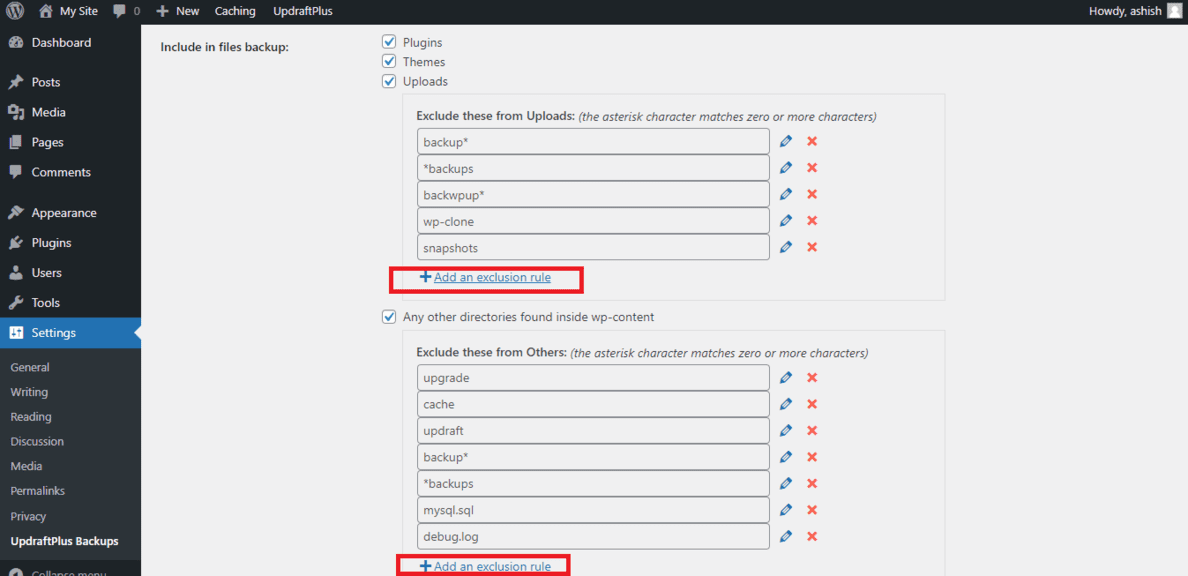
As you can see, you can select whether or not you want to include plugins, themes, or uploads in your backup.
In addition to that, you can add exclusion rules for not including content within the “Uploads” folder or other content.
Step 7: Save your changes and proceed to backup
Click on the ‘Save Changes’ button.
When your settings have been saved, you’ll see another tour prompt like the one shown below:
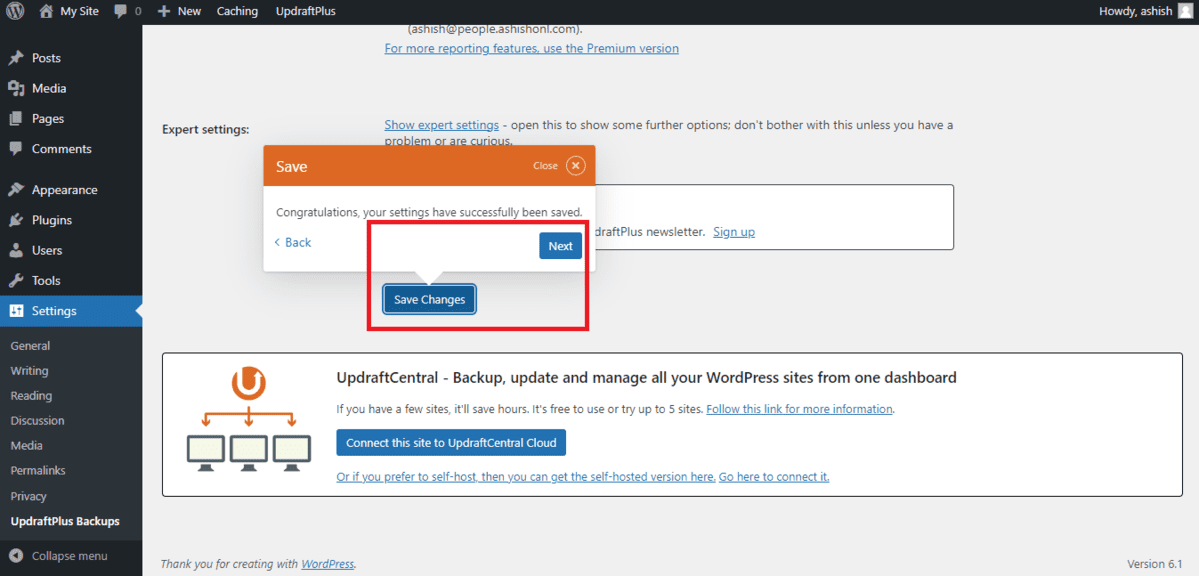
Click on the next option in this prompt.
You’ll be shown another prompt asking you to connect your site to the UpdraftCentral cloud, but skip it and click the ‘Next’ button again.
Then you’ll be taken to the UpdraftPlus Premium page.
If you wish, you can buy their premium subscription. Otherwise, click the ‘Finish’ button.
Step 8: Create your first backup
Now you’re ready to perform your first backup.
Simply navigate to the Backup/Restore tab and click the Backup Now button.
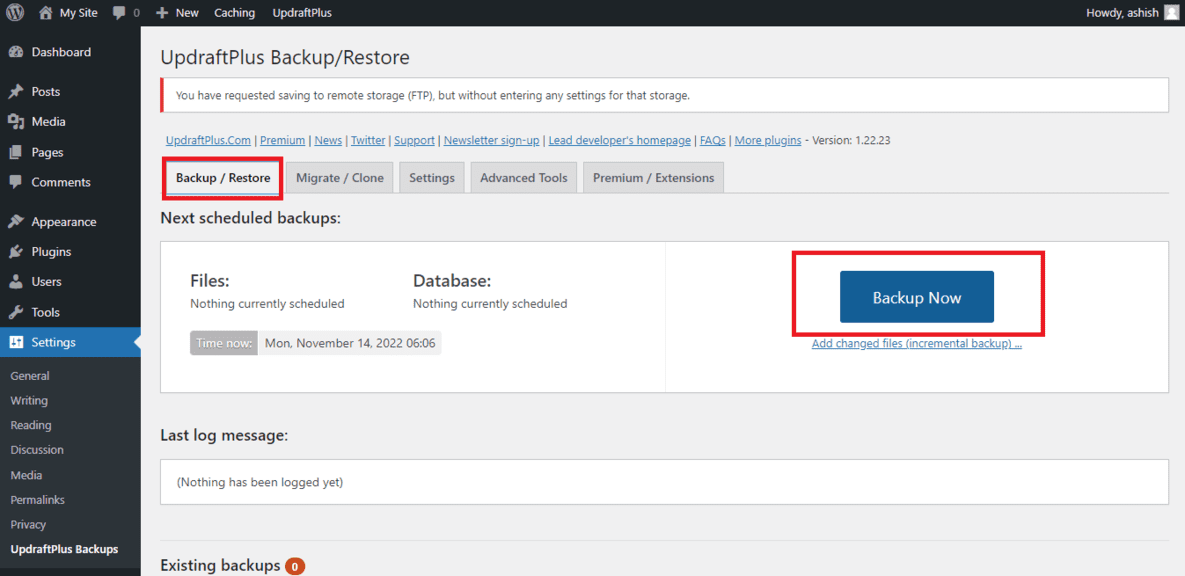
This should bring you to a screen like the one shown below:
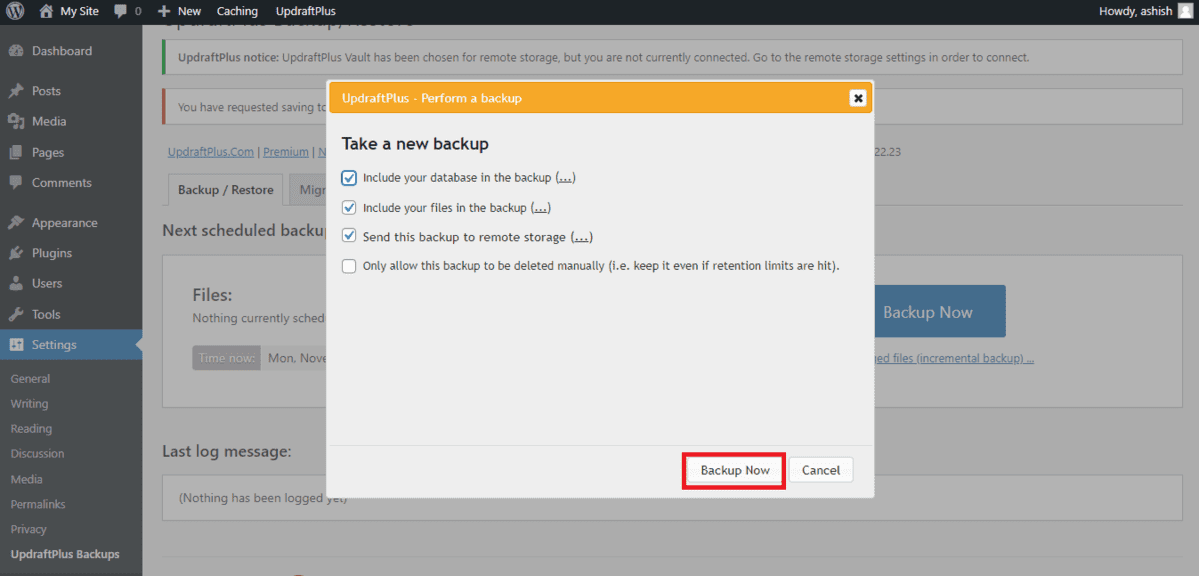
You can keep all the checkboxes checked, or uncheck them depending on your preferences (i.e. if you don’t want to include your database, uncheck the first option).
Once done, click the ‘Backup Now’ button.
When your backup is successful, it will show up under the ‘Existing Backups’ section like this:

Similar Tutorials to Check Out
- How to Remove a Theme From WordPress: Useless themes that you’re not going to use ever only consume server space, so it’s a good idea to remove them. This tutorial explains how can you uninstall such a theme from your WordPress website.
- How to Update WordPress: This tutorial explains how to update your WordPress installation to the latest release of WordPress. Keeping your website software up-to-date is as important as keeping its data backed up, so you should check out how to do that.
- How to Speed Up WordPress: Finally, this tutorial can help you speed up your WordPress website and make sure that it loads faster. Visitors and Google both love a fast-loading website, so you should learn how to speed up yours.
Wrapping Up
So this was our brief guide explaining how to back up your WordPress site.
We hope it was detailed and straightforward enough throughout the process, and that you were able to learn what you needed to learn through it.
If you still have any doubts, or if there’s something that can be improved in our explanation, drop it in the comments and we shall look into it.
Also, don’t forget to share this article on social media so other WordPress users can also learn this simple and easy way of backing up their website.


