
The page margin is one of the several page elements you can customize on your Google document.
It is the space between the text on your page and the edges of your Google Doc document.
Its role is to make your document look neat and professional.
The default margin on Google’s word processor is one inch, but you may want to change that to comply with the requirements of an academic or professional project.
Another common reason is to create sufficient space so that when the document is printed, the binding will not interfere with the text.
So, how do you make the needed adjustments on Google Docs?
In this article, I will show you how to change margins on Google Docs and why you may be better off making the changes on your desktop device.
Here are the questions people are asking on search engines about page margins on Google Docs:
Can You Change Margins On Google Docs?
You can easily change the right, left, top, and bottom margins of your Google document.
You can either make the adjustments using the on-page Ruler or with the Margins option under Page Setup.
Where Is Page Setup In Google Docs?
The Page Setup function lets you modify the orientation, paper size, and paper color of your document, as well as set new measurements for your page margins.
Navigate to File > Page Setup to access the box where you can effect the changes.
What Is Needed To Change Margins On Google Docs
Here are the tools you will need to effectively adjust the margins of your Google document:
- A Desktop — you are better off making the needed adjustments on your desktop device. A large screen will give you a more perfect view of how the changes are affecting the text on your page.
- Google Chrome — if you are working on your desktop, you can access Google Docs more directly through the Chrome browser.
How To Change Margins On Google Docs: Step-By-Step Instructions
You can of the two methods below to change page margins on Google Docs:
- Change margin with the on-page ruler
- Change margin with the page setup option
Method 1: Change Margins With The On-Page Ruler
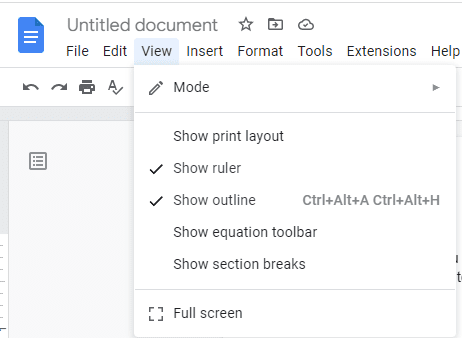
Open your document in Google Docs, then click View > Show ruler on the menu bar to access the on-page ruler.
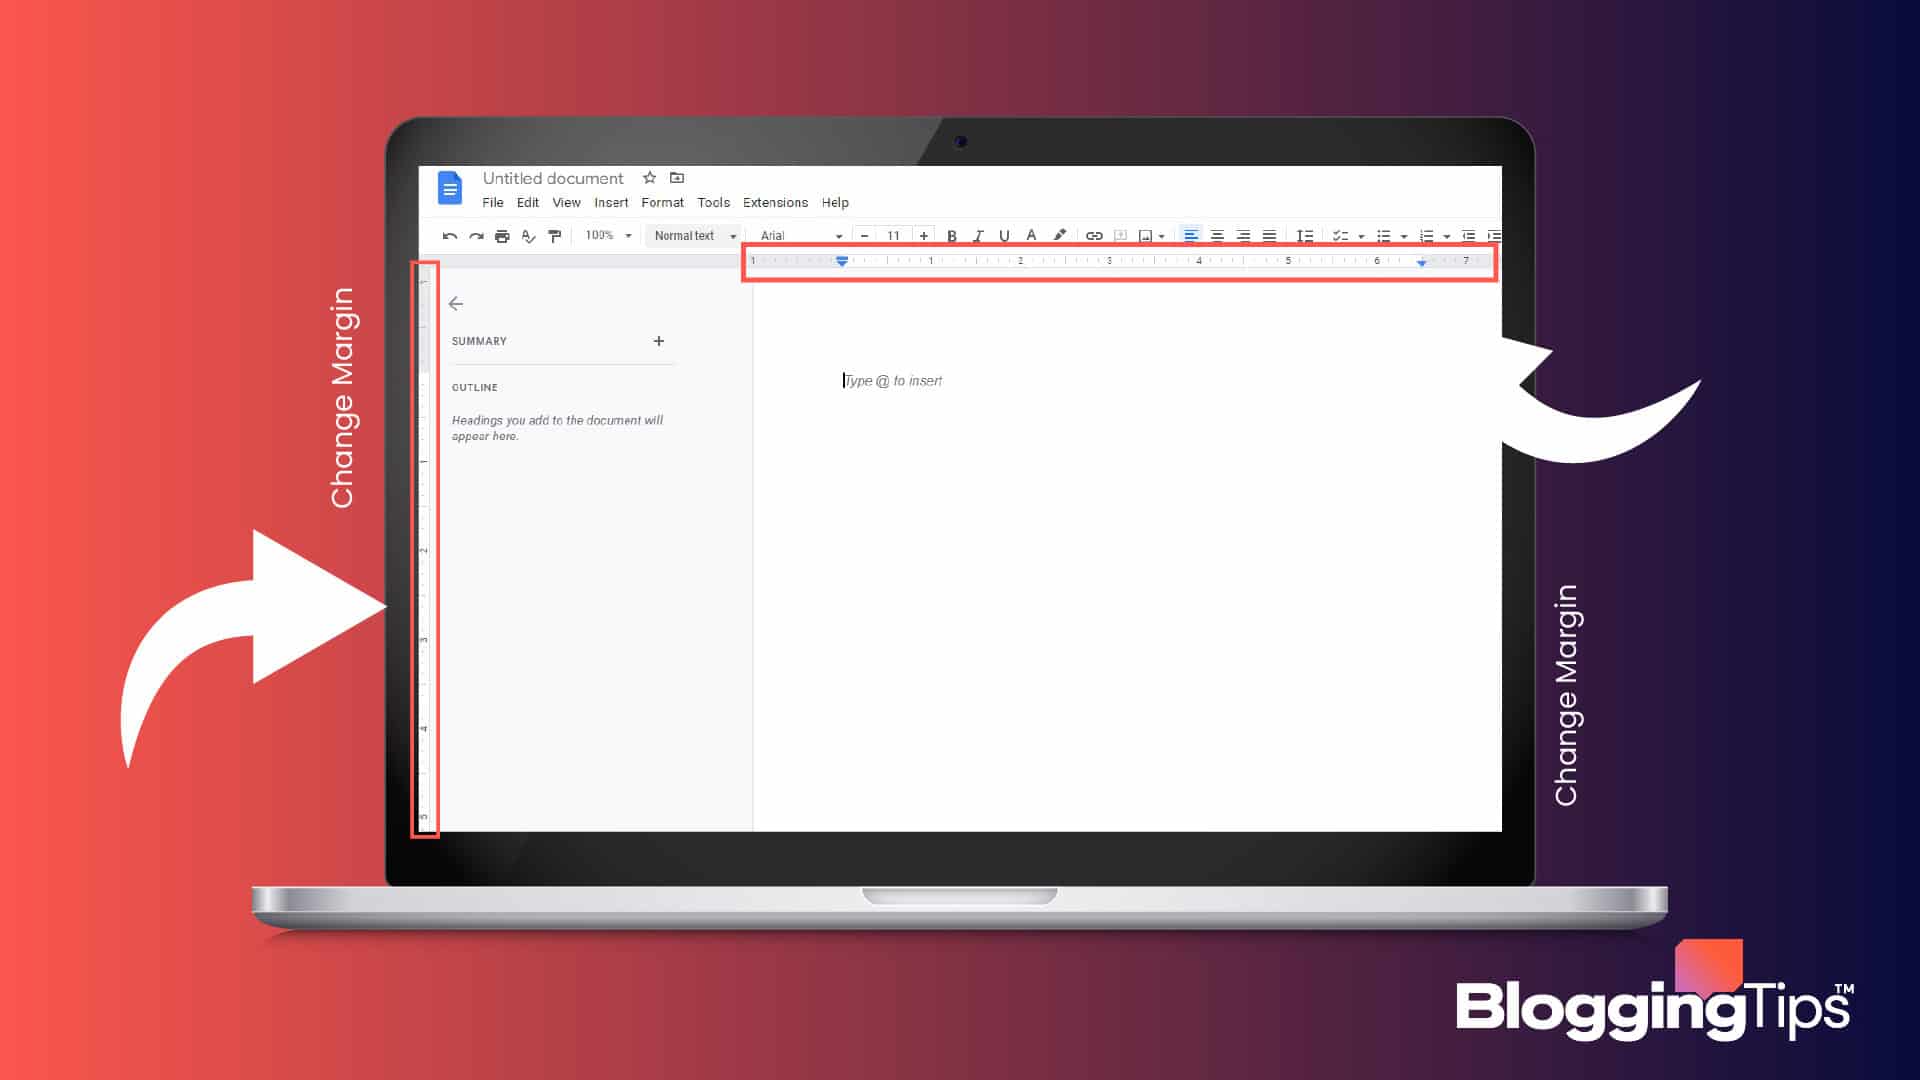
Since you can change your page margins on all sides, you can start with the right and left margins.
To change the left margin on your page, place your cursor on the grey area before 1 to 7 on your ruler.
Right-click and drag the white horizontal two-headed arrow to the right till you are satisfied.

To change the right margin, place your cursor in the grey area on the right side of your ruler, and drag the two-headed arrow to the left.
To change the top and bottom margins, move over to the vertical ruler on the left side of your Google document.
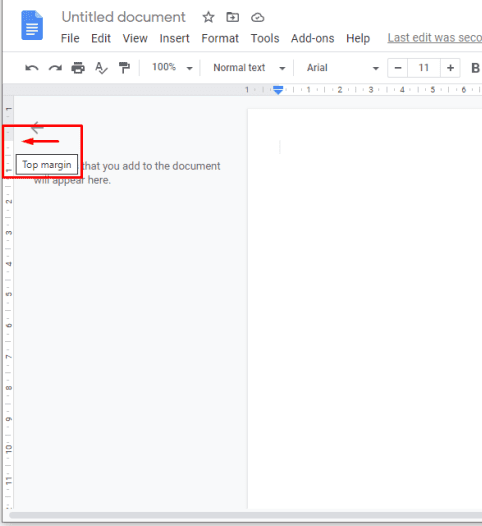
Repeat the same process above to make changes to your vertical page margins.
You should also move the indent icon (it’s blue in color and consists of a rectangle and a triangle pointing downwards) to align it will the new page margins.
Method 2: Change Margins With The Page Setup Option
The page setup option lets you make more precise alterations to your page margins.
To make your changes, open your document, then click File > Page setup to access the Page Setup box.

Now, type in the new margin measurements for the four sides of your document and press OK to complete the process.
One more thing I will like to point out is that you can use the page setup option on your mobile iOS device, unlike the Ruler option which is more suitable for desktops.
The Page setup—margins option is not available on Android devices.
To adjust the page margins on your device, follow the steps below:
- Open the document in the Google Docs app
- On your page, click the three-dots menu at the top of your screen and navigate to Page setup > Margins
- Select one of the available page margin options (custom, wide, default, or narrow)
- With the Custom option, you can add the exact margin measurements you want for your document
- Tap Apply to complete the process.
Similar Tutorial Types To Check Out
- How to Change Google Docs Header Margin: this article will show you how to access header settings on Google Docs and where to enter your new margin sizes.
- How to Have Different Footers in Google Docs: discover why you may need to customize the footers of each page on your Google document and how to go about doing so.
- How to Add Borders in Google Docs: this article will show you how to format the borders around your Google document.
Wrapping Up
Google has made it easy for you to adjust the default margins on your document to meet your specific requirements.
Both methods are easy to implement, and I firmly believe that you are better off making the adjustments on your desktop device.


