
Google loves websites that load faster.
And so do modern internet users, because nobody has got the time to wait nowadays.
Therefore, after you build your WordPress website one of the most important things to do is to make it load faster.
To do so you need to optimize your images and other content, and also implement some advanced features to improve site speed.
What are those advanced features we’re talking about?
Well, the most common (and effective) one among them is Cloudflare CDN service.
It’s quite popular, and there’s a good chance that you might have heard about it already.
But what exactly is Cloudflare? And more importantly, how to use Cloudflare with WordPress?
Those are some questions we’re going to answer in this post.
Bear with us till the end of this short guide, and you’ll have a full understanding of what Cloudflare is and how to use it with your WordPress site.
Frequently Asked Questions
Does Cloudflare Work With WordPress?
Yes, Cloudflare not only works with WordPress but also it’s quite easy to integrate with WordPress, as you’ll discover in the tutorial below.
How Do I Use Cloudflare on WordPress?
Cloudflare can be used with WordPress with the help of its plugin. You can learn the detailed process below.
What You’ll Need to Integrate Clouflare With WordPress
You’ll need 3 things to integrate Cloudflare with WordPress:
- Cloudflare WordPress plugin
- Your WordPress login credentials
- An account on Cloudflare with your preferred subscription plan. Sign up for Cloudflare from their official website and choose a plan that suits your requirements.
How to integrate Cloudflare with WordPress: Step-by-Step Instructions
Step 1: Log in to your WordPress dashboard
First of all, navigate to your website’s login page (i.e. yourdomain.com/wp-admin) and sign in to your WordPress account.
The account you choose to sign in to should be an admin account with full privileges — not any account with limited capabilities.
Step 2: Install and Activate Cloudflare Plugin
Navigate to Plugins >> Add New and search for Cloudflare.
When the results are populated, install the official Cloudflare plugin from Cloudflare Inc.
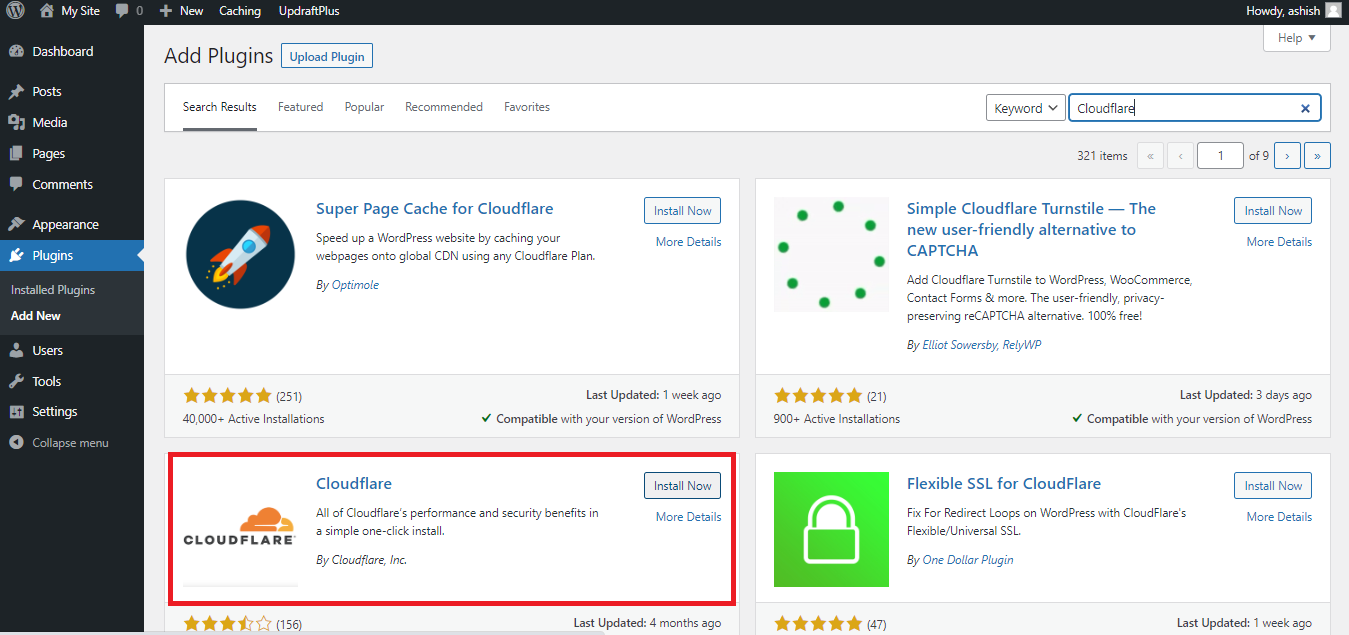
Once it’s installed, click the ‘Activate’ button to activate this plugin on your website.
Step 3: Configure the Cloudflare service
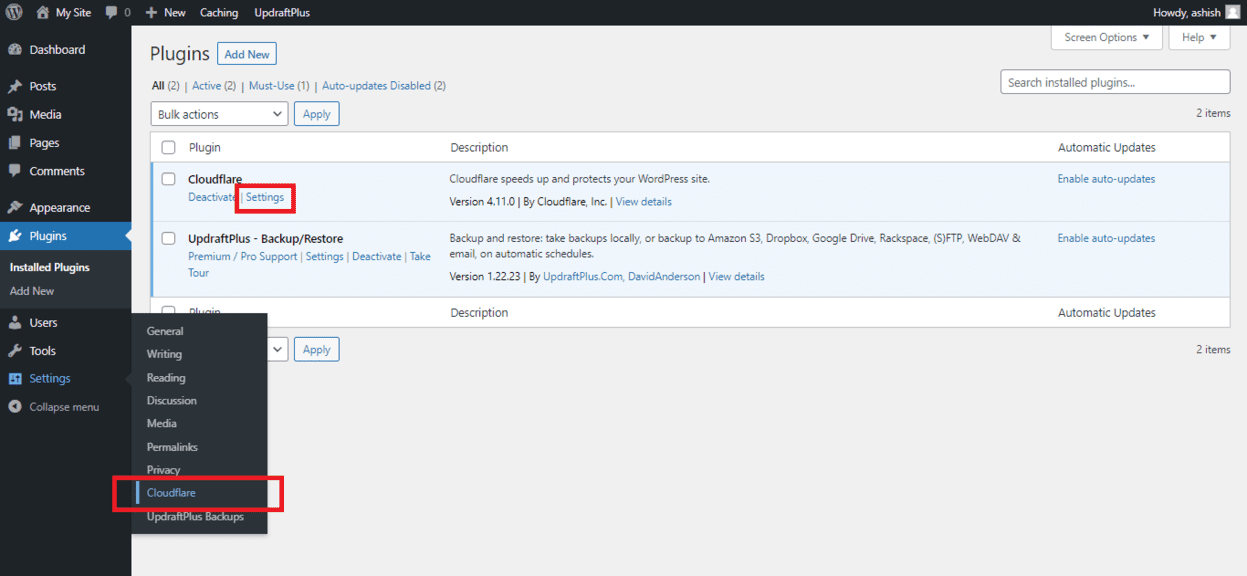
Now you need to log in to the plugin you just installed and connect it to Cloudflare using your API key.
To do so, navigate to Settings >> Cloudflare.
If you already have your account on Cloudflare, click the ‘sign in here’ link.
Otherwise, click on the ‘Create Your Free Account’ button.
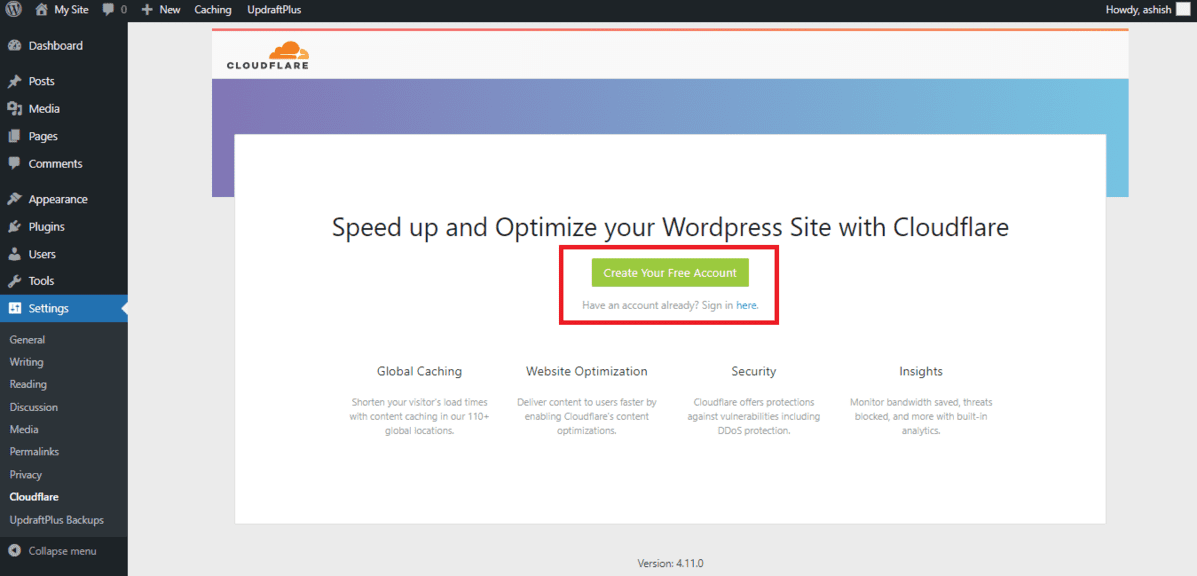
We’d suggest that you create your account before starting the plugin installation process, as we suggested earlier in the “What you’ll need” section above.
We too have done the same, so we shall click on the sign-in link.
That brings us to a page like this:
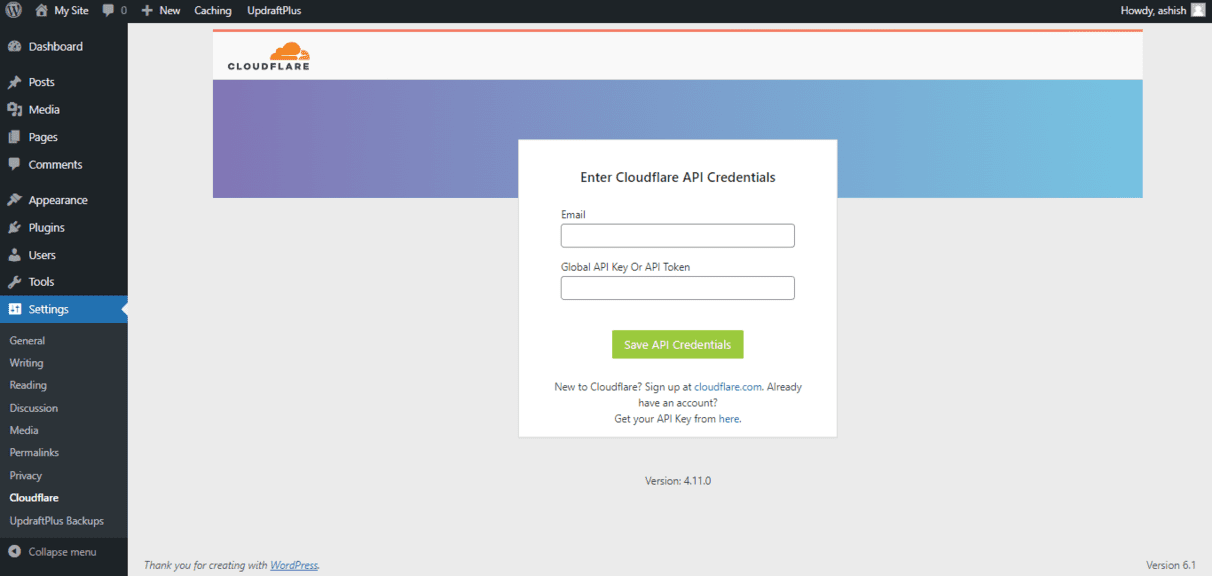
On this page, enter your email ID and the API key of your account to connect it to Cloudflare service.
In case you don’t know what your API key is, you can find it here by logging in to your Cloudflare dashboard.
Once you’ve entered your email and API key, click the ‘Save API Credentials’ button.
You’ll be connected to the Cloudflare service upon successful verification of your credentials.
Step 4: Apply the default settings
Once your plugin is connected to the Cloudflare service, you’ll see a screen like below:
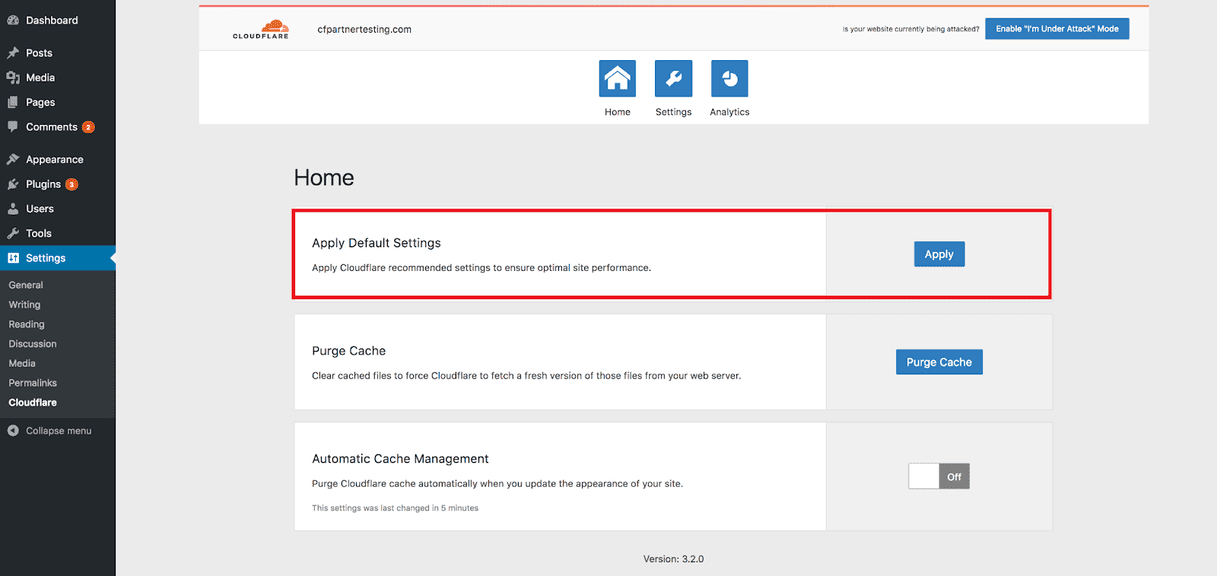
On this screen, apply the default settings for optimum performance.
You just need to click the ‘Apply’ button and Cloudflare takes care of the rest.
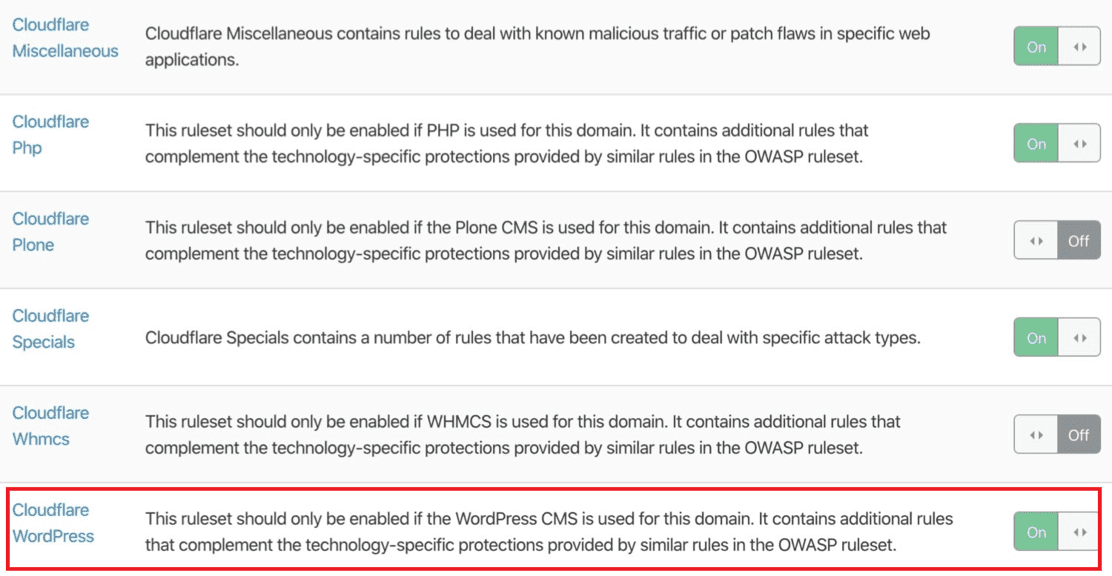
Step 5: Enable Cloudflare Firewall
We’re done with the plugin Cloudflare configuration and the Cloudflare CDN service is working for your site now.
However, for maximum security and performance benefits of a CDN, there are a few more tasks that should be done.
One among them is to enable the Firewall service of Cloudflare, which goes above and beyond a security plugin to protect your website.
Login to your Cloudflare account and navigate to the Firewall app.
Then inside the app, navigate to the ‘Managed Ruleset’ tab and enable the Cloudflare WordPress rule.
That’s it. Now you’re using Cloudflare with WordPress, and your website is ready to take the advantage of its robust and secure CDN offering.
What are the benefits of using Cloudflare with WordPress?
- Reduces page load time
- Content protection through hotlink prevention and other similar technologies
- Greater reliability — your website will work even when network routes become congested because its content can be delivered from multiple locations.
- Better protection against many types of cyberattacks (i.e. DoS attacks, DDoS attacks, etc.) as it works as an effective spam solution by blocking bots, scrapers, and other such elements.
Similar Tutorials to Check Out
- How to Optimize Images for WordPress: This tutorial explains how you can optimize images for your WordPress dashboard. Uploading large images without any optimization may slow down your WordPress site, so you should learn the skill to optimize them.
- How to Secure a WordPress Site: The security of your website is as essential as speed. This tutorial will teach you how to keep your WordPress website secure.
- How to Speed Up WordPress: Cloudflare is just one way to reduce the loading time of your WordPress website. There are a number of other ways too, and this tutorial covers them.
Wrapping Up
Using a CDN like Cloudflare is one of the best ways to boost not only the speed of your WordPress website but also its security.
We hope we explained the process of integrating both of them in an easy-to-understand manner, and now your website is running with Cloudflare enabled on it.
What do you think about this subject and our effort to explain it?
Share your views in the comments, as we’re always open to feedback and improvement.
Also, share this post on your social media so others can also learn how to take advantage of CDNs to speed up their website.


