
Want to create a WordPress plugin? This tutorial will teach you how.
Plugins are instrumental to WordPress’s popularity because they allow users with zero coding knowledge to create stunning websites.
There are over 50,000 plugins in the WordPress directory designed for various purposes.
You’ll find WordPress plugins for newsletter opt-in, security, and Ecommerce. Just name it.
Without them, a WordPress website is just a collection of static images and blocks of text.
With plugins, the Content Management System can attain an unbelievable level of customizability.
Whether you need a custom plugin for your website or want to create a WordPress plugin and monetise it, let’s go.
- Frequently Asked Questions
- What You’ll Need to Create a WordPress Plugin
- How to Create a WordPress Plugin in 7 Steps
- Step 2: Set up a Testing Environment
- Step 3: Create Your Plugin Folder
- Step 4: Create the Main PHP File for Your Plugin
- Step 5: Set up your plugin information
- Step 6: Add Code to Your Plugin
- Step 7: Activate the plugin. In action.
- Wrapping Up
- More Helpful WordPress Tutorials:
Frequently Asked Questions
Do WordPress Plugins Make Money?
Yes. WordPress plugins make money. You can sell the plugin on your website or a third-party marketplace.
CodeCanyon, Themeforest, and Mojo marketplace are the 3 best websites for selling plugins.
You can also add a free version of your plugin to the WordPress repository and offer a premium version with additional features.
Is it Hard to Create WordPress Plugins?
Creating a WordPress plugin is relatively easy and difficult, depending on your desired functionality.
Creating a plugin is simple if you are already familiar with WordPress development and PHP Programming basics.
If you aren’t, it can be very difficult. It’s best to start with a simple plugin, as shown in this guide.
How Much Do Plugin Developers Make?
According to Zip Recruiter, the average hourly rate of WordPress plugin developers in the United States is $35 per hour.
That amounts to an estimated $72000 yearly and $6000 per month.
If you are selling your plugin, you can earn up to $5000 monthly, depending on the number of sales. Offering plugin customisation services can earn you between $20-$200 per hour.
What You’ll Need to Create a WordPress Plugin
To create a plugin, you don’t have to be an expert WordPress developer. You only need some basic coding knowledge to get started.
- Basic PHP Programming Knowledge: WordPress plugins are written in PHP, so you should understand the language and its syntax before you start.
- Basic HTML and CSS: HTML and CSS allow you to control the output and appearance of your plugins. So understanding their basics is crucial for creating a WordPress plugin.
- Familiarity with WordPress: It helps to have some familiarity with the WordPress platform and its core functions, as well as the WordPress Codex (the online manual for WordPress development).
- A Development Environment: To develop and test your plugin, you need to install WordPress on your local machine or a staging site. This will allow you to test your plugin without affecting a live website. We’ll show you how to do that in the coming section.
- A Text Editor: You will need a text editor to write the code for your plugin. Many options are available, such as Sublime Text, Atom, and Visual Studio Code.
How to Create a WordPress Plugin in 7 Steps

Step 1: Understanding How WordPress Plugins Work
Since WordPress is written in some Programming language, anyone with coding knowledge can go to the WordPress code and edit it.
That’s exactly how plugins work. They allow you to modify and extend the functionality of WordPress by interacting directly with your WordPress using some PHP functions.
Creating your WordPress plugin and adding code will only do something if you call the PHP function using a hook.
Hooks are what make your plugin interact with WordPress without having to edit the core files.
Let’s look at the relationship between hooks and functions to understand the basics of WordPress plugins.
WordPress Functions:
WordPress Code is built on functions that allow any third-party code to interact with WordPress.
That’s why you’ll find plenty of functions in plugins and themes.
Every function has its name, followed by braces and the code inside the brace.
Here’s an example:
function sticky_header() {

  ?>

  <script>

  // Select the header element

  var header = document.querySelector(‘header’);

  // Get the offset position of the header

  var sticky = header.offsetTop;

  // Add the sticky class to the header when you reach its scroll position. Remove “sticky” when you leave the scroll position

  function addSticky() {

    if (window.pageYOffset > sticky) {

      header.classList.add(“sticky”);

    } else {

      header.classList.remove(“sticky”);

    }

  }

  // Add the sticky class to the header when you scroll the page

  window.onscroll = function() {

    addSticky();

  };

  </script>

  <?php

}

add_action( ‘wp_footer’, ‘sticky_header’ );
You can call this function directly in your WordPress plugin by typing sticky_header() where you want the code to run.
But this is a bad practice as you might run into issues. Here are two other reasons you shouldn’t call functions directly in your code.
First, calling directly only works for basic functions like adding content to a theme file.
Also, using this approach, you’ll have to call functions repeatedly to use them in multiple places, which takes time and leads to heavy code files.
Calling a function manually can also be tricky if you are new to coding.
When creating plugins, the best practice is to attach them to a hook. This will save you from recalling the function in multiple places.
WordPress Hooks:
A hook is a specific point in the WordPress codebase where you can execute your own custom functions.
There are two types of hooks: actions and filter hooks.
Action Hooks
Action hooks allow you to execute custom functions at a specific point in the WordPress execution cycle.
Here’s what an action hook syntax looks like.
add_action('hook_name', 'my_custom_function');The hook_name is the name of the action hook you want to use.
There are several action hooks in WordPress. You can find them in the WordPress codex.
The my_custom_function is the function that contains the code you want to execute.
This function should be defined before the add_action function.
The syntax will look like this to attach the above sticky header function to a hook.
add_action( 'wp_footer', 'sticky_header' );This will execute the sticky_header() function when the wp_footer action hook is called.
You can also attach the function to a specific hook by replacing wp_footer with the hook name of your choice.
For example:
add_action( 'init', 'sticky_header' );This will execute the sticky header function when the WordPress init action is called.
Filter Hooks
Filter hooks allow you to modify data before it is displayed or saved to the database.
Here’s an example of a filter hook that changes the title of a blog post to uppercase.
add_filter( ‘the_title’, ‘uppercase_title’ );

function uppercase_title( $title ) {

  return strtoupper( $title );

}
This function accepts a single argument, $title, which is the blog post’s original title.
The function then uses the strtoupper() function to convert the title to uppercase and returns the modified value.
The Difference between Action and Filter Hooks
Action hooks allow you to execute custom functions at a specific point in the WordPress execution cycle.
In the example above, the wp_footer action hook is called just before the closing </body> tag.
Filter hooks, on the other hand, allow you to modify data as it is passed through the WordPress codebase.
As in the example above, the the_title filter hook allows you to modify the title of a blog post before it is displayed on the website.
Step 2: Set up a Testing Environment
The second step to creating a WordPress plugin is to set up a testing or development environment.
The purpose of this is to avoid experimenting on a live site.
Creating a plugin will sometimes require some back and forth. You can as well make mistakes that will break your website.
You can use your computer as a local server to host a testing WordPress site where you can create and test your plugin.
If your hosting plan supports setting up a testing site, you can also use that. We’ll use the former here.
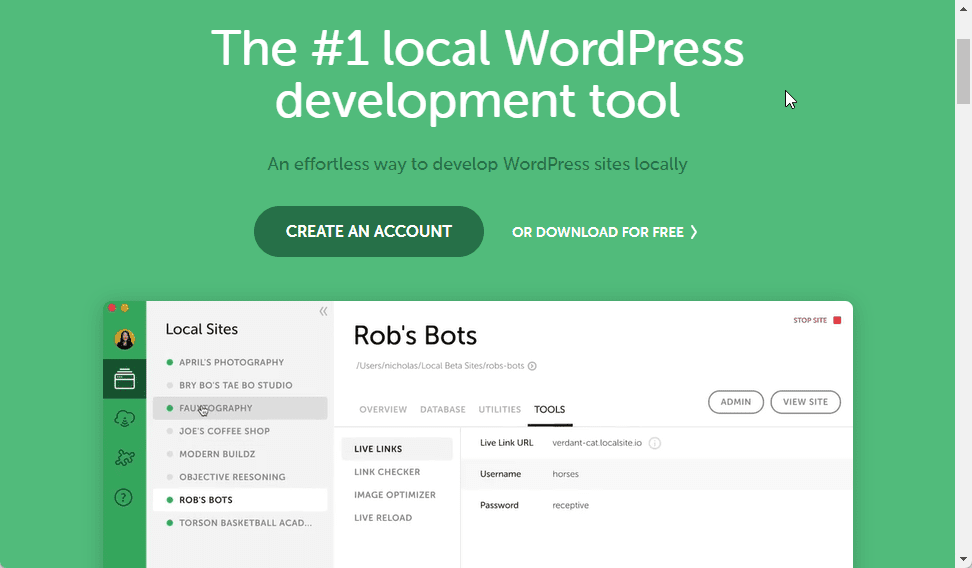
To set up a testing environment, We’ll download Local, a development tool for hosting WordPress websites locally.
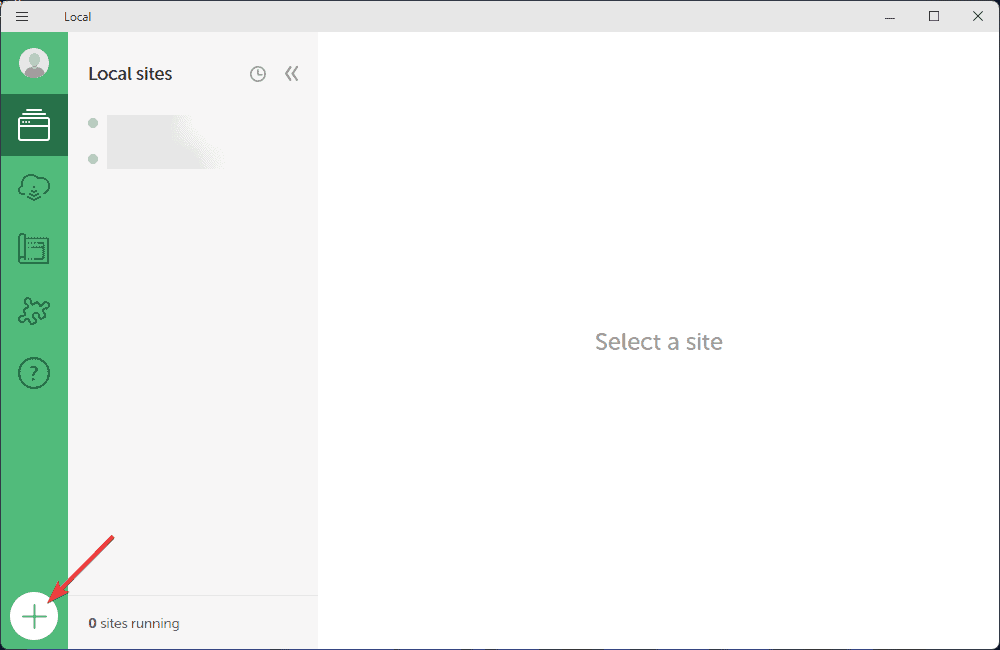
Once the download is complete, launch the software on your computer and click the + icon at the bottom left to create a new local site.
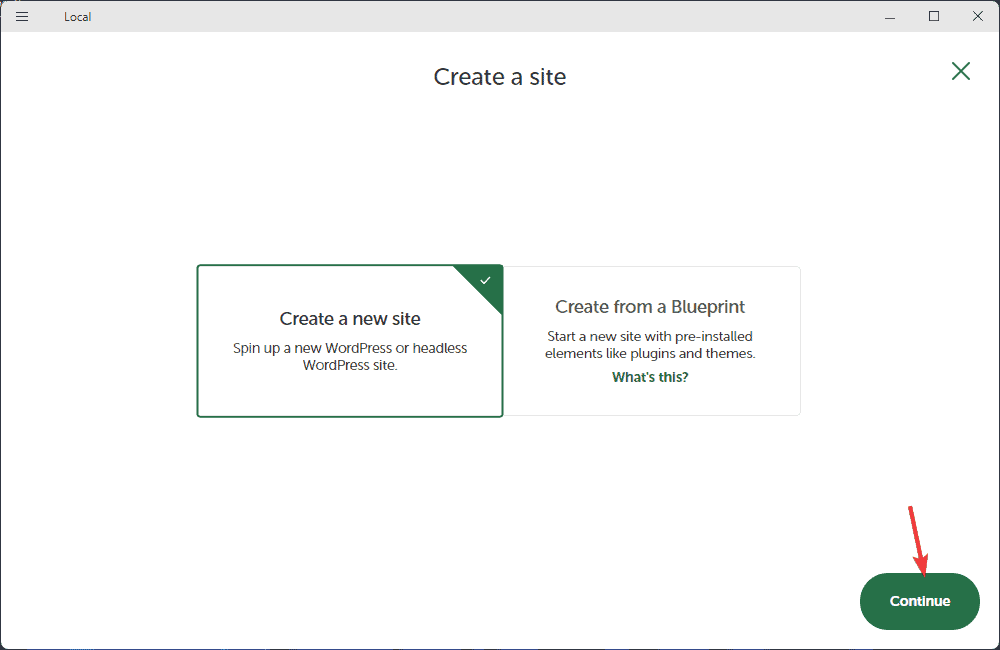
Choose to Create a new site and click the Continue button.
Next, follow the on-screen prompt to add your site name, set up the environment and create WordPress login details.
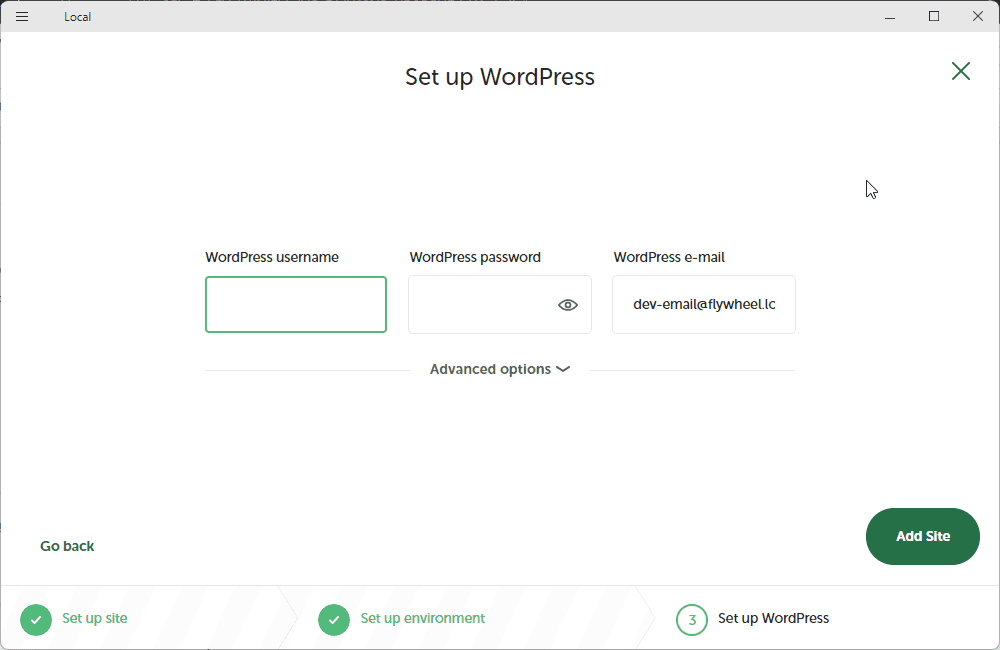
Once you are done. Click on the Add Site button.
After Adding your site, select your website from the local dashboard and launch your WordPress Admin dashboard.
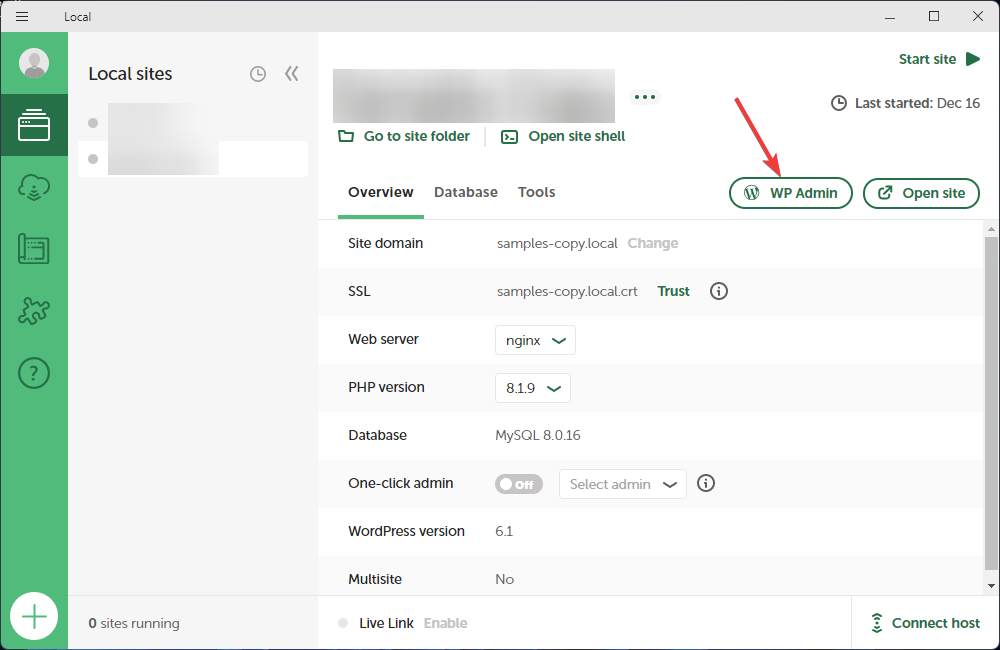
Once the admin login page opens, use the WordPress username and WordPress password you created above to access your dashboard.
Done. Your testing environment is ready. Let’s start creating your WordPress plugin.
Step 3: Create Your Plugin Folder
Once your staging environment is up, the first thing to do is to create a plugin file in your site’s directory.
By default, WordPress stores all plugins inside the wp-content/plugin directory.
Every plugin installed on a WordPress website will have a folder inside this directory.
So for your plugin, you’ll need to create a folder inside the directory and give it a name.
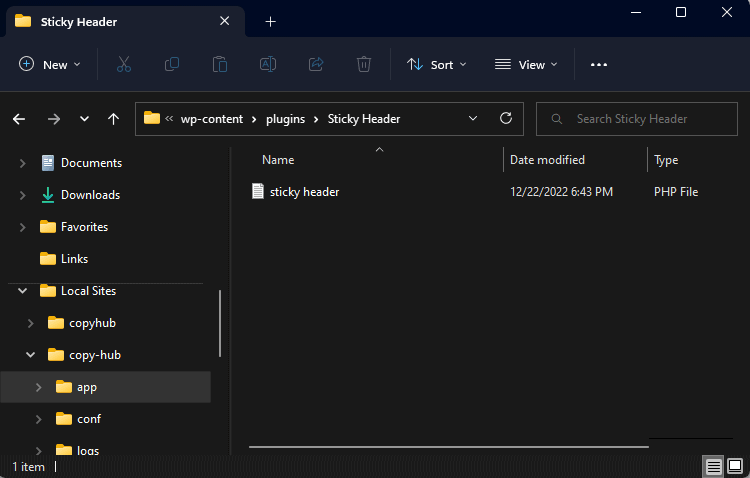
For this tutorial, we’ll navigate to the wp-content/plugin in our local site directory. Here’s how.
Note: The process is the same if you use a staging site.
On your local dashboard, click on the Go to site folder. You’ll be taken to your local site directory.
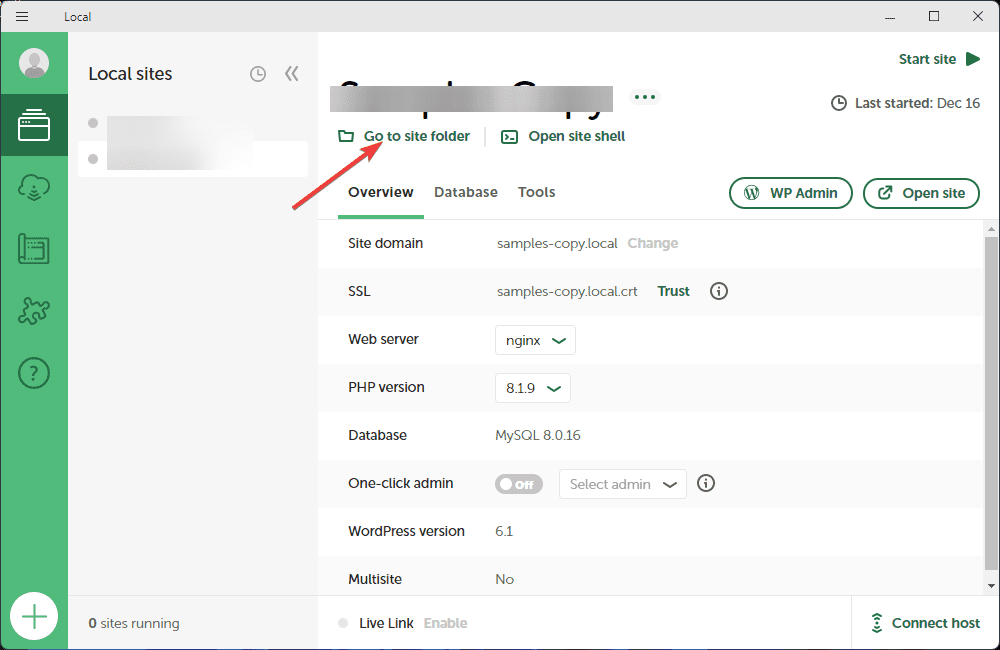
Select apps from the options, click on public and then wp-content. You’ll see different folders in this directory.
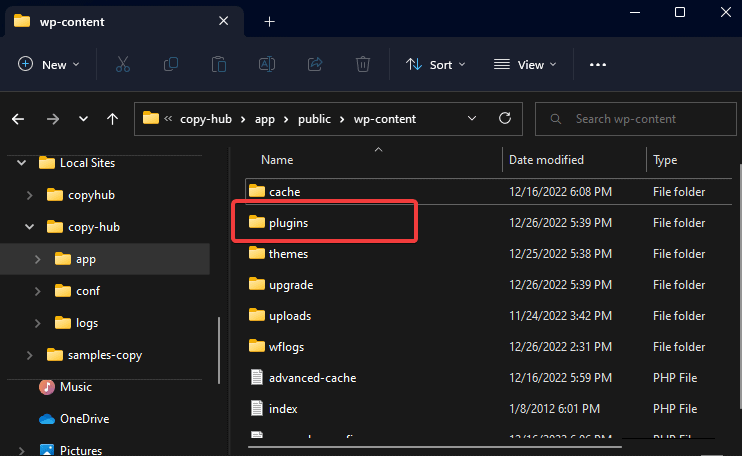
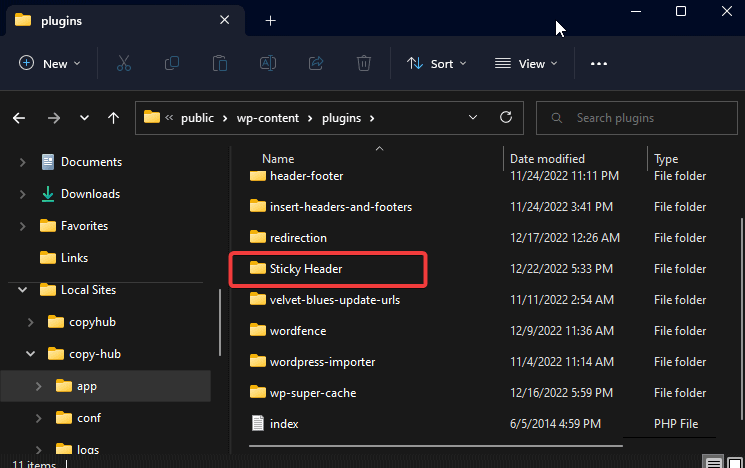
Open the Plugins folder and a new subfolder with the name of your plugin.
We’ll use Sticky Header here since that’s the name of the plugin we want to create.
Step 4: Create the Main PHP File for Your Plugin
After creating your plugin folder, the next is to add a PHP file inside this folder.
This is where your plugin’s codes and functionality would be available.
For this tutorial, we only need a single PHP file for a simple plugin that creates a sticky header in WordPress.
For more complex plugins with advanced functionality, there may be different file types inside the plugin folder, such as CSS and javascript.
In our own case, a single PHP file will do.
To do this, create a PHP file inside the plugin folder, as in the screenshot below.
Once the file is ready, It’s time to add some information to your plugin.
Step 5: Set up your plugin information
Also called the plugin file header, your plugin information is a PHP comment block which includes details about your plugin such as plugin name, version, URL, author name and website, license etc.
It’s the information you see on the WordPress plugin page after installing a plugin.
You can find the plugin file header in the WordPress codex. It looks like this.
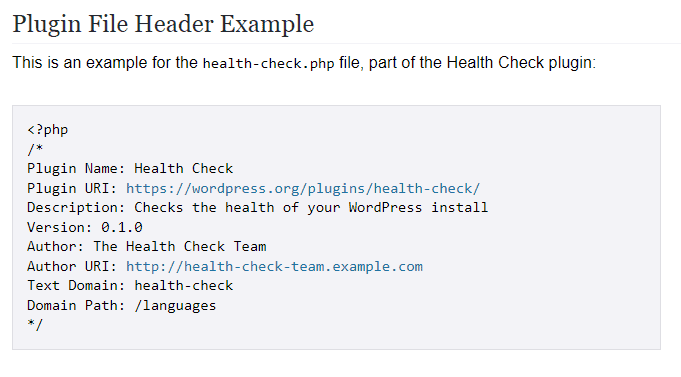
Just copy and paste this code into your plugin PHP file, then edit the details as they pertain to your plugin. In our case, the sticky header plugin file reader will look like this.
<?php
/*
Plugin Name: Sticky Header
Plugin URI: https://wordpress.org/plugins/sticky-header/
Description: Make your website header sticks to the top of every page on your website as users scroll.
Author: The BloggingTips Team
Author URI: https://bloggingtips.com/sticky-header
Text Domain: Sticky Header by BloggingTips
Domain Path: /languages
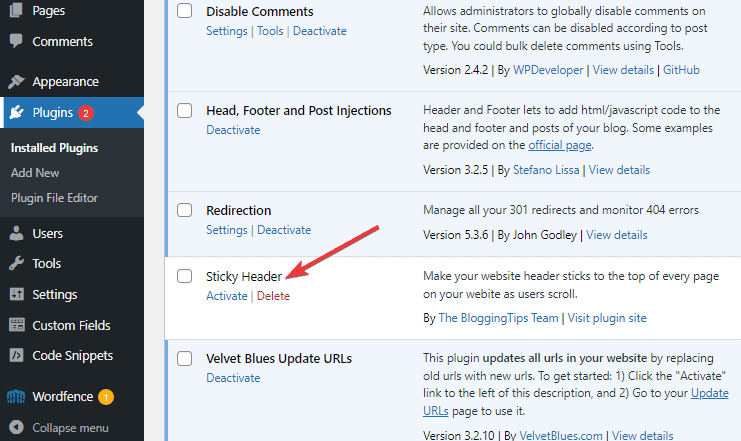
*/Once you save this file, you’ve created a new plugin and can find it in your site’s list of plugins already installed.
Log in to your testing site WordPress dashboard and go to Pugins>Installed Plugins.
You’ll see the Sticky Header plugin with the details. Here it is.

Now you can activate the plugin, but it won’t do anything because we have yet to add any function to it.
So, let’s make your plugin do something.
Step 6: Add Code to Your Plugin
To do this, We’ll add the sticky header code we use while learning WordPress functions and hooks above. Here’s how.
Open your plugin PHP file. Under the Header details, copy and paste these code snippets into your plugin’s main PHP file and save it.
function sticky_header() {

  ?>

  <script>

  // Select the header element

  var header = document.querySelector(‘header’);

  // Get the offset position of the header

  var sticky = header.offsetTop;

  // Add the sticky class to the header when you reach its scroll position. Remove “sticky” when you leave the scroll position

  function addSticky() {

    if (window.pageYOffset > sticky) {

      header.classList.add(“sticky”);

    } else {

      header.classList.remove(“sticky”);

    }

  }

  // Add the sticky class to the header when you scroll the page

  window.onscroll = function() {

    addSticky();

  };

  </script>

  <?php

}

add_action( ‘wp_footer’, ‘sticky_header’ );
This code does 2 basic things,
The sticky_header function is activated when a user scrolls the page and stops once the scrolling stops.
Secondly, the add_action( ‘wp_footer’, ‘sticky_header’ ); action hook uses the ….
Save the code, and that’s all. You’ve successfully created a WordPress plugin that makes your website header sticky when users scroll.
Step 7: Activate the plugin. In action.
Go back to your site and activate the plugin.
When you scroll the life version of the website, your website header will stick to the top of the page.
Once you see the effect of the new plugin on your staging site, It’s time to try it on your live site.
Before doing this, ensure you’ve tested the plugin for bugs and vulnerabilities. Resolve them, if any.
To err on the side of caution, back up your WordPress website before deploying your new plugin.
If you are satisfied with the plugin’s performance on your live site, you can proceed to upload your plugin to the WordPress plugin repository.
As website owners use it for free, you’ll get feedback on what and how to improve.
And if you are interested in making money from your plugin, you can sell it on any of the websites we listed above
You should do this only after you’ve mastered plugin development. To learn more about coding plugins, consult the plugin developer handbook.
Wrapping Up
If you make it this far, you’ll agree that creating a WordPress plugin is relatively simple.
By following the instructions in the guide, you’ll be able to create a basic WordPress plugin.
You can experiment with as many functions as you like and improve the functionality of your Plugin.
Creating complex plugins follows the same method. More functionality means more functions to your plugin file.
Have you ever tried creating a WordPress plugin? Let’s hear about your experience in the comment section below.
More Helpful WordPress Tutorials:
- How To Install WordPress Plugins: Installing a WordPress is a walk in the walk. You don’t need any tech experience to do it. You’ll get it right even as a complete beginner.
- How To Reinstall WordPress Plugins: You can reinstall WordPress plugins and reverse any damage to your website. This WordPress plugin reinstallation tutorial covers everything you need to know.
- How to Use Custom Fields in WordPress: There are two methods to add custom fields in WordPress, plugins or editing theme files. This tutorial explains both methods step by step.


