
Follow this guide to easily create effective transaction emails.
If you run a WooCommerce store, you may already know how important it is to customize the emails it sends to your customers.
These emails serve as key points of communication and can help build trust among your customers.
They can also strengthen the relationship between your business and your customers.
That’s why in this post we’re going to explore with you the two methods of customizing WooCommerce emails to ensure that they reflect your brand and provide value to your customers.
This will help you create great introduction emails, effective transaction emails, and other professional emails easily that will make your brand stand out from the crowd.
Frequently Asked Questions
Can WooCommerce Emails Be Customized?
Yes of course.
You can completely customize your WooCommerce emails to make them look just as you want to, and say just as much as you want them to say.
How Do I Customize WooCommerce Emails?
There are two different methods to customize your WooCommerce emails.
One of them uses the internal settings of WooCommerce, while the other uses a plugin, as you’ll see below.
What You’ll Need to Customize WooCommerce Emails?
Here’s everything you’ll need to customize your WooCommerce emails:
The content that you want to add to your emails (all the text, images, color codes, etc.)
MailChimp plugin (if using the MailChimp plugin).
How to Customize WooCommerce Emails: Step-by-Step Instructions
Method #1: Customize using in-built WooCommerce settings
Customizing body text
To access your email settings in WooCommerce, log in to your WordPress dashboard and navigate to WooCommerce >> Settings in the left-hand menu.
From there, click on the “Emails” tab to view a list of email templates.
Your templates will appear in a list like below:
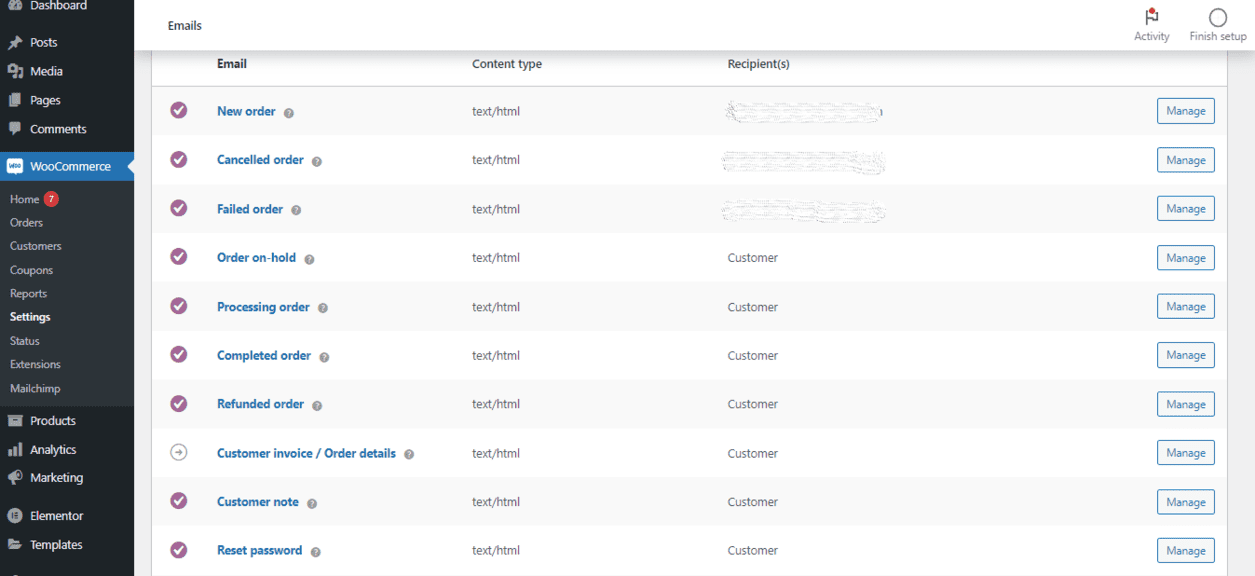
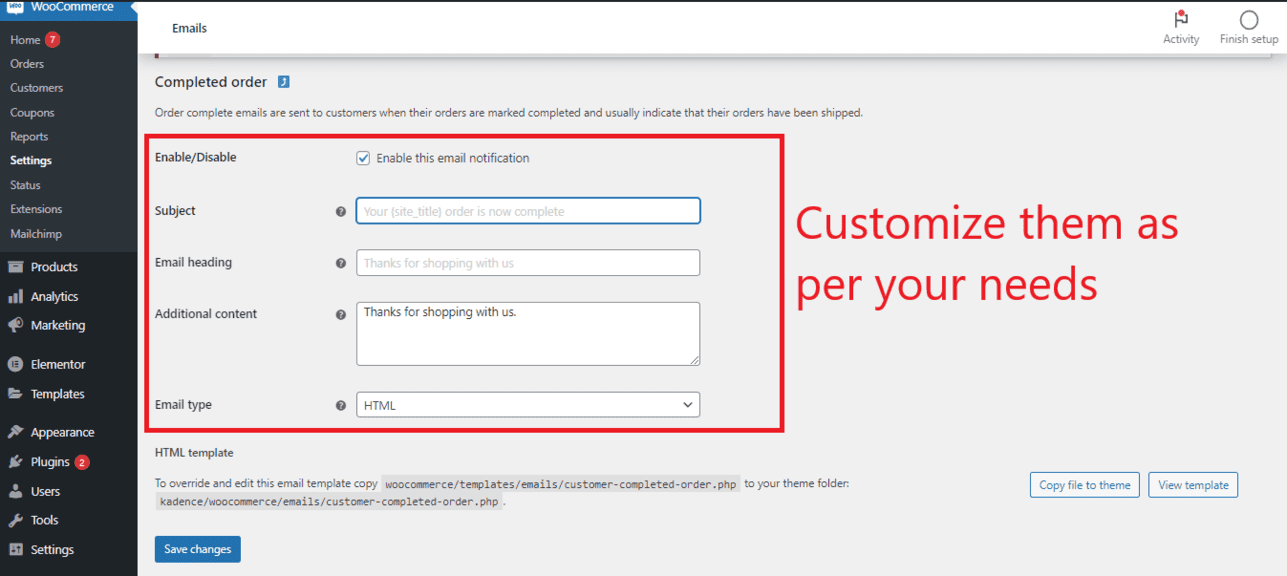
To edit a particular template, click the Manage button on the far right and you will be able to customize the content of the email.
Change it as per your needs, and once everything is perfect, save your changes by clicking the “Save changes” button.
Customizing colors
In the WooCommerce Settings >> Emails section, you will find global customization options below the list of email templates (as shown below).
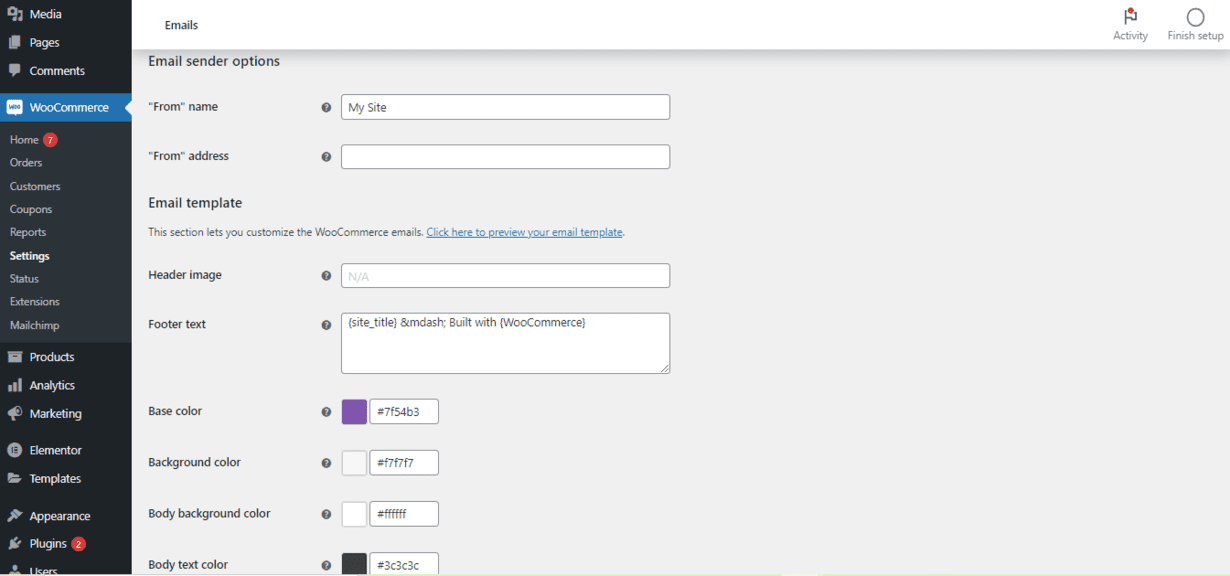
Keep in mind that any changes made to these global options will apply to all of your email templates.
Here’s everything that you can add, remove, or change in your emails using these options::
- Header image
- Base color
- Body text color
- Background color
- Body background color
- Footer text.
Once you’re done with your changes, click the “Click here to preview your email template” button to preview your emails.
Adding product information
Finally, if you want to customize your emails by adding product-specific information to them, here’s how to do that:
- Go to the Products page in your WordPress dashboard.
- Click “Edit” below the product whose information you want to be added to your emails.
- On the Edit Product page, scroll down to the ‘Product Data’ section, and then to the “Advanced” tab.
- Add a Purchase Note.
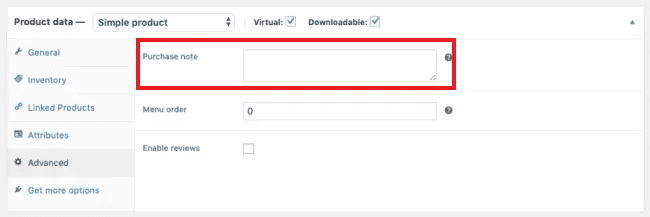
These purchase notes are always added to the email that is sent whenever a particular product is purchased.
You can add whatever you want to include in them — a link to the User Manual of the product, a coupon code for the customer’s next purchase, related product suggestions, whatever.
Method #2: Customize using Mailchimp
Mailchimp is among the most popular email marketing platforms in today’s times.
If you use the Mailchimp plugin on your site, that can also be used to customize your WooCommerce emails.
Here is the process you need to follow for that:
Navigate to Plugins >> Add New
Search for “Mailchimp for WooCommerce”, and then install the following plugin:
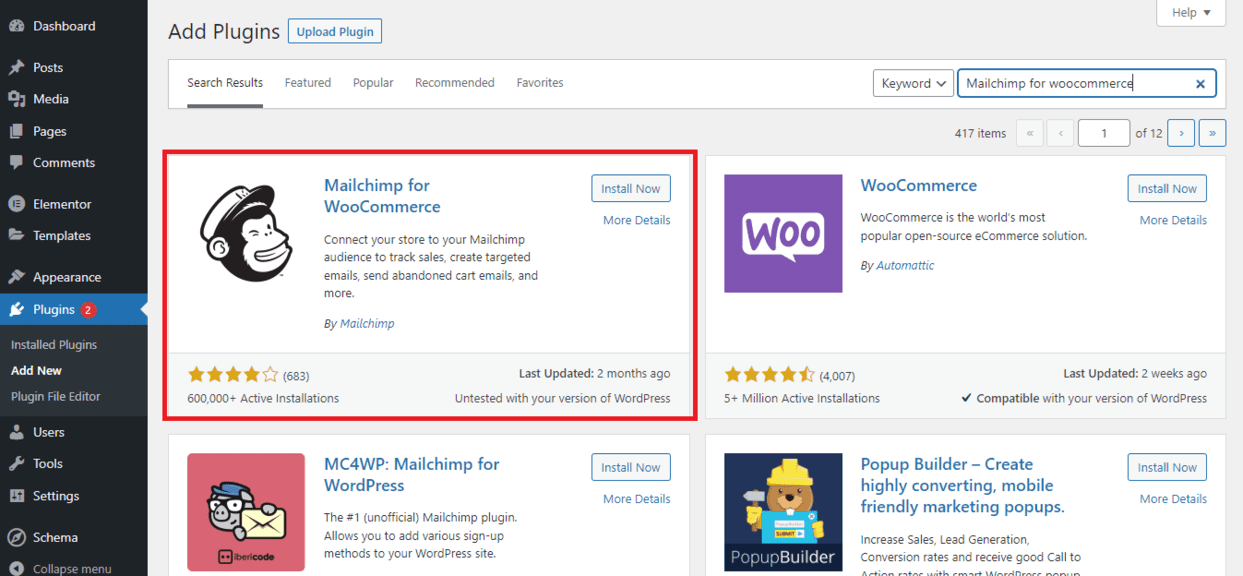
Activate the plugin once it’s installed.
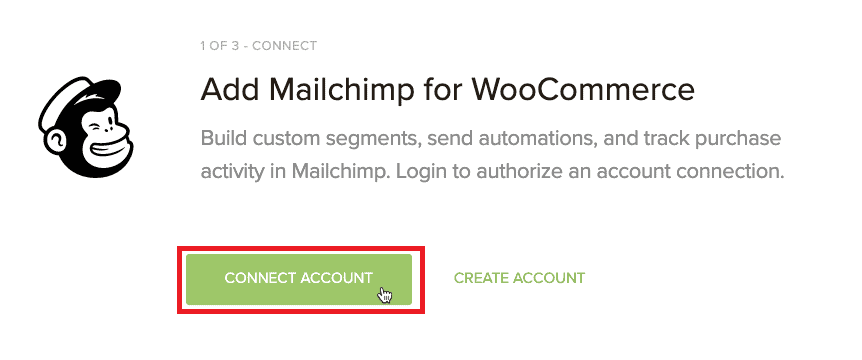
Now in your WordPress dashboard, navigate to WooCommerce >> Mailchimp.
On this page, you’ll see a button asking you to connect your Mailchimp account. Click on it and then log in with your Mailchimp account.
Enter your Mailchimp account credentials, and then hit the “Login” button.
Finally, click the “Allow” button to connect your Mailchimp account with Mailchimp for WooCommerce.
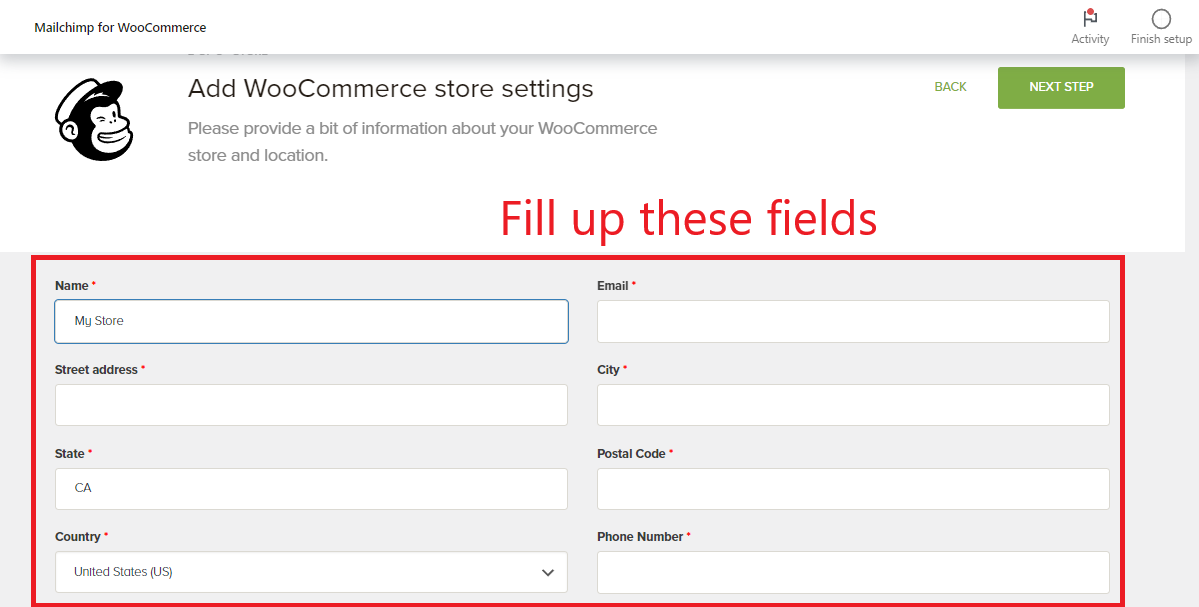
Now you need to enter the details of your WooCommerce store. Enter them, and be as accurate as possible, because this information will appear in your emails.
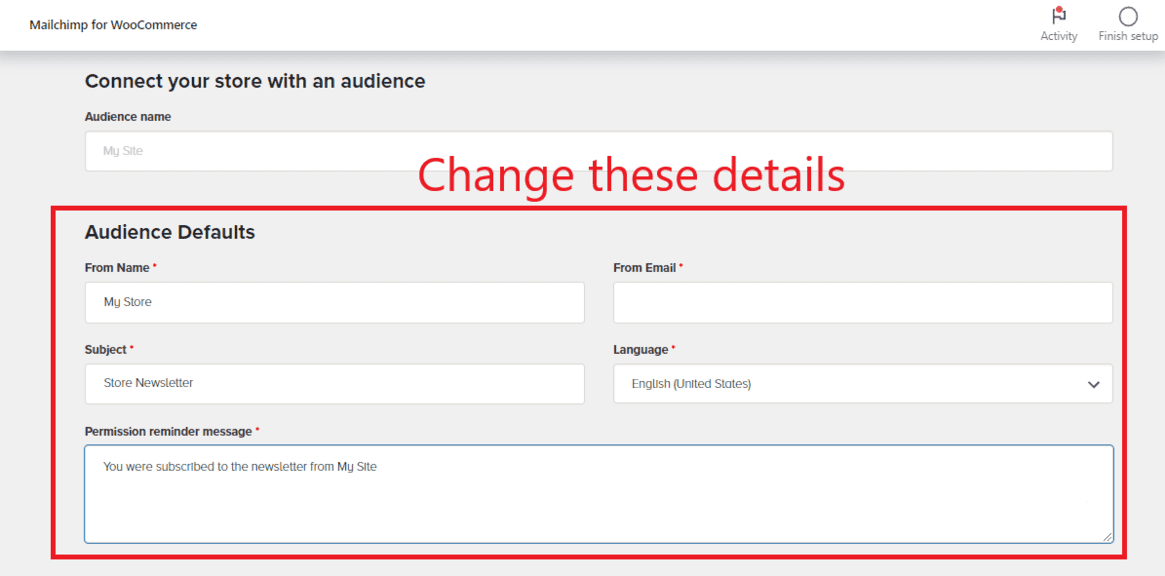
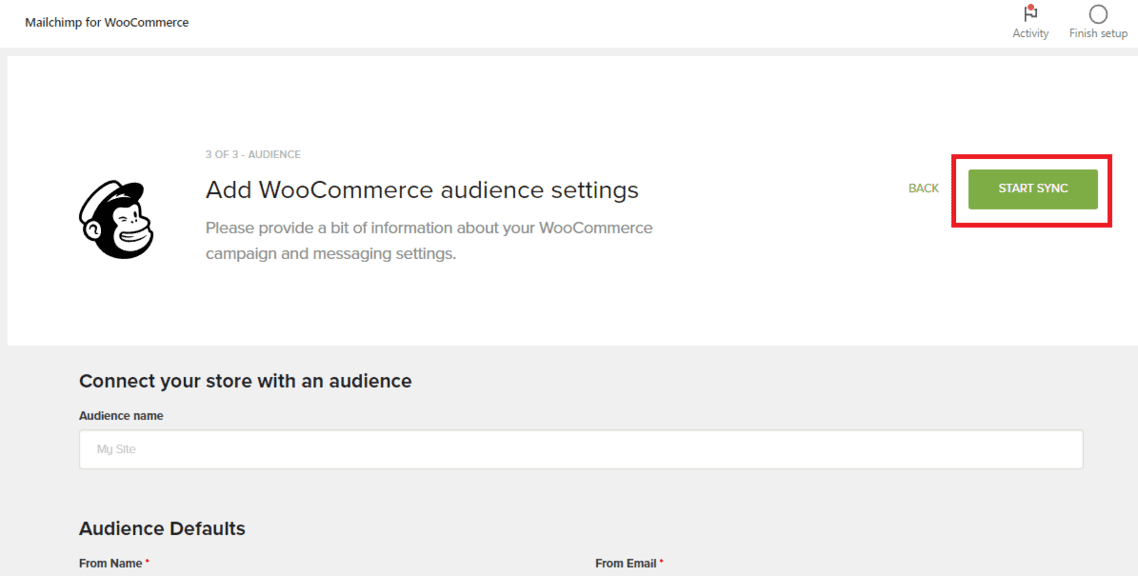
Next, you need to enter a name and other details about the audience of your store.In case you don’t know, Mailchimp allows you to organize your email list into various groups as Audience.
This helps in creating email campaigns tailored specifically to the needs of a particular list.
The default audience name for your store is filled in already, so you don’t have to touch it.
Fill up the remaining details, like the name and email address you want to use for sending emails to this audience, a default subject line you want to use for those emails, language, and a reminder message.
Once you’ve entered all the details, click the “Start Sync” button to connect your WooCommerce store with Mailchimp.
Now you can customize the look and feel of your emails by navigating to your Mailchimp dashboard.
You can even build highly customized notification emails that look inline with your brand identity using Mailchimp’s default form and email template builder.
Similar Tutorials to Check Out
- How to Use WooCommerce: If you want to learn how to set up and use WooCommerce, which is among the best e-commerce platforms, this tutorial is everything you need.
- How To Start An E-commerce Business: Get started with your own e-commerce business by following our step-by-step guide. It will help you easily navigate through the tricky steps of starting your online store.
- How To Build An Email List: Finally, in this tutorial, you’ll discover the best ways to build an email list and grow your audience. Since an email list can be your most valuable revenue-generation resource, make sure you go through this.
Wrapping Up
Customizing WooCommerce emails is an important step in building a successful online store.
By taking the time to carefully craft these transaction emails, you can create a professional and trustworthy brand image that will help you stand out in the crowded e-commerce space.
Whether you choose to customize your emails with default WooCommerce settings or use Mailchimp, make sure that you create effective and personalized emails that resonate well with your customers.
We hope this tutorial will guide you well in creating such emails, so try the steps explained above and let us know your thoughts in the comments.


