
If you’ve been looking for the easiest ways to make money online, dropshipping on Shopify might be a great business to settle for.
Shopify is an all-in-one Ecommerce platform that allows you to run your online store without your own product.
You only need to master Ecommerce marketing while every other process runs on autopilot., from manufacturing to warehousing, shipping, and delivery.
In this tutorial, you’ll learn dropshipping on Shopify step by step.
- Frequently Asked Questions
- What You’ll Need to Start Dropshipping on Shopify
- How to Start Dropshipping on Shopify Step by Step
- Step 1: Choose a Dropshipping Niche
- Step 2: Validate Niche Profitability and Viability
- Step 3: Identify Your Audience
- Step 4: Choose a Store and Brand Name/Domain
- Step 5. Create Your Shopify Account
- Step 6: Set up Your Shopify Dropshipping Store
- Step 7: Add Products to Your Store
- Popular Shopify Dropshipping Apps
- Step 8: Launch and Market Your Store
- More Helpful Ecommerce Tutorials:
- Wrapping Up
Frequently Asked Questions
Is Shopify Good for Dropshipping?
Shopify is among the best Ecommerce platforms for dropshipping.
The platform allows you to add inventory from vendors on platforms like Amazon and AliExpress.
And you don’t have to worry about order management and fulfillment.
How Profitable is Shopify Dropshipping?
If you pick the right ecommerce niche, dropshipping on Shopify is a profitable and lucrative business.
Shopify drop shippers earn up to 20-30% per sale and net an average of $100,000 per year.
Beginners can earn up to $2000 per month.
What You’ll Need to Start Dropshipping on Shopify
- A Shopify Account: If you don’t have one already, we’ll show you how to create an account and set up your Shopify store.
- A Domain name and Store Name: To stand out from the competition, you need a brandy store name and a domain name that’s niche relevant. You’ll learn more about this shortly.
- The Host Platform Fee: Like all other platforms, dropshipping on Shopify requires a small upfront cost for setting up your store. Check out more on Shopify fees here.
- Dropshipping Licence or Permit: Depending on your jurisdiction, you may need a business license or sales tax ID for your dropshipping business.
How to Start Dropshipping on Shopify Step by Step
- Step 1: Choose a Dropshipping Niche
- Step 2: Validate Niche Profitability and Viability
- Step 3: Identify Your Audience
- Step 4: Choose a Store and Brand Name/Domain
- Step 5: Create Your Shopify Account
- Step 6: Setting up Your Shopify Dropshipping Store
- Step 7: Add Products to Your Store
- Step 8: Launch and Market Your Store
Step 1: Choose a Dropshipping Niche
The fastest route to success in the dropshipping business is to focus on niche-related Ecommerce.
Niche-focused e-commerce means analyzing and dividing a larger market into niches and sub-niches, then picking a section for your business.
Say you want to drop ship in the fashion and beauty niche.
This niche competition will be fierce because of its broadness.
And since this is dropshipping, thousands of store owners have access to the same products as you.
To gain a competitive advantage, you have to get specific.
It can be challenging to figure this out as a new digital entrepreneur.
However, separating your market based on demographics, location, preference, location, lifestyle, and interest of your audience can be great first steps.
Think of women’s fashion, and you’ll beat down the competition significantly.
And you can go further down from there.
Step 2: Validate Niche Profitability and Viability
Once you are to pinpoint your niche, you’ll have to determine how profitable the niche is.
Is there a demand for the product you want to sell?
Are people searching for products in that niche?
There are tools online, free and paid, that you can use to check the viability and profitability of a niche.
Facebook Audience insight and Google Trends are great examples.
Use Facebook Audience Insight to Validate Niche Profitability
Facebook has the largest number of users in the world, with over 2.23 billion active users per month.
You can use the Facebook audience insight tool to quickly validate your niche idea and decide whether it’s worth pursuing.
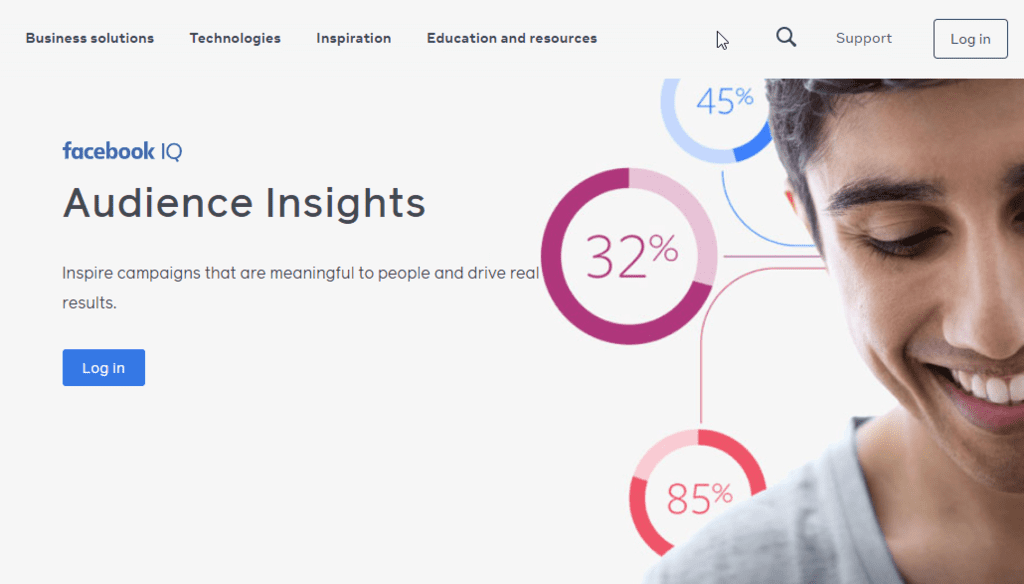
Pick a keyword in your niche and plug it into the tool.
Facebook will show you user’s data relevant to your niche.
You’ll know the demographics of people most interested in your niche and their location.
Facebook will also tell you about their online behavior, lifestyle, interests, etc.
There’s a lot of data to look at that can help you make an informed decision.
Use Google Trends to Validate Niche Viability
As the name implies, you can find out what people are searching for at a particular time, from where and the rationale behind their searches, i.e., search intent.
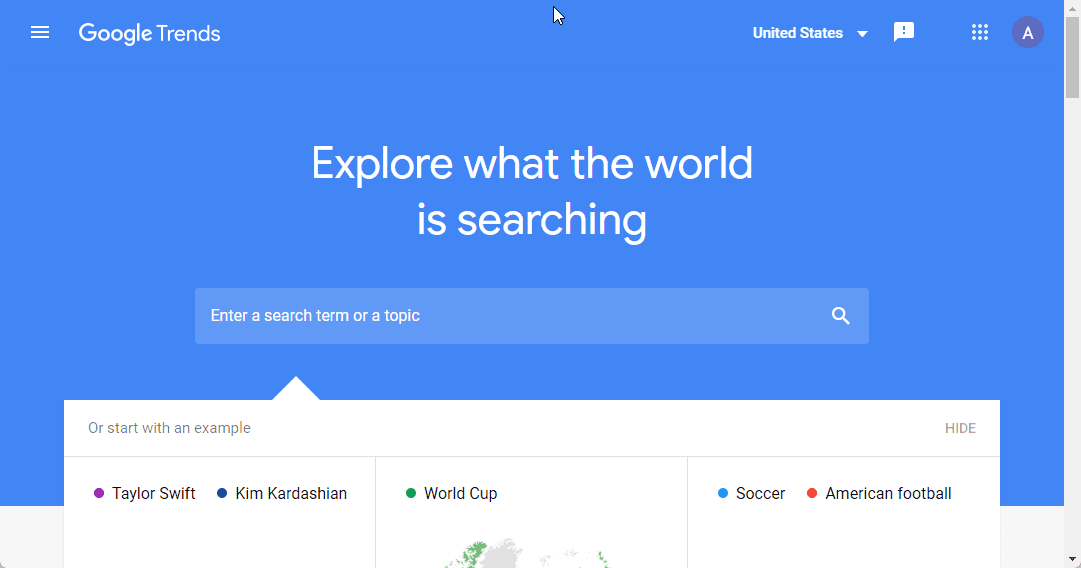
Using Google trends, you can avoid expensive mistakes and prime your marketing to sell the right product at the right time.
Seasonality on Google Trends tells you the high and downtime of keywords.
With the power to measure searchers’ interest over time, It’s easy to conclude how viable a niche will be and plan for the low season if there is.
Step 3: Identify Your Audience
Once you’ve settled for a dropshipping niche and validated its profitability based on available demands, It’s time to get intimate with the audience you’ll be selling to.
With steps 1 and 2, you’ll already have an idea of who these people are, and you’ll have clarity in defining your audience.
You just need to get more granular.
Here are some questions to help:
- Who will buy my product?
- What are their interests, beliefs, and behaviors?
- What gets their attention?
- Where do they hang out online?
- What’s their shopping habit? Do they buy online? How often?
- How are they buying products online?
- Who are my competitors? How are they selling their products? Who are those buying from them?
If you truly want to run an Ecommerce store, you should know this much about your audience.
Step 4: Choose a Store and Brand Name/Domain
As a starter, one of your biggest challenges will be picking a name for your Ecommerce store.
How do you pick a brand name that resonates with your target audience?
The rule of thumb is to keep it short, simple, and memorable.
You want a name that sticks to your audience’s memory at first sight.
Fortunately, you don’t have to sweat too much to develop catchy names for your store.
Shopify Business Name Generator is a free tool to generate business names for your store.
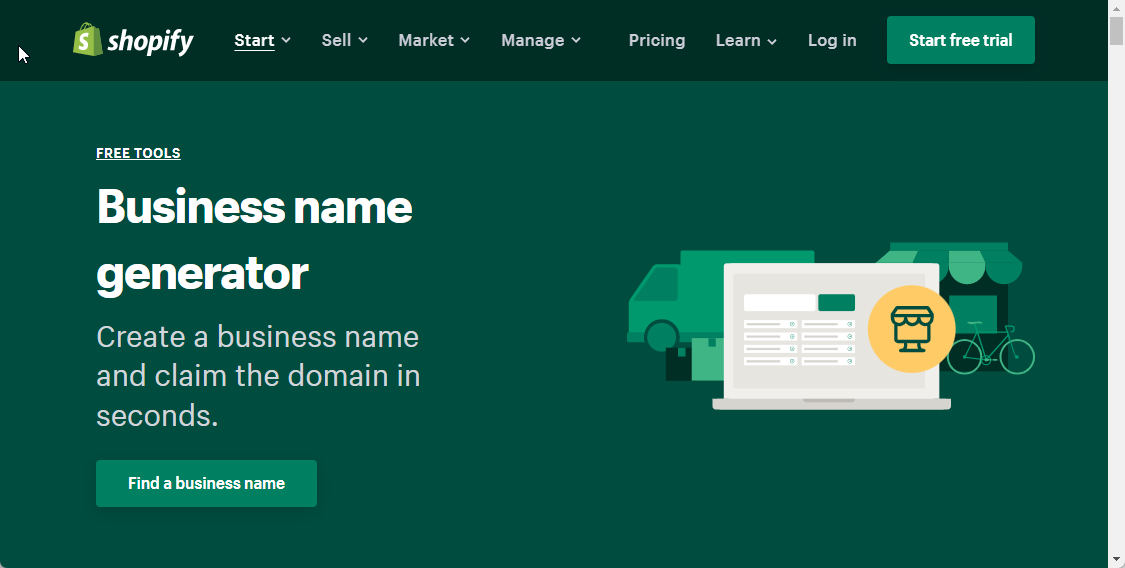
Enter your keyword, hit the generate name button, and then pick from the list.
After picking your favorite name, you must verify the domain’s availability.
It’s never a good practice to separate your domain and store name.
You’ll get your customers confused.
If the name is already taken, you can either change the name or use a domain extension other than .com.
Other domain extensions you can use are .store .shop. .fitness and so on.
Step 5. Create Your Shopify Account
Setting up your Shopify Ecommerce store is straightforward.
Go to Shopify dropshipping web page, input your email and click the Start free trial button.
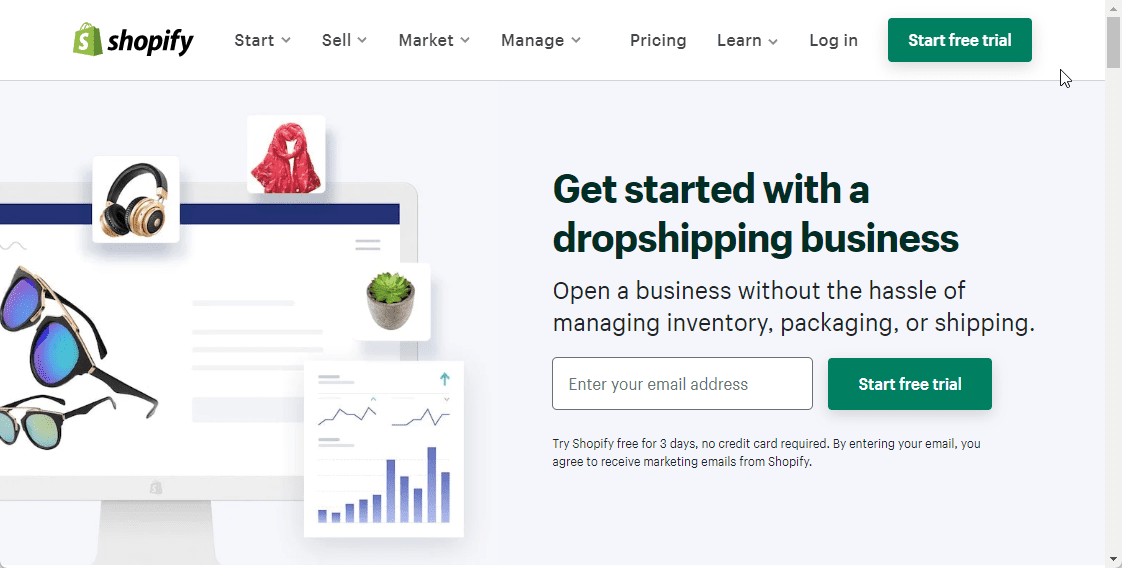
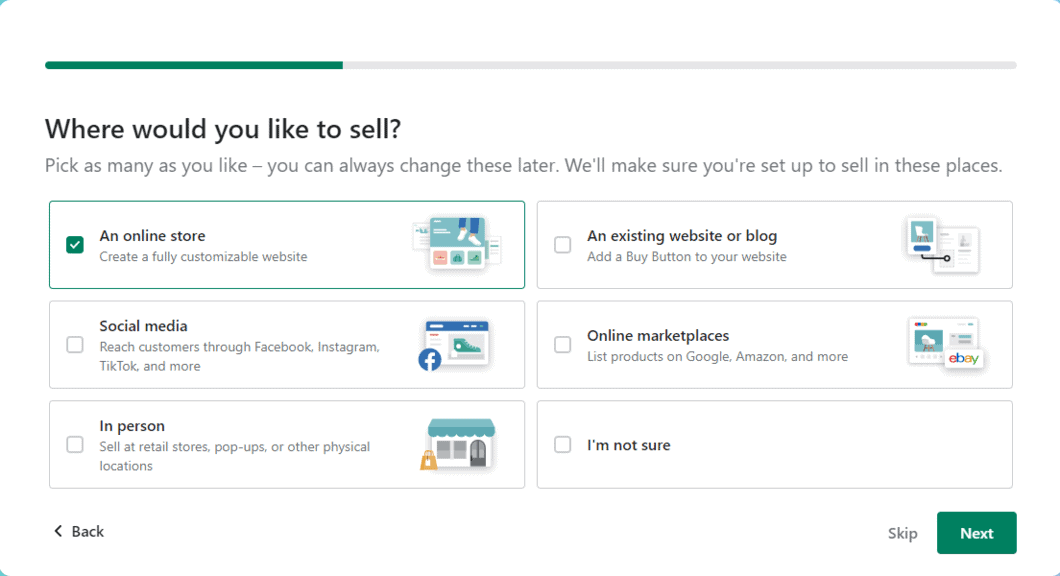
On the next screen, select the Online store option.
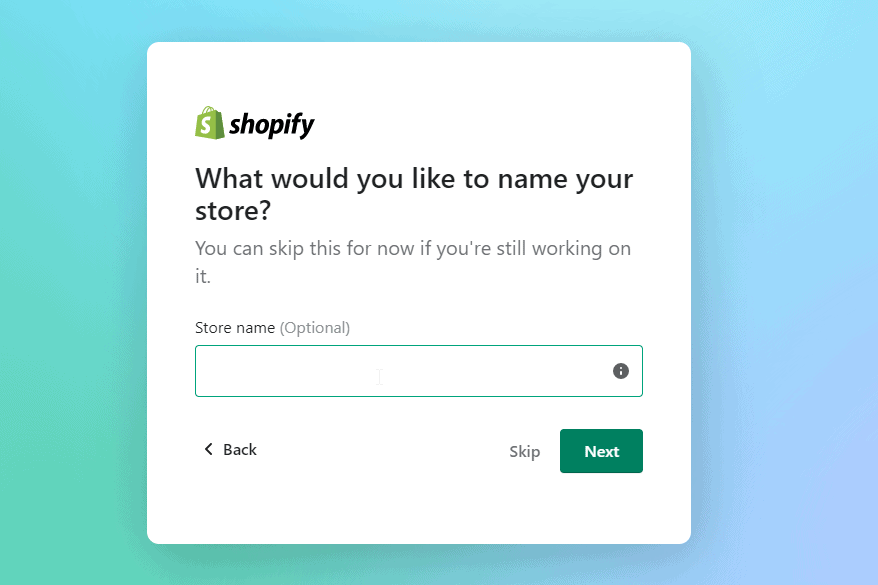
Next, enter your Store name and click Next.
Create your Shopify login credentials.
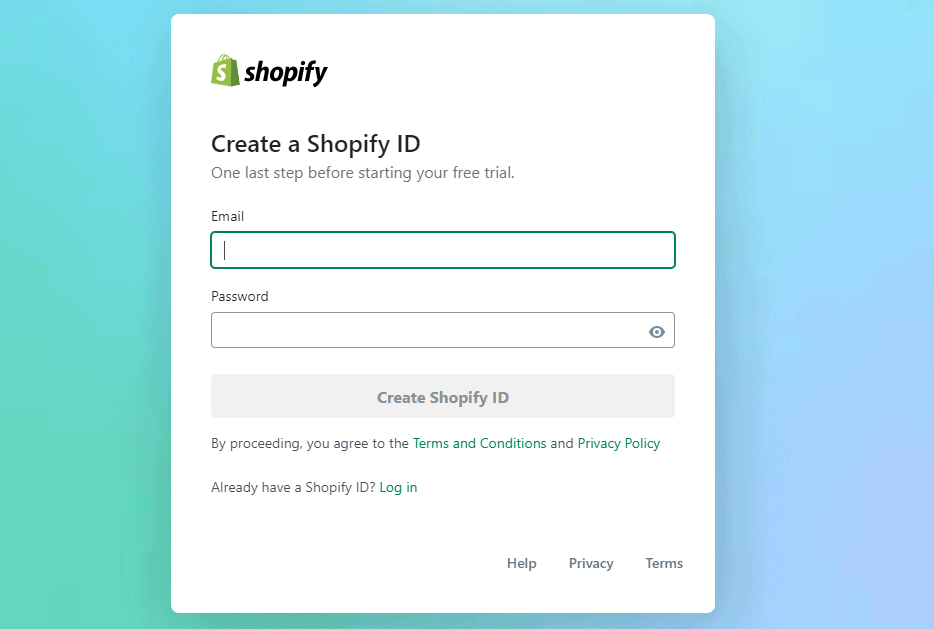
You’ll receive a verification email.
Go to inbox and click the Verify button.
And That’s it.
Your new Shopify dropshipping store is ready.
The Next step is to configure it and add products.
Step 6: Set up Your Shopify Dropshipping Store
To set up your store, here’s a list of things you need to do;
Customize Your Theme
On your Shopify dashboard, your first job is to select a theme.
Shopify has a lot of free and premium themes you can select from.
You can select a free theme to start.
Here’s how;
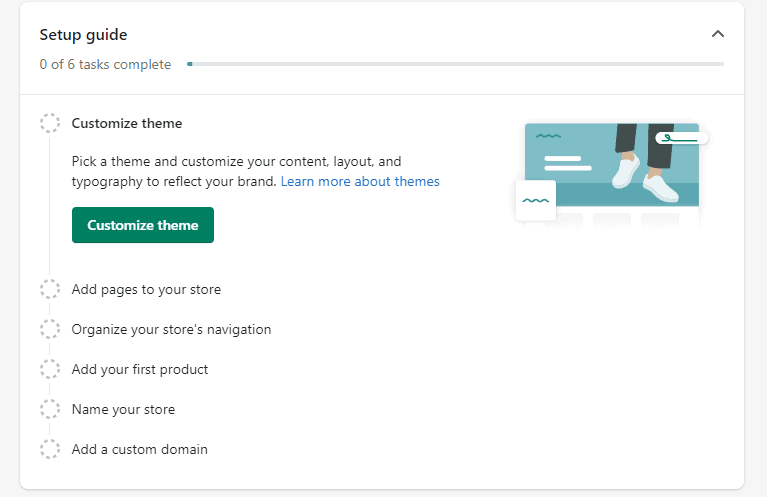
Click on Customize theme under the setup guide.
You’ll be taken to the Shopify theme library, check the themes and pick anyone you like.
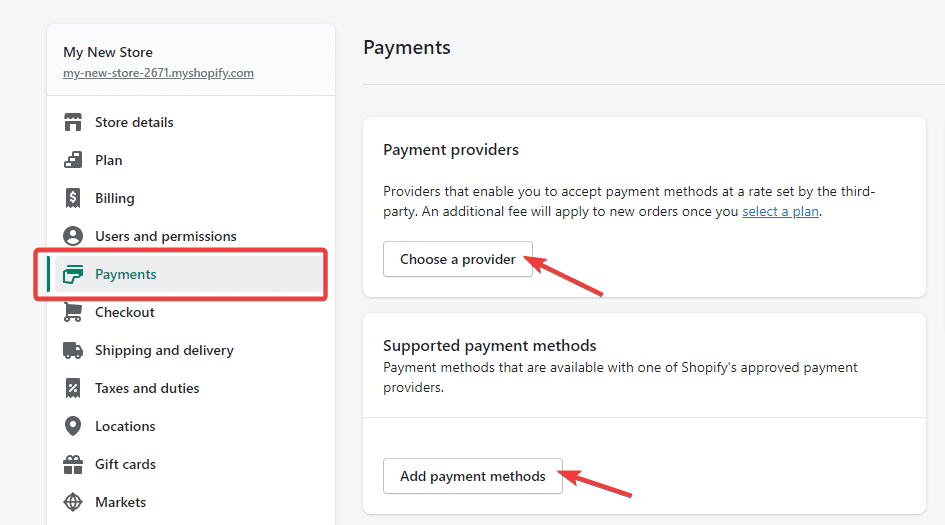
Add Payment:
The next step is to set up your payment information.
Go to Settings and on your Shopify dashboard.
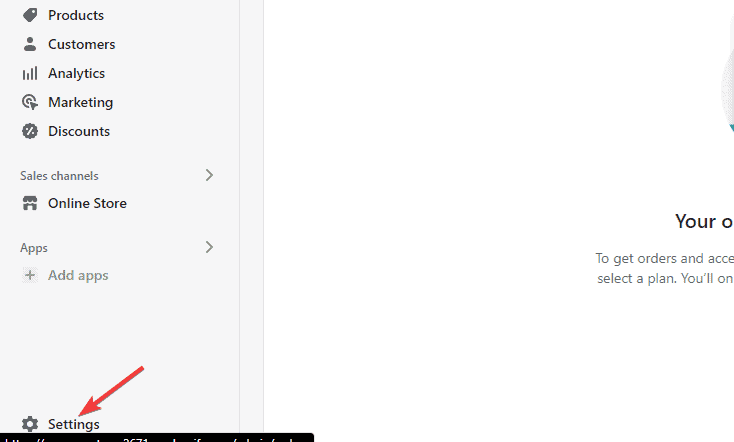
Select Payments on the left panel and input your payment information.
Add Store Policies
Another important aspect of your Shopify store to set up before selling are the site policies like a refund, privacy, and TOS.
You can quickly do these by going to the Settings page.
Locate Policies at the bottom of the menu and input your text.
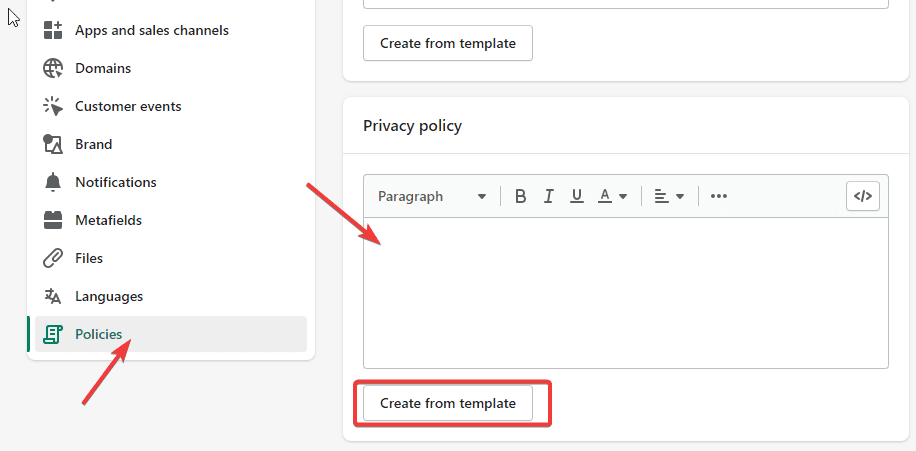
You can automatically generate these Policies by clicking the Create from template button below the Text field.
Set Your Shipping Rate
Another important part of setting up is the shipping fee.
Hint: Having separate shipping rates for different locations can get you confused as a beginner.
A pro approach is adding the shipping rate to the product’s price and offering free shipping.
For example, you can add $5 to a $50 product and then make the shipping rate free.
Besides saving you some headaches, offering free shipping on your store is a great marketing strategy.
Here’s how to quickly do it;
On the Settings page, select shipping and delivery from the left panel and click the manage button.
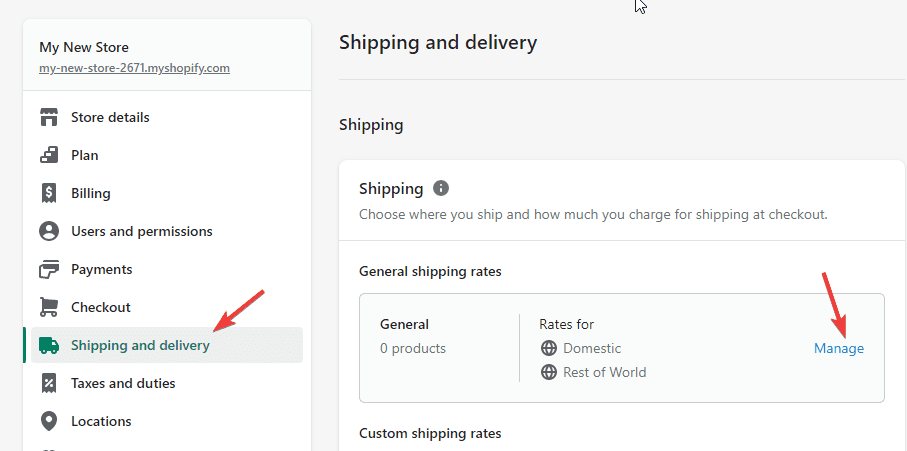
Delete all the Standard Shipping rates and add new ones.
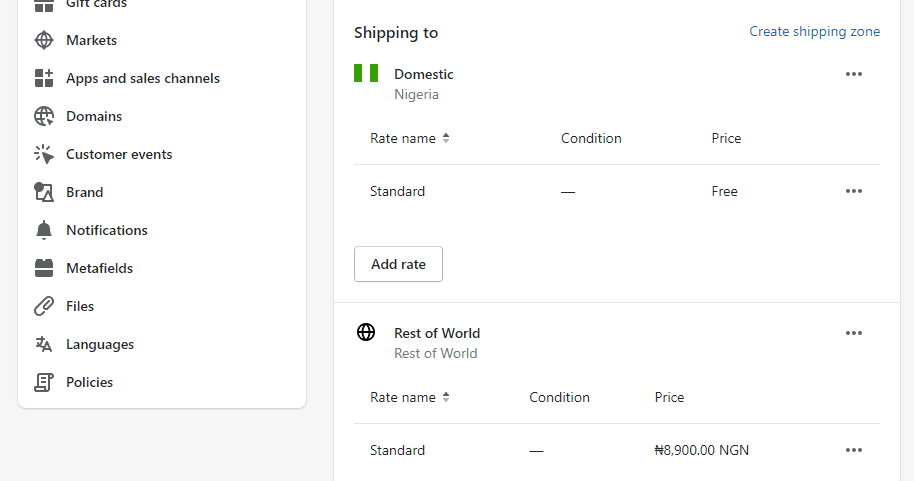
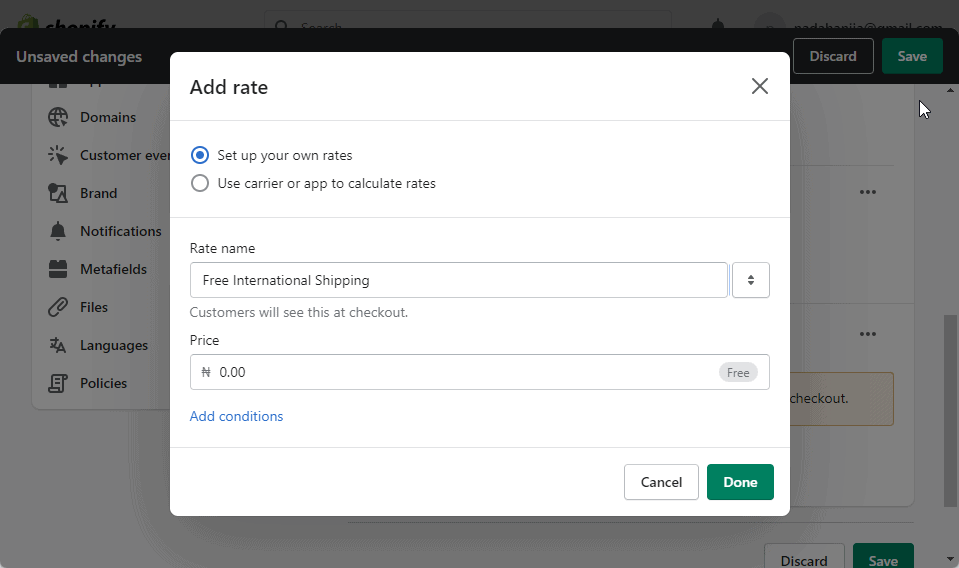
Under Rest of World, add Free International Shipping, leave the price at $0.00 and Click the Done button.
Also, you’ll need to add a navigation menu, categories, and filters to your site, just like you see on other Ecommerce platforms.
The theme you select should make this simple.
Other setups you’ll have to complete include; customer and shipping pages, domain name connection, and adding tax details.
Follow the setup guide to complete the process.
Step 7: Add Products to Your Store
Once you’ve completed the documentation and settings aspects of your store, it’s time to add products.
Using Shopify apps makes adding inventories to your store simple.
Here’s how;
Go to Products on your Shopify dashboard and select Find products to sell.
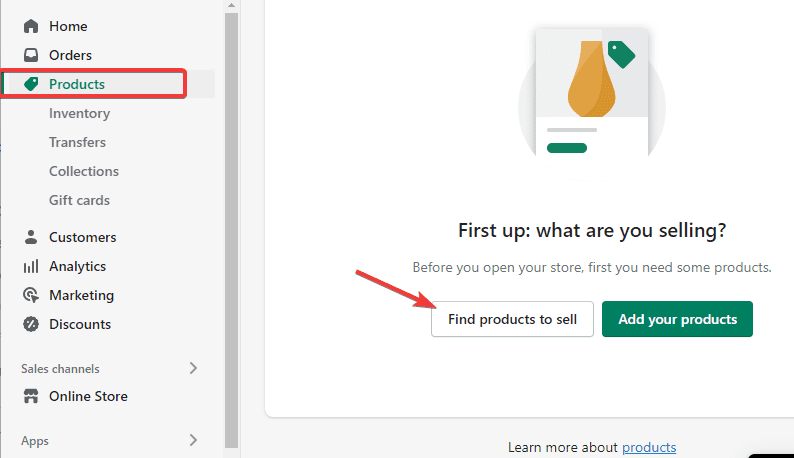
You’ll be taken to the Shopify App Store, where you can select apps that can add thousands of products to your store in a few clicks.
Here are some of the most used Shopify dropshipping apps and how they work.
Popular Shopify Dropshipping Apps
Oberlo is the most popular app on the Shopify apps store, and that’s because it is built specifically for Shopify. With Oberlo, you can add up to 500 items to your store for free.
These products are sourced from Oberlo marketplace and Aliexpress.
You can select a product and customize everything, from images to descriptions and the products’ names.
The good thing about Oberlo is that you get data and statistics to select the best products.
You’ll see supplier ratings, feedback, shipping method, and other useful information to select the right product as a beginner.
- DSers allow you to add products from vendors on Aliexpress to your store.
- Spocket allows you to add products from thousands of suppliers in the United States, Europe, and Canada.
- Printful is a print-on-demand platform that allows you to sell customized merchandise with your design.
You’ll spend some time curating the best product for your store.
You don’t have to overthink it.
You can just select 20-25 products first to test the market.
Step 8: Launch and Market Your Store
Once your Shopify store is live and populated with products, you need to spread the word about your new site and attract potential customers.
You can use both organic and paid marketing.
Here are some areas to look at.
Social Media: Starting on social media with your friends and existing followers will make getting your first sales easier.
Shopify integrates your store with your Facebook and Instagram.
So you can display your product to your social media audience.
Simply go to your Shopify dashboard and select sales channels.
Connect your store, and you are good to go.
Email Marketing: Once people start buying from you, you should start building your email list from day one.
You won’t need to do it the hard way.
Shopify readily integrates with popular email marketing platforms like ConvertKit, Mailchimp, and ConstantContact.
Ecommerce Blogging: Publishing valuable content relevant to your dropshipping niche will generate traffic to your site and attract potential customers.
Besides the SEO benefit, It helps build brand loyalty.
Paid Advertising: A quicker method to drive shoppers to your store is targeted marketing.
Google Ads and social media advertising can get your product in front of ready-to-buy customers in no time.
More Helpful Ecommerce Tutorials:
- How To Start An Ecommerce Business: Read the ultimate guide to starting an Ecommerce business for beginners.
- How to Start an Online Boutique: Want to start an online boutique but need help figuring out how and where? This tutorial has answers to all your questions.
- How to Dropship on Amazon:Amazon is an alternative destination for drop shippers. Learn how to get started here.
Wrapping Up
Congratulations! You are now a proud Ecommerce entrepreneur.
What next?
Mastering dropshipping on Shopify and marketing.
Yes.
All kinds of marketing, from email marketing to content marketing and social media marketing, by yourself or pay someone.
Wishing all the best on your new entrepreneurial journey.
Have any questions?
Let’s hear from you in the comment section below.


