
Developing a hanging indent is a function that Google Slides takes from Google Docs.
Understanding how to create a hanging indent on Google Slides is helpful when building a biography document for an academic presentation because it is frequently used in works cited pages.
With just a few clicks, you can quickly add a hanging indent to any text in Google Slides. In this article, we’ll walk you through the step-by-step process of creating hanging indent on Google Slides.
- How Many Spaces is a Hanging Indent?
- How Do I Add a Hanging Indent in Google Slides?
- What You’ll Need To Create Hanging Indent On Google Slides
- What Is A Hanging Indent?
- When Would You Use Hanging Indents?
- How To Create A Hanging Indent On Google Slides: Step-By-Step Instructions
- How To Create A Hanging Indent On Google Slides Using Keyboard
- Similar Tutorials To Check Out
- Wrapping Up
How Many Spaces is a Hanging Indent?
There are 5 spaces; to manually indent every line of a paragraph, use the space bar five times.
How Do I Add a Hanging Indent in Google Slides?
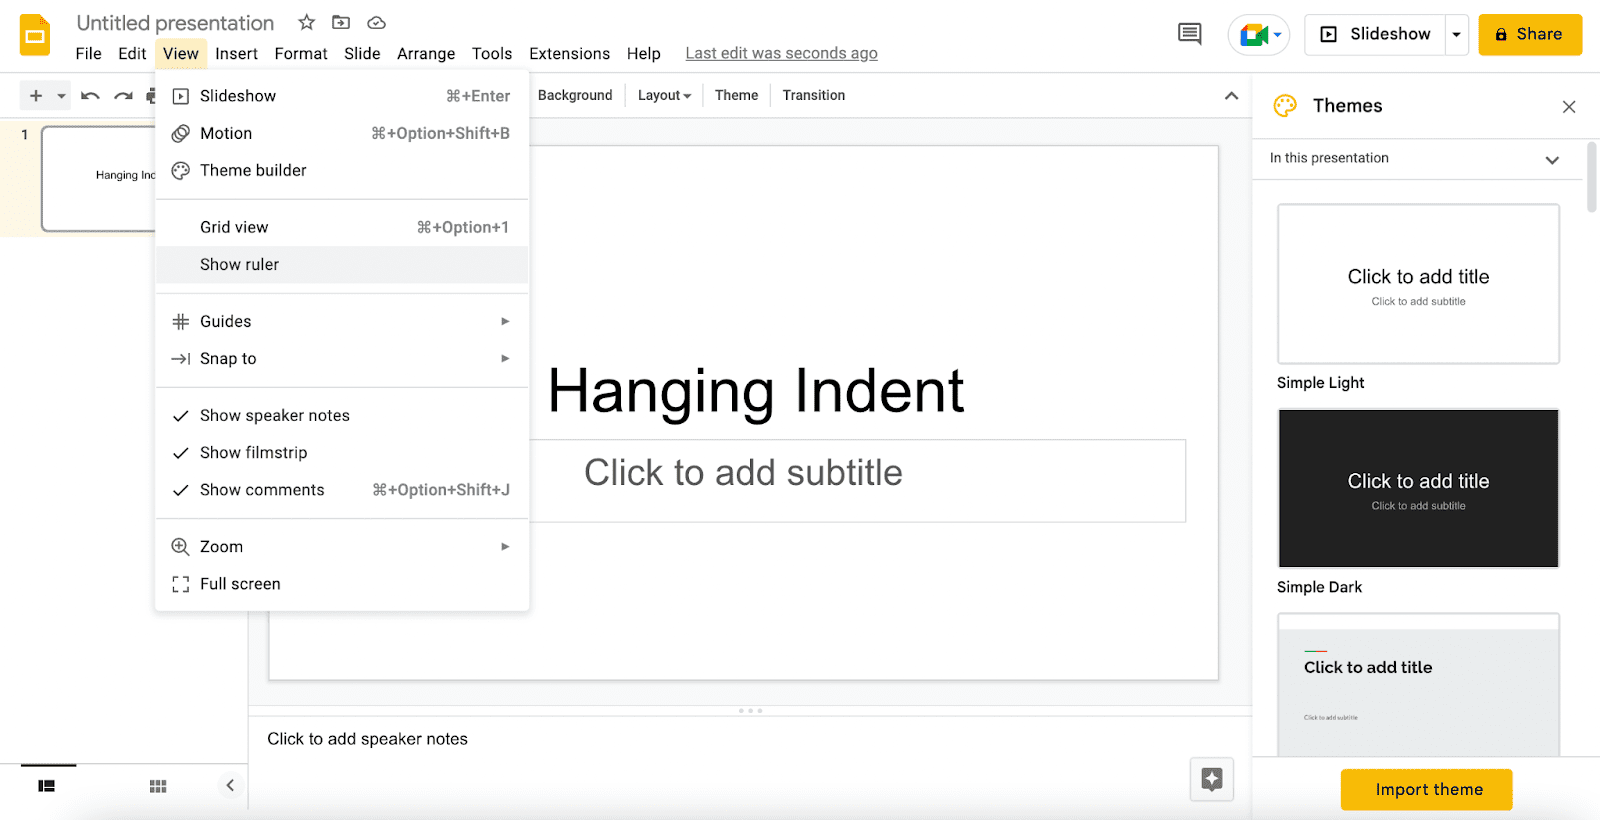
To start, switch on the ruler by opening the View tab and choosing Show ruler. To add the hanging indent, pick the text and drag the Indent command bar.
What You’ll Need To Create Hanging Indent On Google Slides
Google Slides: You’ll need Google Slides, which is a free program included in the Google suites.
With the help of the online presentation tool Google Slides, you can collaborate with others while creating and formatting presentations.

The primary distinction between PowerPoint and Google Slides is that the former is an offline, downloaded program produced by Microsoft Windows, whilst the latter is an online-only product made available as part of the Google Workspace.
What Is A Hanging Indent?
Like bullet points, hanging indents are a type of text styling. Its name comes from the fact that only the first line of the prepared text has a standard indentation, with all subsequent lines having a greater indentation than the first.
As a result, the very first line “hangs” over the rest of the content.
Academic citation styles like MLA and Chicago style, as well as bibliographies, frequently employ hanging indents. They can also be an effective approach to produce a text effect that stands out and highlights particular content.
The prevalence of hanging indents is higher in text documents written using Microsoft Word, Google Docs, or any other comparable software than in presentations made with Google Slides.
However, there may be times when you want to use the function in presentations to credit sources or for aesthetic purposes.
When Would You Use Hanging Indents?
Hanging indents are highly helpful for Google Slides presentations, even though they are often used for academic papers.
They are utilized in lists to offset line breaks distinctly. Reference pages, bibliography, and publications cited pages frequently have hanging indents.
Correct attribution and acknowledgment should be given when using certain statistics and other information in many presentations.
Now let’s focus on our main topic: hanging indents on Google Slides.
How To Create A Hanging Indent On Google Slides: Step-By-Step Instructions
Follow these steps to add a hanging indent on Google Slides presentations:
Step One: Start a fresh presentation in Google Slides or launch an existing one. By selecting View > Show Ruler, ensure the Ruler is displayed.
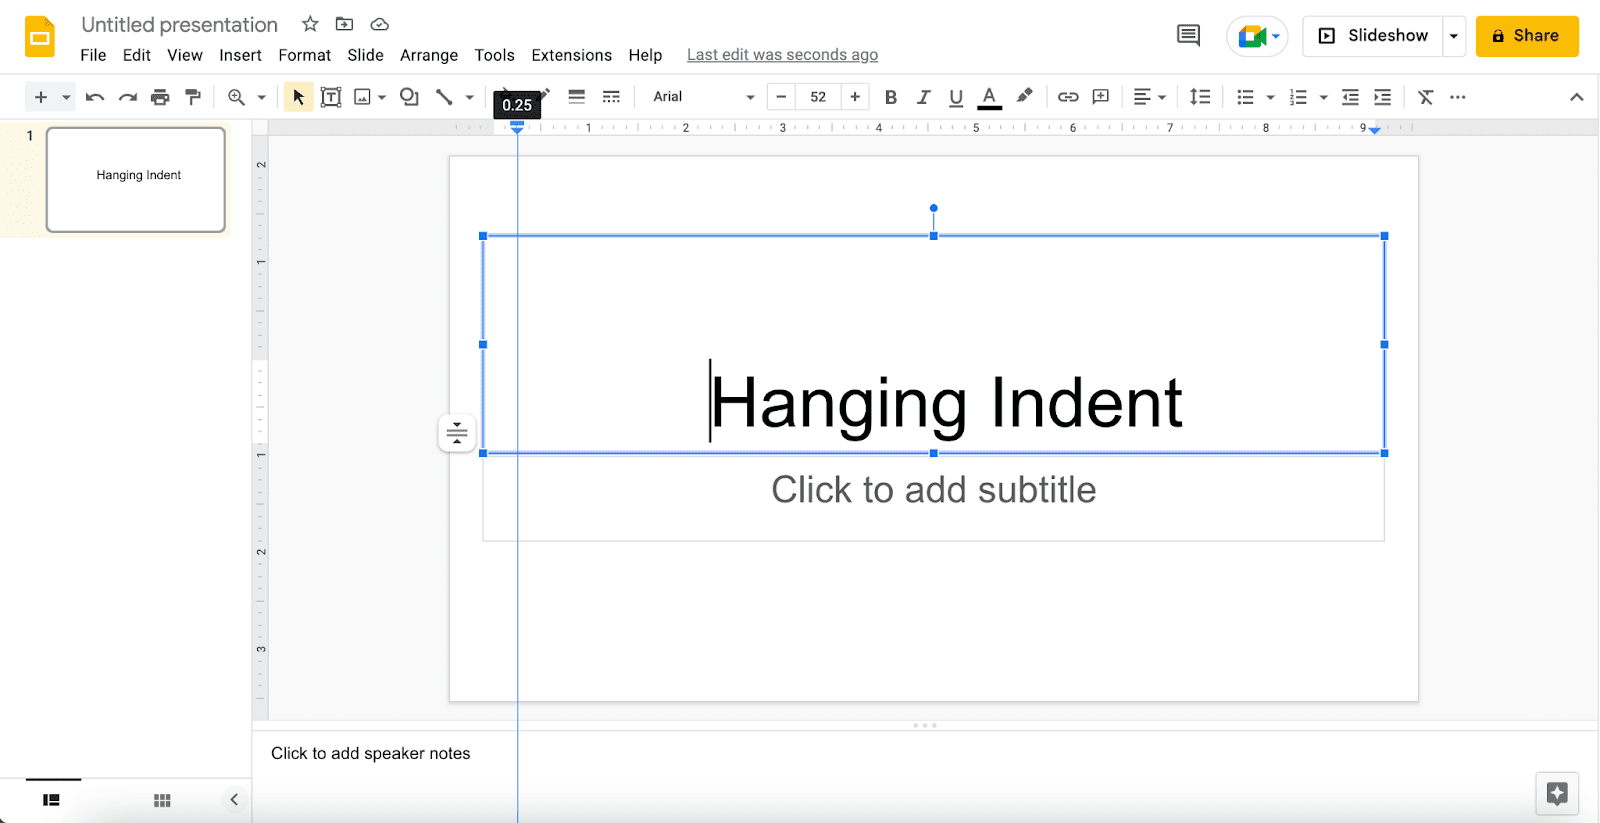
Step Two: If the text isn’t there, add it before using the hanging indent. The section of text that will have a hanging indent is highlighted.
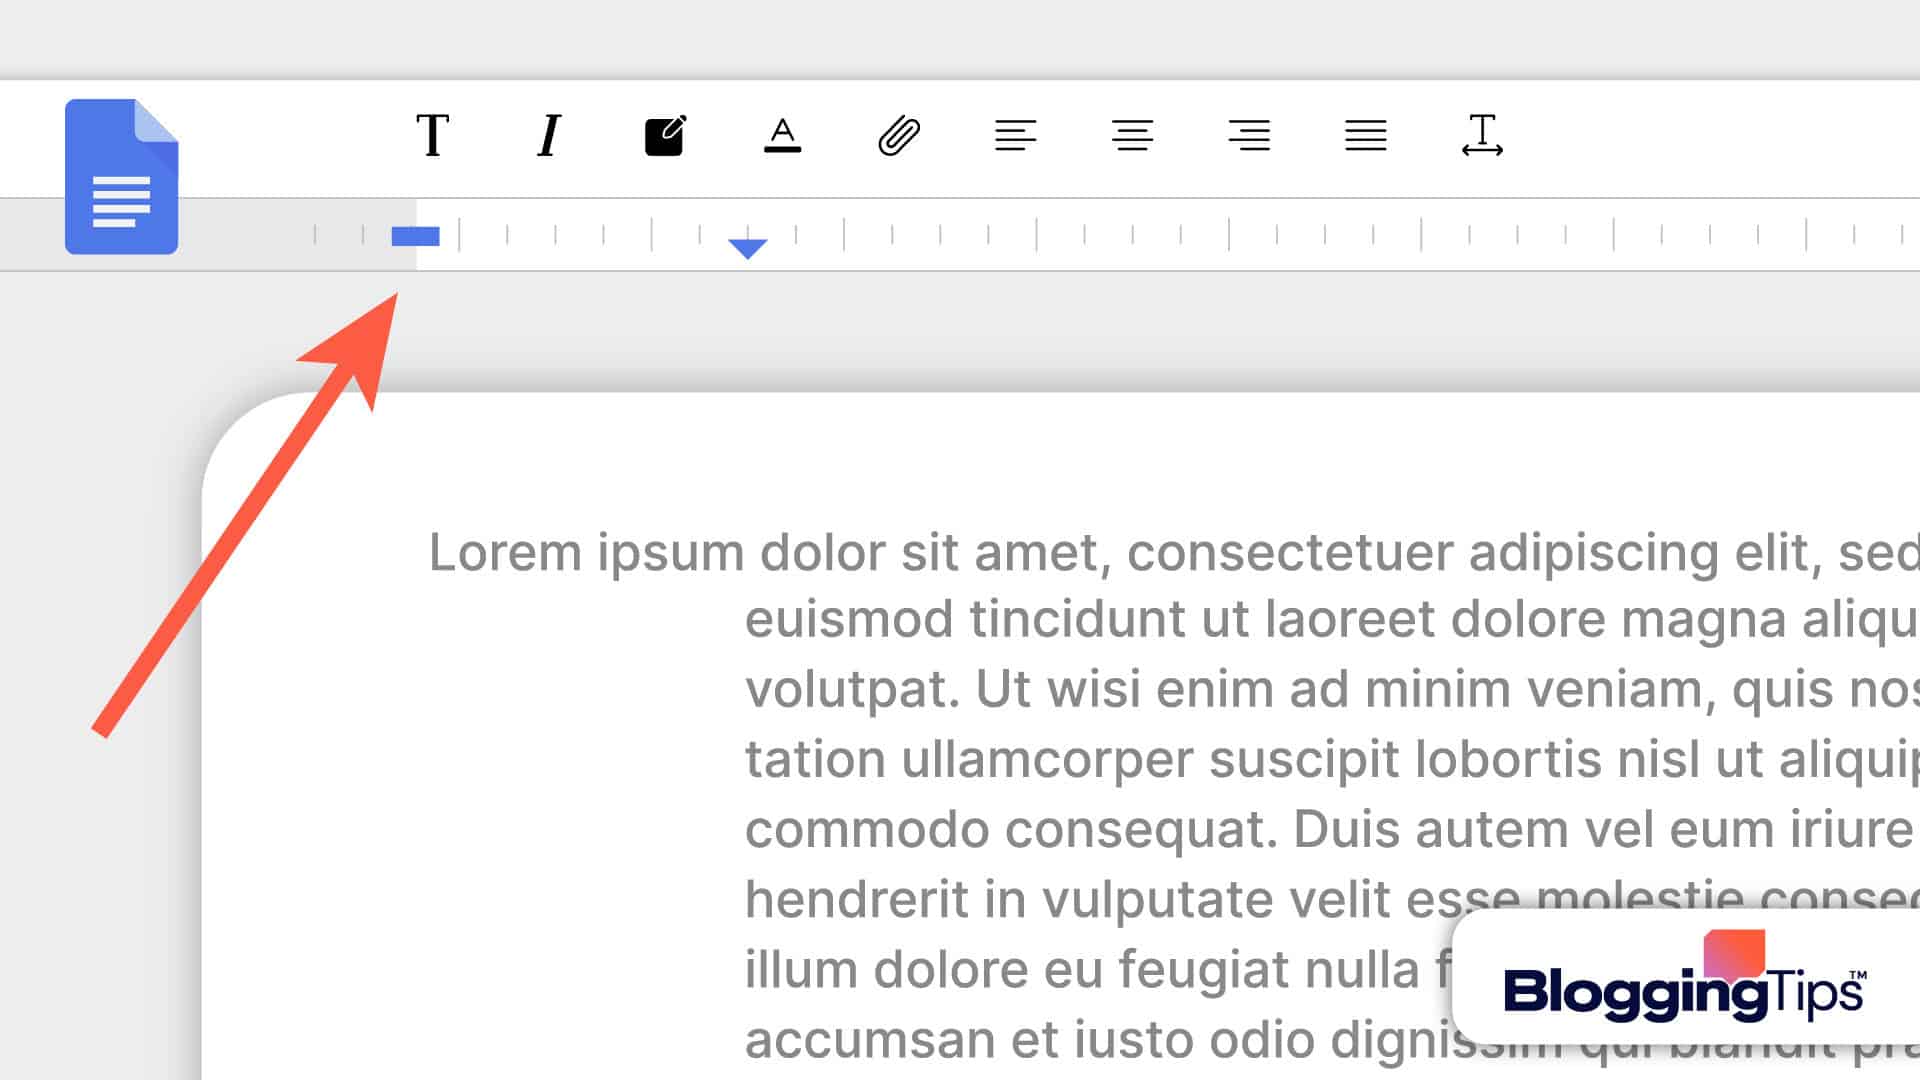
Drag the indent control by clicking and dragging it on the ruler area. It resembles a triangle that faces down. Once the text is indented where you want it, let go of it.
Step Three: Ensure that you don’t inadvertently grab the margin control.
The left indent control, which resembles a blue bar directly above the triangle, can be grabbed and moved back to the beginning of the first line of text.
Although hanging indents can be as large as you like, they typically measure 0.5 inches over.
Step Four: The hanging indent will be generated once you release the left indent control.
How To Create A Hanging Indent On Google Slides Using Keyboard
The easiest approach to inserting a hanging indent on Google Slides is to follow the instructions in the preceding section since the indents you insert that way remain in position regardless of how much content you insert.
Additionally, many phrases or paragraphs might have that style of hanging indent.
If you simply need to indent a single line, there is another method that is quick and useful for making a hanging indent. Here is what to do:
Set your cursor at the start of the line in your Google Slides presentation that you wish to indent.
Press Return or Enter while simultaneously holding down the Shift key on your keyboard. Press the Tab key to add one tab to the line’s indent.
Similar Tutorials To Check Out
- How to Double-Space in Google Docs: A page of text that is double-spaced is simpler and more fun to read. We’ll show you how to double-space in Google Docs.
- How to Change Margins on Google Docs: You might need to alter the default margins when executing a task with Google Docs, which can be difficult if you’ve never tried it before. We’ll show you how to change margins on Google Docs.
- How to Make a Small Number in Google Docs: There’s a good chance that you frequently need to add superscripts and subscripts to your Google Docs project if you write professional or educational documents. This article will show you how to make a small number in Google Docs.
Wrapping Up
All done! As you can see, adding hanging indents in your presentation in Google Slides is pretty simple.
To give your slides a professional appearance, use this method the next time you add a reference page.
Hanging indents provide a specific role in showcasing the substance of professional work when it pertains to text formatting. The paragraph becomes more interesting and meaningful when the necessary sentences are indented.
Compared to straightforward presentations, professional company presentations attracted a more favorable audience.
We hope this article helped you understand how to add hanging indent on Google Slides.


