Brett has been starting, growing, and monetizing websites since 2014. While in college, he began to learn about digital marketing. After graduating, he continued to build a diverse portfolio of websites while working a full time job. After years of building the portfolio on the side, he made the jump to run his websites full time.
Level up your digital marketing skills with our free courses, expert insights, forums, and social groups!
Create a Google Adsense account, add Google Adsense to WordPress, create and insert ad units on your website, and viola, your passive income stream is ready to flow.
For best results, place your Adsense code in prominent parts of your website.
The only forbidden place is in a floating widget, as that’s against Google Adsense Terms of service.
Other than that, anywhere goes.
What You’ll Need to Add Google Adsense to WordPress
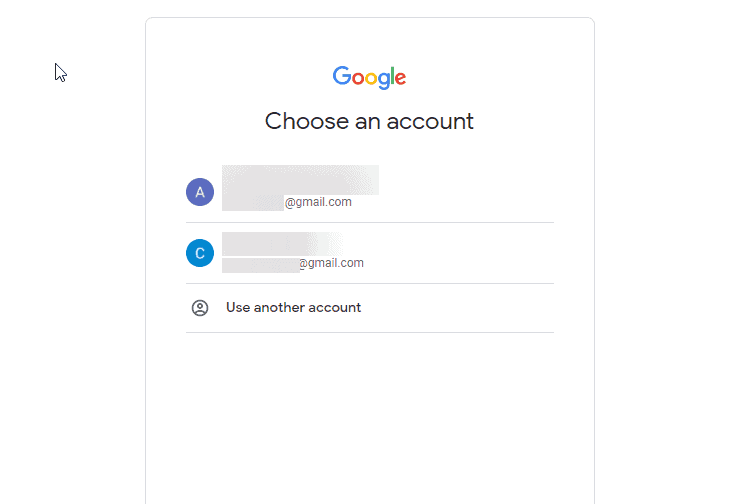
A Google Account: Before you can create adsense account, you need to first set up a Google account. Creating a gmail account gives you access to all Google services.
A Google Adsense Account: You’ll also need to set up a Google Adsense account. You’ll learn that in the next section of this tutorial.
WordPress Admin Access: You can only effect changes on a WordPress website with an Admin or Super Admin role. So you’ll need access to the WordPress Admin Dashboard.
Chrome Web Browser (optional): Chrome is the best web browser out there. It’s what we use for this tutorial. Nonetheless, you can use any secure web browser.
How to Add Google Adsense to WordPress Step-by-Step
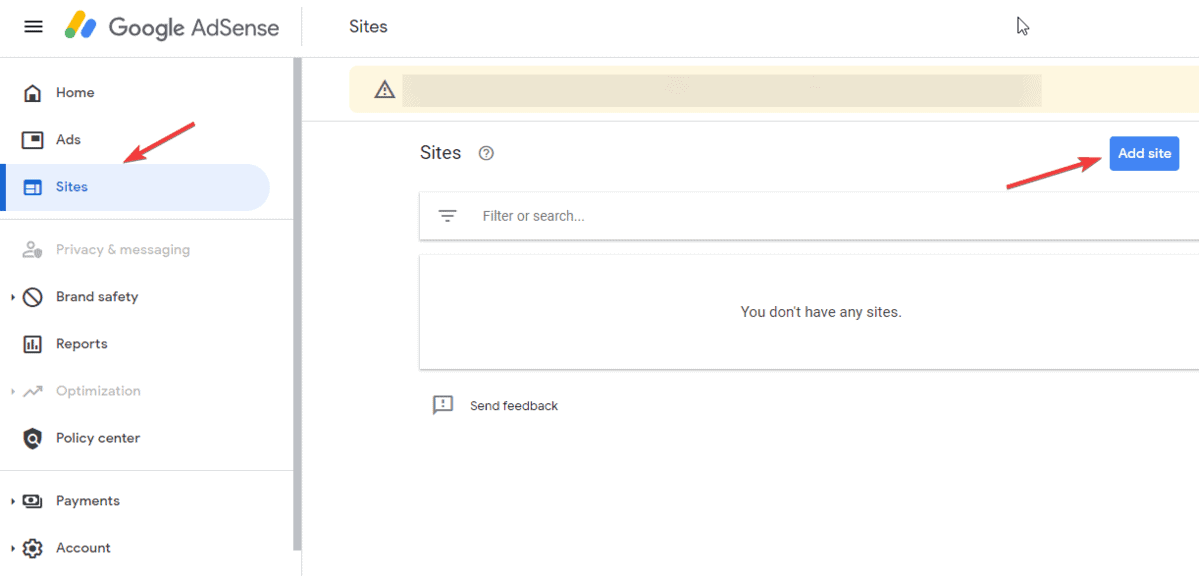
Step 1: Create a Google Adsense account.
Step 2: Connect Your Google Adsense Account to WordPress
Step 3: Add Google Adsense Codes Snippets to WordPress
Step 4: Create Your First Adsense Ad Unit
Step 5: Add Your Ad Unit Code to WordPress
Step 6: Add Adsense Auto-Ad Codes to WordPress
Step 1: Create a Google Adsense account
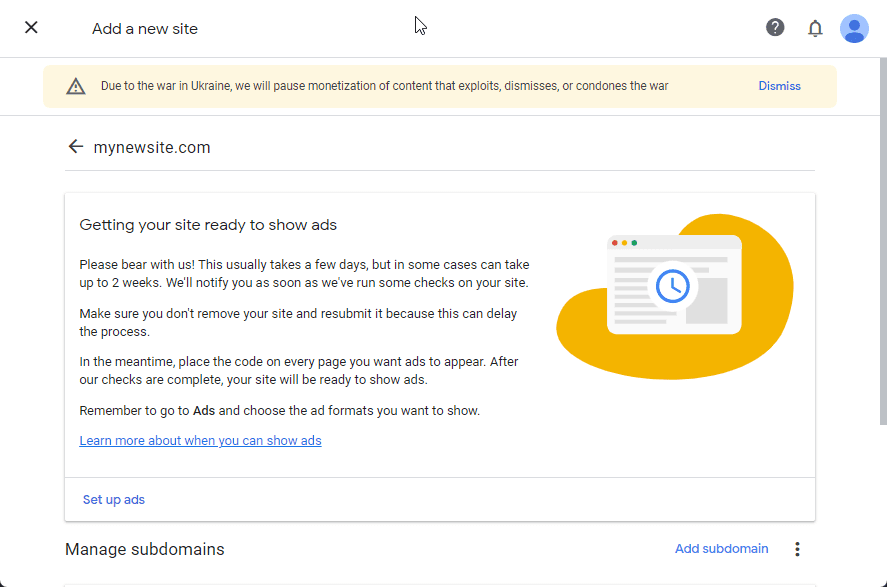
To add Google Adsense to WordPress, you need to first set up your Google Adsense account and wait for your application to be approved.
This may take some days.
Before you apply, make sure you have some quality content on your website and see that your website is already getting a bit of traffic.
This will boost your application and fast-track the approval process.
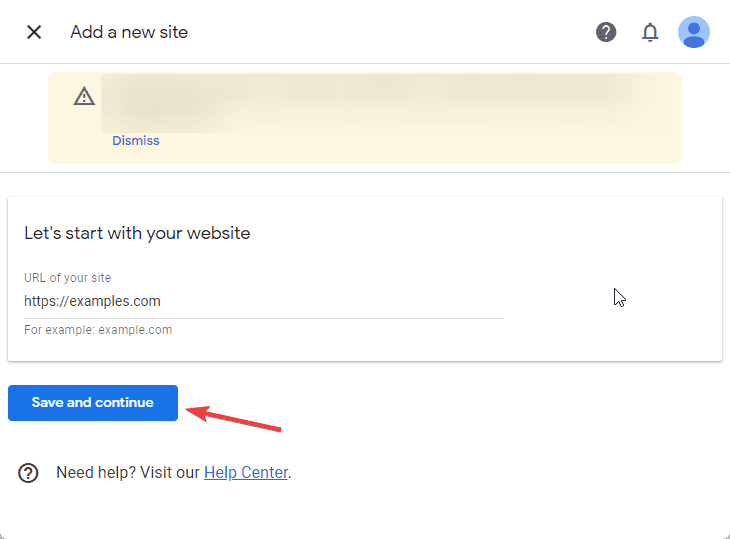
Follow these steps to set up your Adsense account:
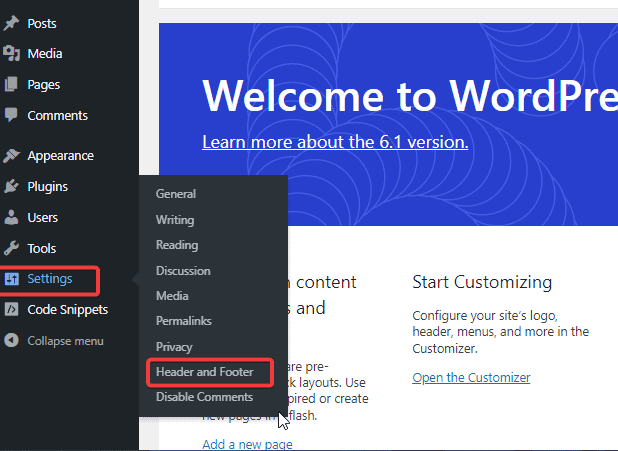
Open your WordPress admin dashboard, hover over Settings on the left pane, and select Header and Footer.
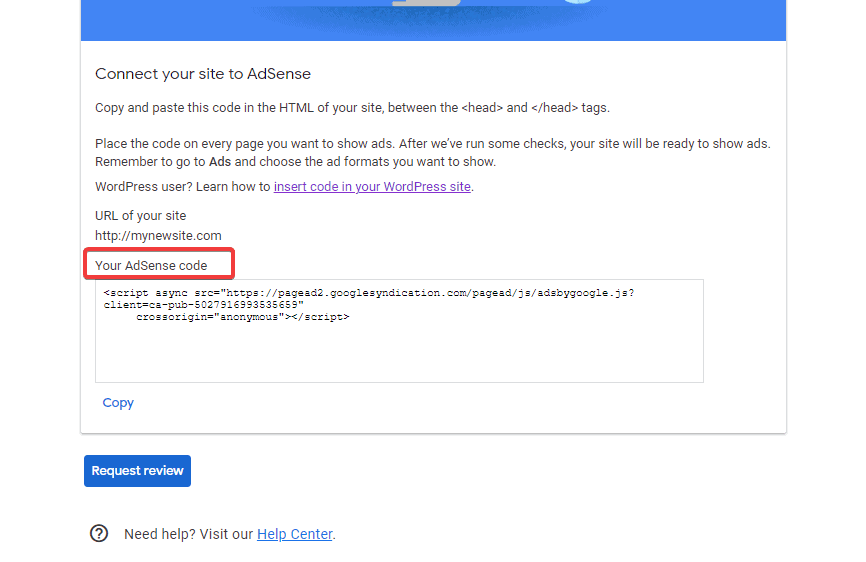
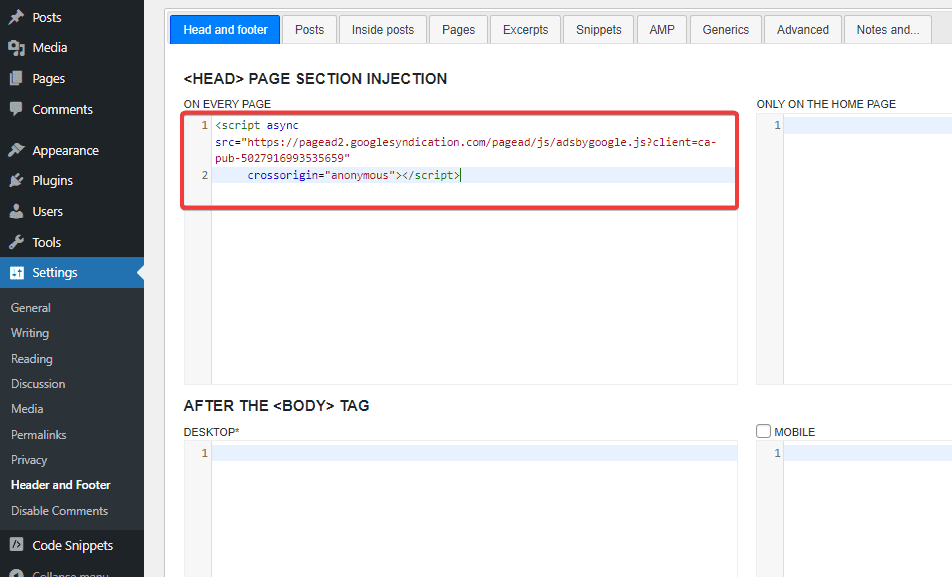
Next, Paste your Adsense code in the field with the title <HEAD> PAGE SECTION INJECTION ON EVERY PAGE
Scroll to the bottom to click the Save button.
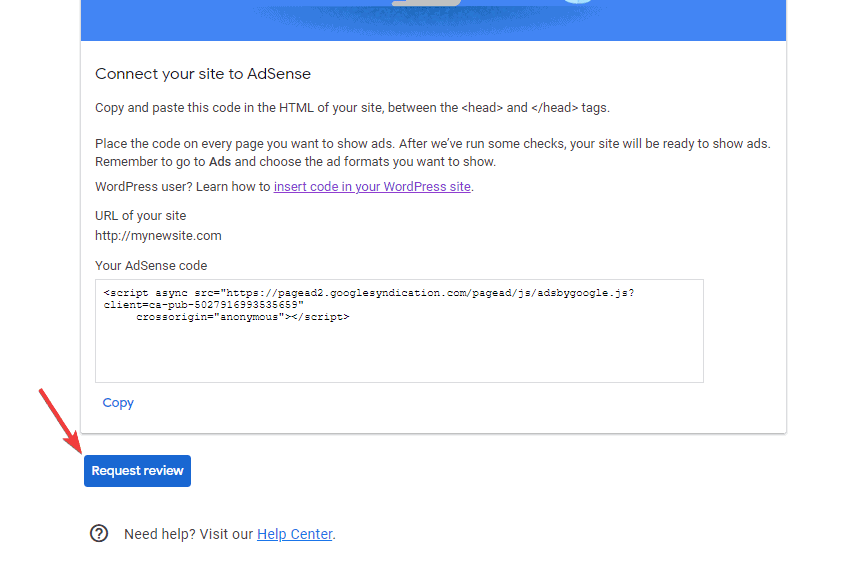
Then, return to the Adsense window and click Request review.
You will see a notification with a confirmation message that your code was found.
Click Got it.
Your account is now under review.
If your application is rejected, the content of the email will highlight the reasons.
Make adjustments and reapply.
Step 4: Create Your First Adsense Ad Unit
Once your account is approved, Google will not automatically show ads on your site unless you create ad units and place them on your site.
You can create as many ad units to display in different parts of your website.
Here’s how:
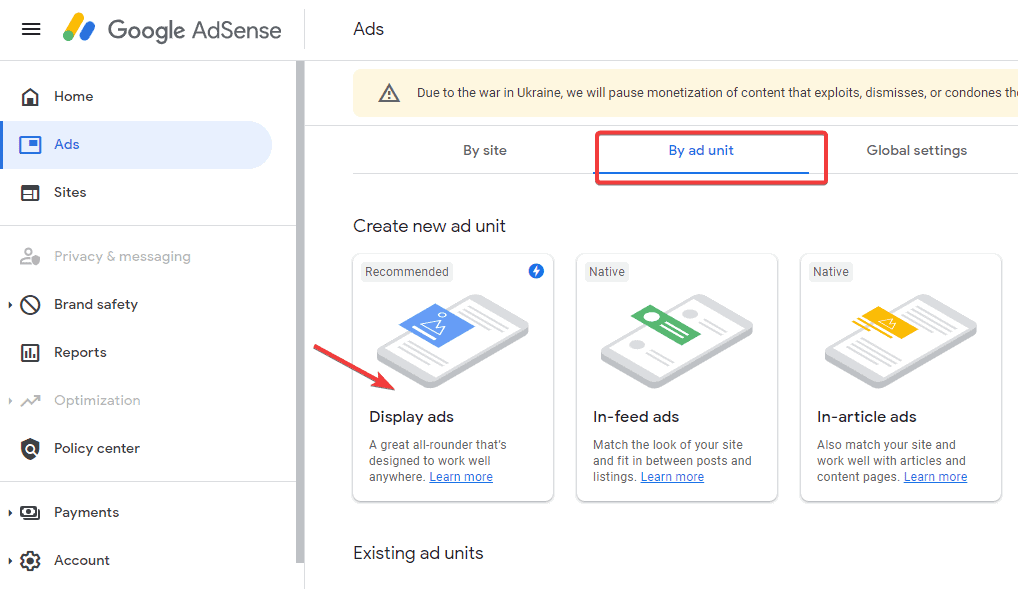
Open your Adsense dashboard and select Ads from the left panel.
On the ads page, switch to the By ad unit tab, and select Display ads from the options.
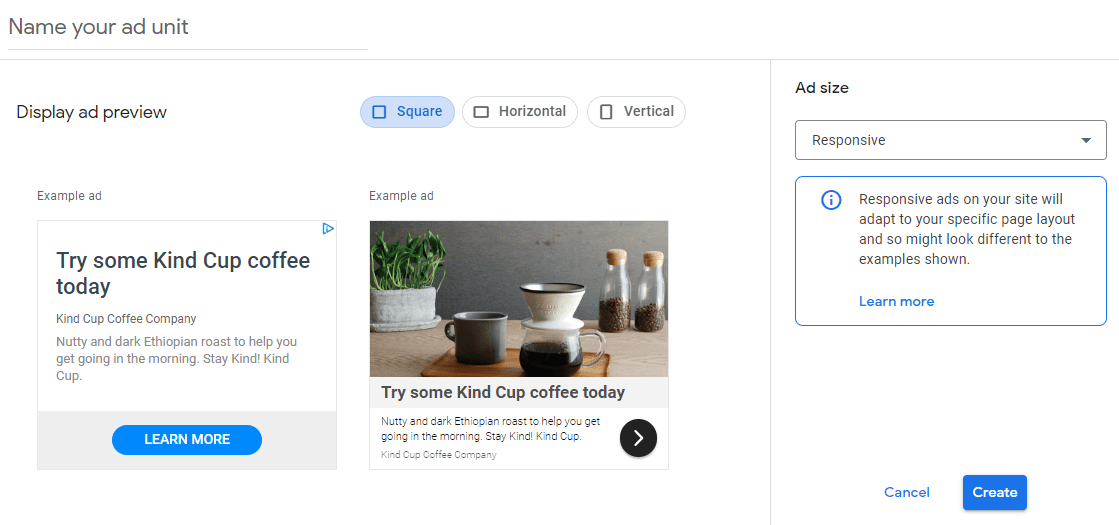
Next, name your ad unit.
Select size and type, then click on the Create button.
Your ad will be created.
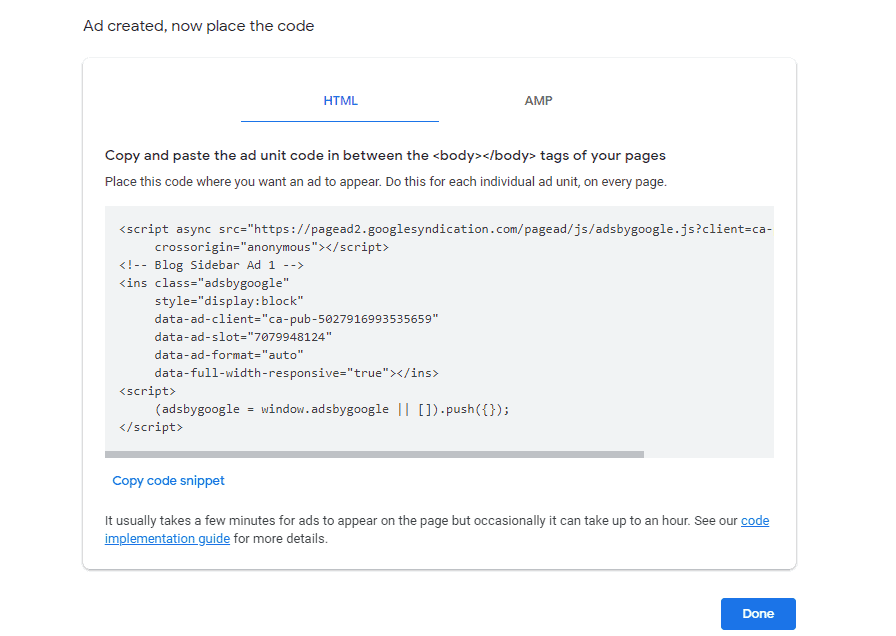
Now copy your ad code and save it in a notepad.
You’ll need it in the next step.
You need to place this code where you want the ad to appear on your website.
Step 5: Add Your Ad Unit Code to WordPress
You have to determine where you want an ad to appear on your website.
For this tutorial, we’ll add Google Adsense to WordPress sidebar using the sidebar widget.
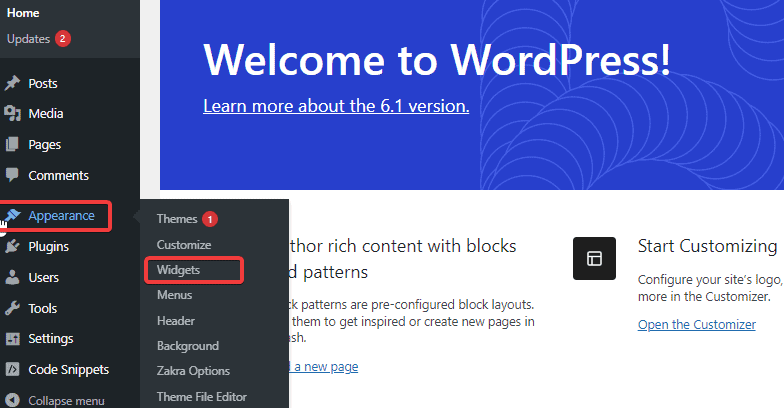
Log in to your WordPress Admin Dashboard, go to Appearance and select Widgets from the options.
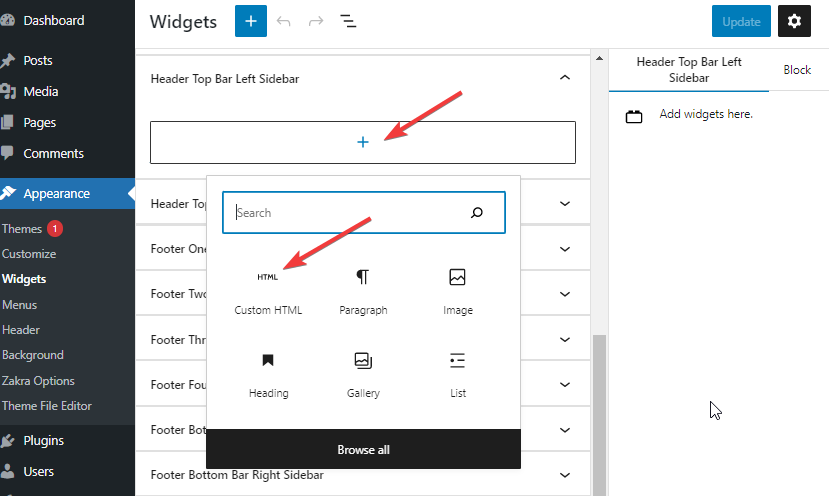
On the Widget page, select the sidebar position you want to insert the ad, click the + icon and select Custom HTML.
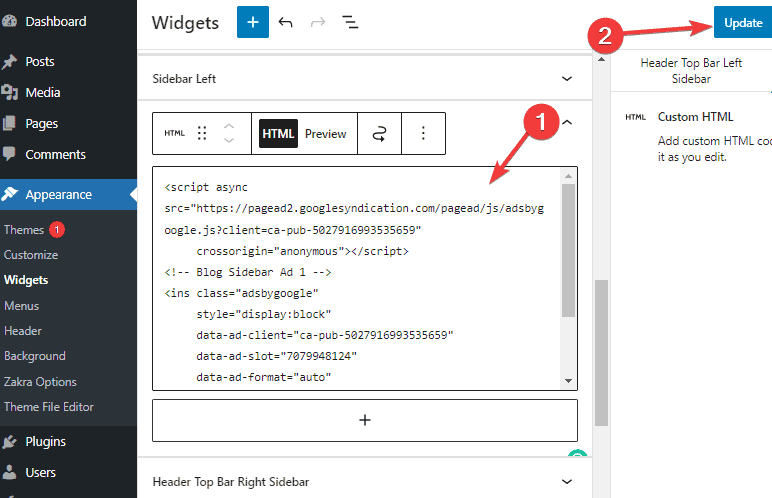
Next, paste the ad unit code you copied from Google Adsense into the Write HTML field.
Then click the Update button at the top.
Wait for a few minutes and check your website to see if the ad has appeared.
It might take up to a few hours.
That’s all.
Your first display ad is running.
You can use the same steps to create more ad units and place them where you want on your website.
When starting out, you may not want to go through the manual process of adding ads to different areas of your site.
That’s where Adsense auto ads come to play.
With Adsense auto-ad, Google automatically finds all the best placements to display ads on your website.
Setting up auto ads is very simple.
Step 6: Add Adsense Auto-Ad Codes to WordPress
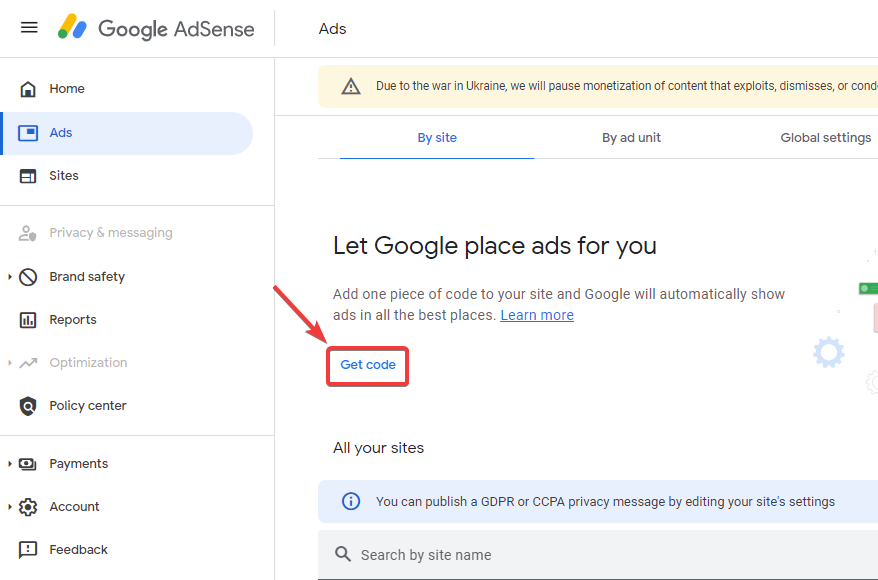
Log in to your Adsense Account.
Click on Ads on the left pane.
Select Get code and wait for Google to generate your auto-ads code.
Once the code is generated, copy and save it in your notepad.
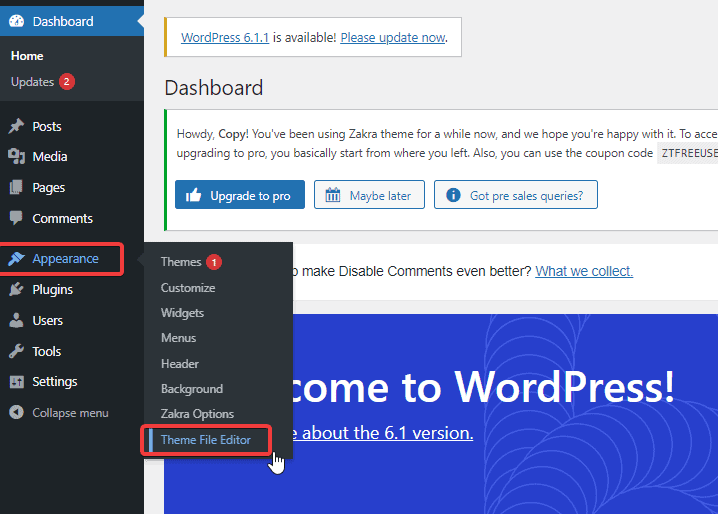
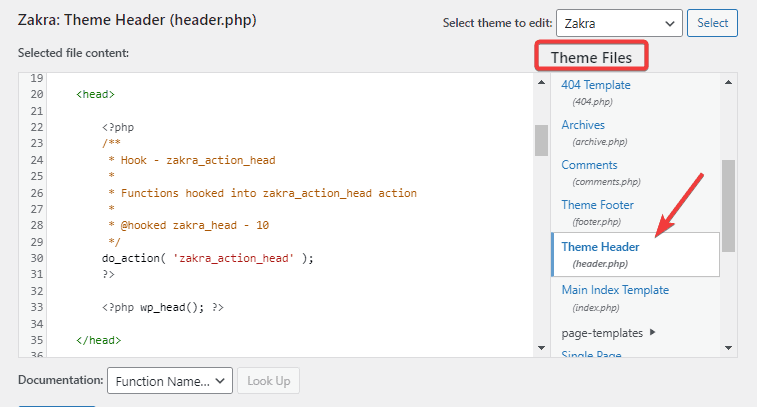
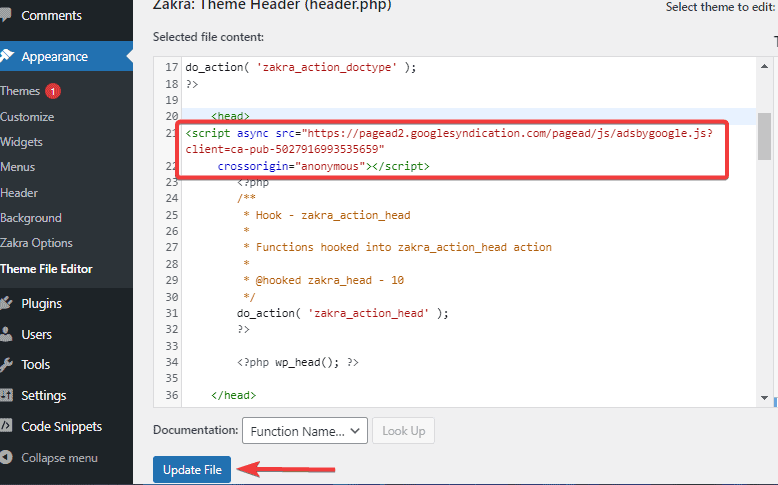
To add auto-ads code to your website, use the same method as above to place the code snippet to your Theme header or header.php file.
Alternatively, you can use a header and footer plugin.
The steps are the same.
Once done, this single code will auto-display ads on every page of your website.
More Helpful WordPress Tutorials
How to Add Google Adsense to WordPress: If you want to monetize your WordPress blog, Google Adsense is one of the best ways. Here’s a practical guide for you.
How to Use Google Analytics: Understanding how people engage with your website can help you make better business decisions. Check out how to use Google Analytics to uncover information that matters to your business.
You may need to play around with ad placements and formats until you find locations that work best for your site.
Once you identify them, you can maximize your earning potential.
Keep earning!
Drop us a line in the comments section if you find this tutorial helpful.
By Brett Helling
Brett has been starting, growing, and monetizing websites since 2014. While in college, he began to learn about digital marketing. After graduating, he continued to build a diverse portfolio of websites while working a full time job. After years of building the portfolio on the side, he made the jump to run his websites full time.