
Whether you are just starting a blog or your blog has been around for a while, Google Adsense is an easy way to make money from your blog.
The small banner ads and other sizes you see in the middle of a post or those on the sidebar of many websites are examples of Google ads.
As people see those ads and click on them, money drops into the blog’s owner account.
So how can I apply for Google Adsense?
In this tutorial, you’ll learn how to apply for a Google Adsense account and get approved.
- Frequently Asked Questions
- What You’ll Need to Apply for a Google Adsense Account
- How to Apply for a Google Adsense Account in 7 Steps
- Step 2: Input Your Business Information
- Step 3: Connect Your Google Adsense Account to Your Website
- Step 4: Get Permanent Adsense approval
- More Helpful Google Ads Tutorial:
- Wrapping up
Frequently Asked Questions
How Many Posts Do I Need to Get Approved for Adsense?
There’s no rigid rule about the number of posts you should have on your website to get approved for Adsense.
While some experts have recommended an average of 20 posts, according to Google, you only need some original content.
In Google words, “Your own content created from scratch.”
Is it Hard to Get Adsense Approval?
No.
Getting Adsense approval is very easy if your website complies with the Adsense program policies.
Once you have a reasonable amount of traffic, you can apply for Google Adsense and get approved within 24 hours.
What You’ll Need to Apply for a Google Adsense Account
A New Google Account: You already have one if you have a Gmail account or you are using any Google services.
You can’t use a Google account that’s already linked to another Adsense account.
A Website: You can’t use Google Adsense without having a website.
However, Google allows you to apply for an Adsense account if you still building your website.
You can set up your account, but you have to wait till your website is live before requesting approval.
Some Original Content: The number of content you must have on your website before applying for Adsense is not written in stone.
You can apply for a new website and get approved.
Google only cares about some indefinite quality content.
Some Traffic: Google does not state the minimum amount of traffic to approve Adsense.
But from experience, websites with great traffic always get approved.
Contact and Privacy Policy Page: One of the obscene reasons why Google rejected Adsense applications is the absence of the Privacy Policy and Contact page on websites.
Age Limit: You need to be at least 18 years of age before you can use Google Adsense.
Once you are good with these prerequisites, you can apply for a Google Adsense account.
Follow these steps:
How to Apply for a Google Adsense Account in 7 Steps
- Step 1: Create A New Google Adsense Account
- Step 2: Enter Your Business Information
- Step 3: Connect Your Google Adsense Account to Your Website
- Step 4: Get Permanent Adsense approval
Step 1: Create A New Google Adsense Account
Visit the Google Adsense website and click Get Started.

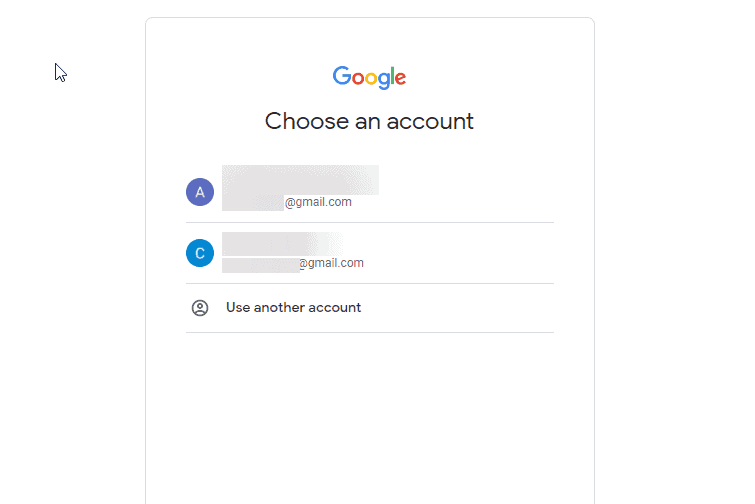
This will bring you to a new page to select the Google account you want to use.
You can proceed with any of your existing Google accounts or choose the Use another account option to create a new Gmail account for the Adsense application.
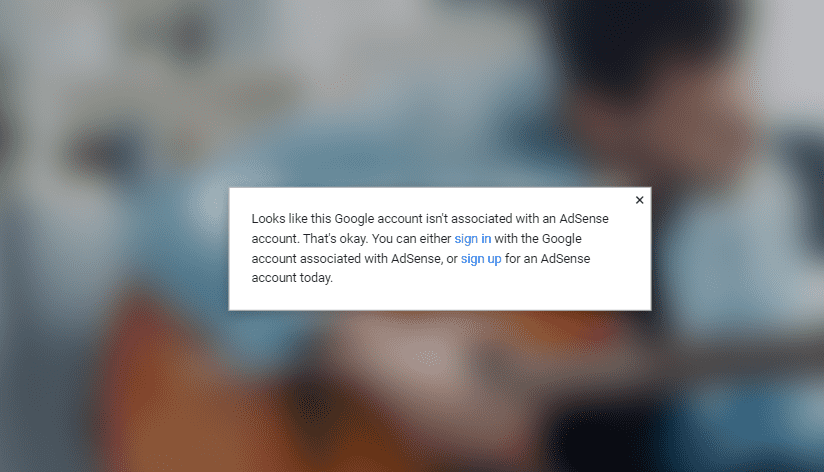
Once you select a Google account, you’ll be redirected to a page that says your Google account isn’t associated with an Adsense account as in the screenshot below.
Click on Sign up to continue.
This will take you to the beginning of your Adsense application process.
On this screen, you are required to input the following information:
- Your site URL: Your website root domain e.g bloggintgitps.com.
- Payment Country/Territory: Make sure you input the correct information here as Google will use it during the verification process. And you can’t change it later.

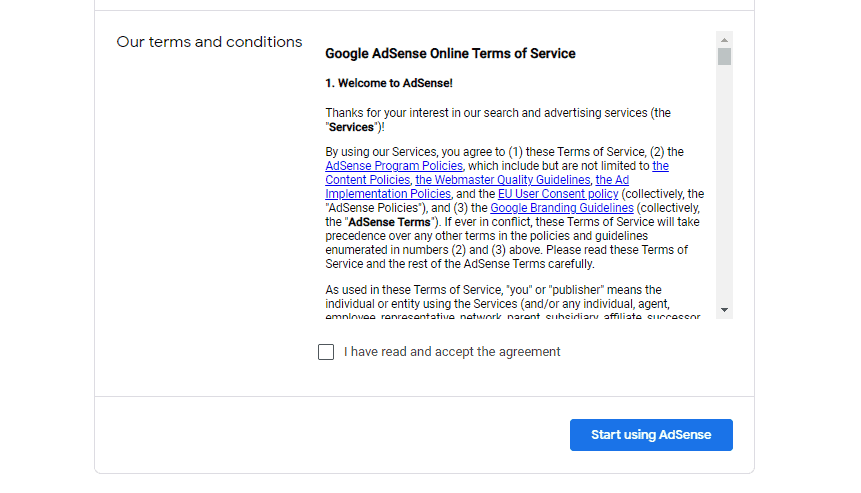
Next, scroll down to Our terms and conditions.
Check the box next to I have read and accept the agreement then click the Start using Adsense button.
Done.
You’ve successfully created your Google Adsense account.
The next step is to input some information about your business.
Step 2: Input Your Business Information
On your Google Adsense dashboard, go to the PAYMENTS card and click the Enter information button.
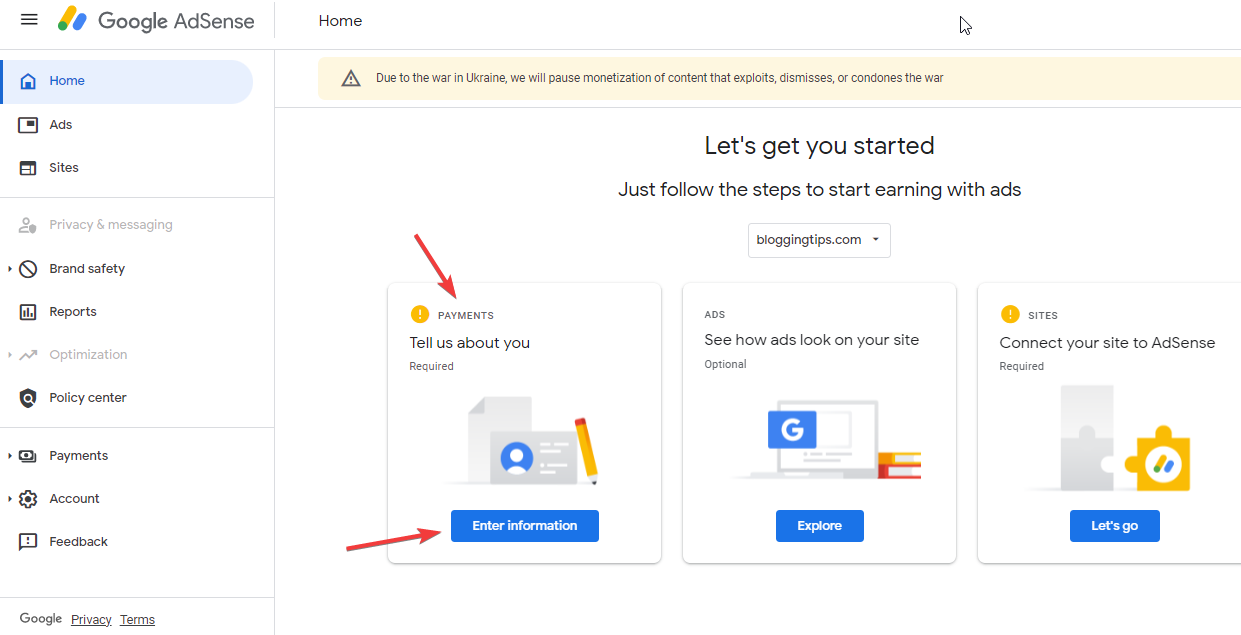
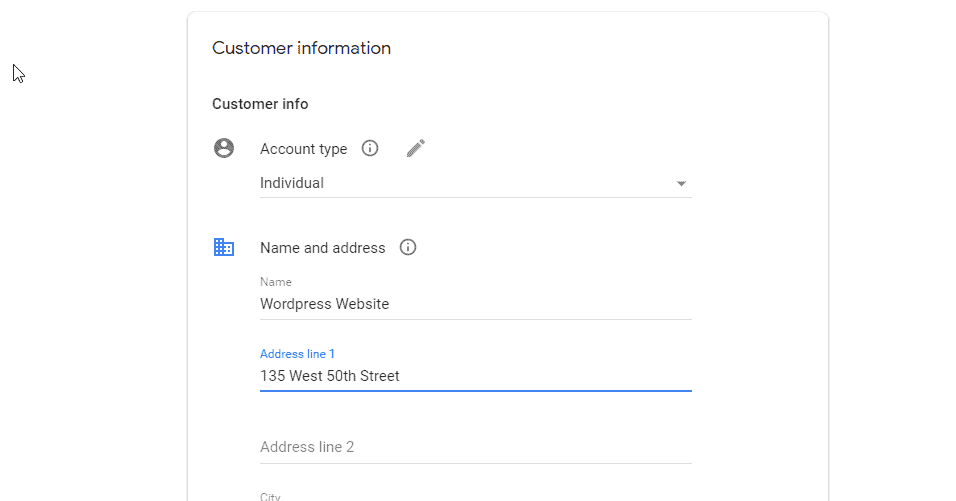
A customer information window will appear.
Here, you’ll provide Google with the following information about yourself or your business:
- Account type (individual or business)
- Mailing address: Use your correct residential or office address where you can receive mail.
- Zip code
- Phone Number: Use an active phone number. Google will verify it.
After your online application is completed.
Google will verify the phone number you input.
Google will also send you a PIN via the mailing address you provide.
If you are unable to verify this information, your approval will be withdrawn.
Step 3: Connect Your Google Adsense Account to Your Website
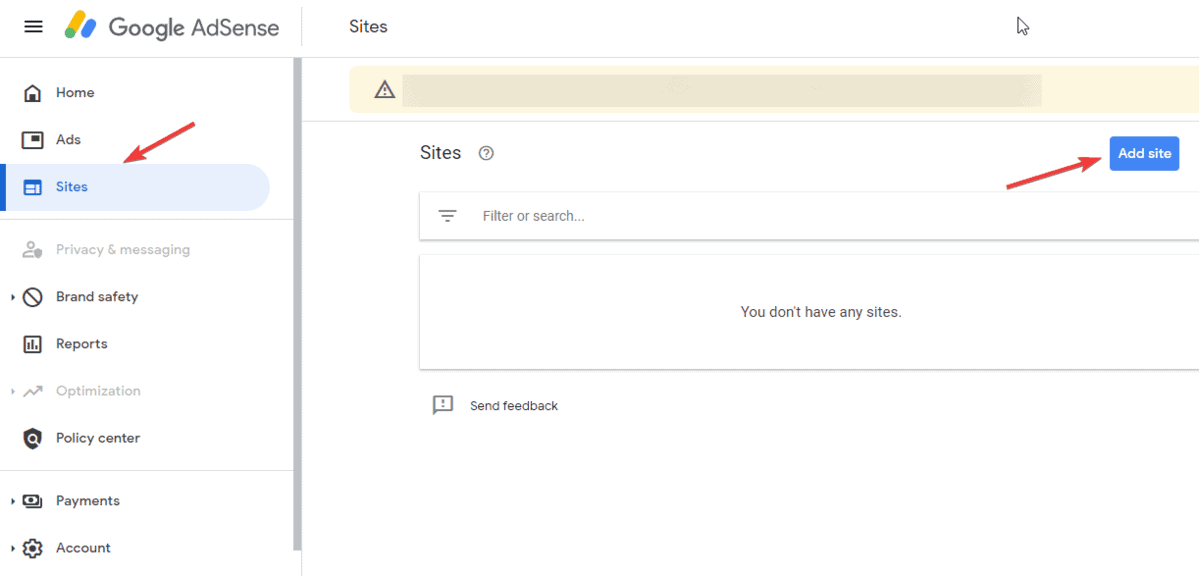
On your Adsense dashboard, select Sites on the left panel, then click the Add Site button at the top right.
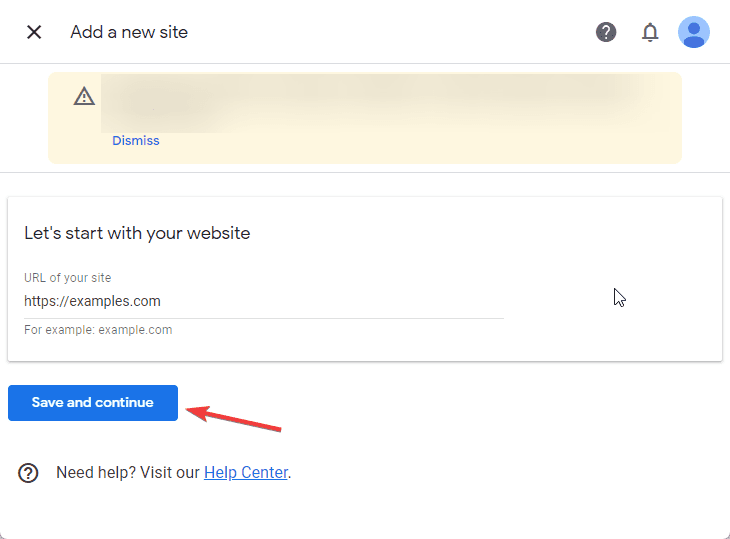
Enter your website URL and click the Save and continue button.
On the next page, you will see the Adsense Code Snippet to connect your site to Adsense.
Copy and save the code in your notepad.
Don’t click Request review yet.
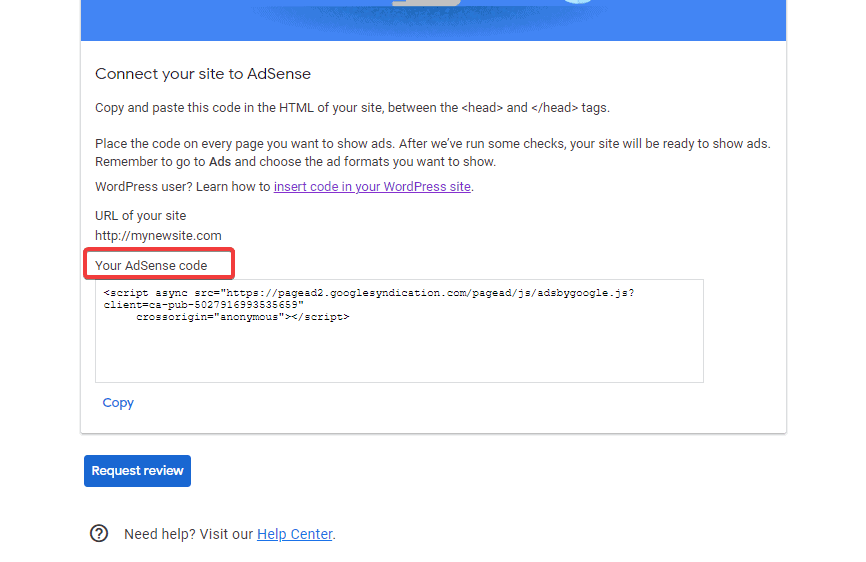
You have to add the code to your website before requesting the review.
If your website uses WordPress CMS, follow our guide on how to add Adsense code to WordPress.
Once you are done, come back to this page and click Request review.
You will see a notification with a confirmation message that your code was found.
Click Got it and you are done.
Now your account is Under Review.
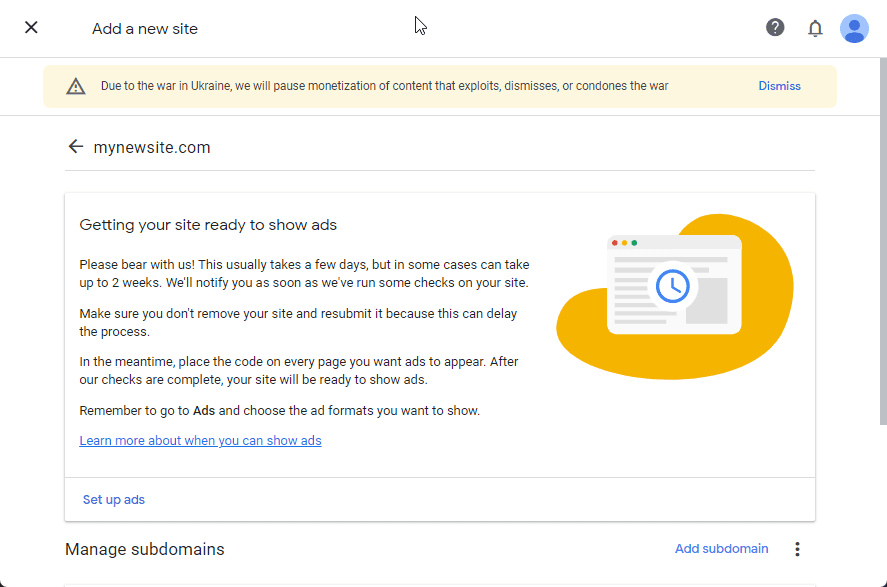
The approval will 24 to 48 hours.
You will receive an email from Google detailing that your application has been temporarily approved.
This means that you can start placing ads on your website.
If you follow the instructions in this guide, you will have no problem whatsoever.
Should your application get rejected, the email you receive will state the reasons.
Correct the mistake and apply for Google Adsense again.
Step 4: Get Permanent Adsense approval
When you apply for Adsense, there are two types of approval, temporary and permanent.
- Temporary approval: The approval you get when you apply for a Google Adsense account online after adding the Adsense code to your website.
- Permanent Approval: To gain permanent Adsense approval, you have to verify your tax information, phone number, and bank account details.
After a couple of weeks, Google will start a final verification process.
Here are the steps involved:
Google will send your Adsense Personal Identification Number (PIN) to the mailing address you provide while setting up your account.
Depending on your location, this can take up to 3-4 weeks to arrive.
The content of the mail will contain the following information and instructions.
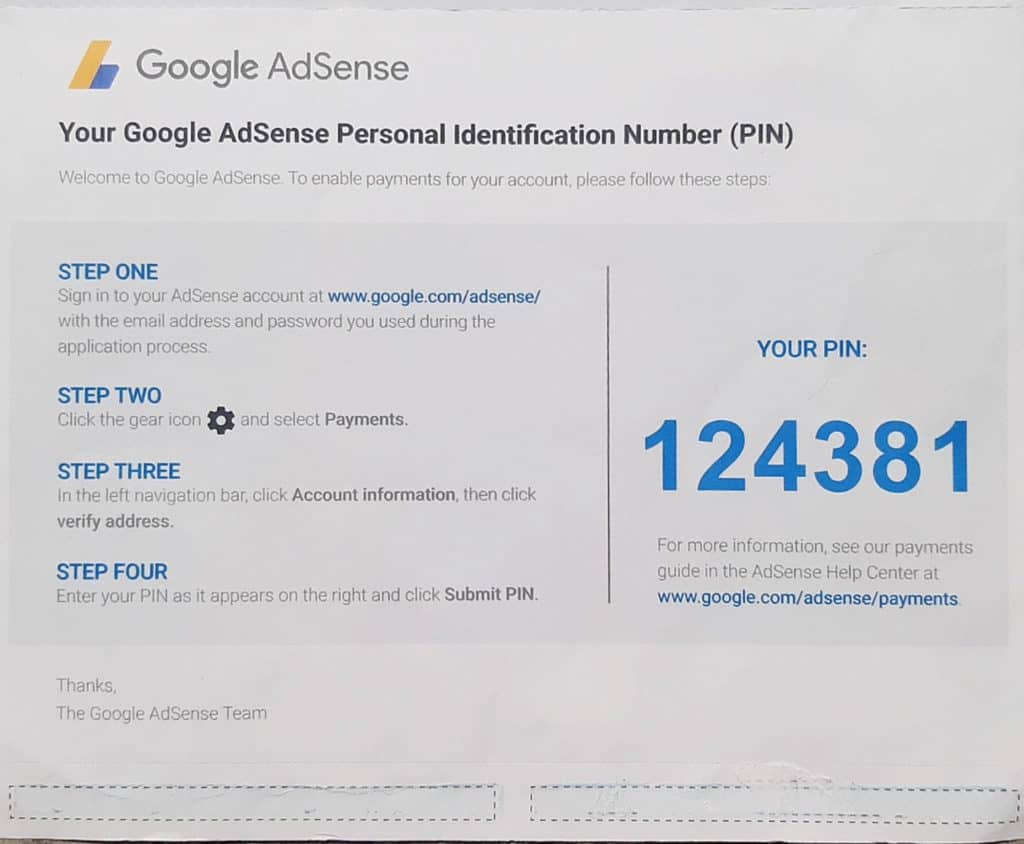
Once you complete this, you’ll be approved permanently to use Adsense.
The next step after approval is to submit your tax and bank information.
Yes.
Your application is approved, but you’ll need this to receive ad revenue payments.
Provide the correct information to avoid issues.
You might get banned from using Adsense if Google senses that something is fishy.
Make sure the name on your account is the same as the name on your Google Adsense account.
If you use a business name to apply, the bank account must carry that business name.
Google will also verify your phone number by placing an automated test call.
You need to log in to your Adsense account and enter the code you get from the call to complete the verification.
Congratulations!
Your Google Adsense account has been verified and permanently approved.
More Helpful Google Ads Tutorial:
- How to Advertise on Google: If you are desperate to get your business in front of millions of potential customers in no time, advertising on Google is the best way. Learn how to start now.
- How To Add Google AdSense To WordPress: Want to Add Google Adsense to WordPress? This comprehensive guide will work you through.
- How to Avoid Getting Click Bombed on Adsense: You can avoid getting click bombed on Google Adsense by taking some simple but important steps. You’ll find them here.
Wrapping up
Easy.
Right?
That’s how to apply for Google Adsense and get approved.
Never attempt to game the system by clicking on your ads or using duplicate content to drive traffic.
Google will notice and penalize you harshly.
It may go beyond losing your Adsense account, your website might never be able to show ads again.
Thus, you should focus on organic SEO to increase your website traffic.
Start by creating content that readers and search engines love.


