
Tables are great tools for displaying information in a more easily digestible and comprehensive format. In addition, well-designed tables are always visually appealing and user-friendly.
Tables on WordPress are instrumental in improving user experience, especially when presenting data that is tricky to understand in prose form.
When building a website with WordPress, you’ll need to use tables on your WordPress website at some point. To compare items, present a list of the product, services, and other essential data in a clear, concise, and structured format.
So if you’ve been looking for ways to incorporate tables into your WordPress content, this practical guide will show you how to create tables in WordPress step by step. Let’s go.
- Frequently Asked Questions
- What You’ll Need to Create Tables in WordPress
- How to Create Table in WordPress: 3 Methods
- Method #1: Create Tables in WordPress with the Block Editor
- Method #2: Create Tables in WordPress with a Plugin
- Method #3: Create Tables in WordPress with Table HTML Generator
- More Helpful WordPress Tutorials:
- Wrapping up
Frequently Asked Questions
What is the Best Way to Create a Table in WordPress?
The best way to create a table in WordPress is to use a WordPress plugin.
While creating a plugin with the WordPress block editor is possible, there are some table features you can’t get except with a plugin.
The block editor works fine to create a simple basic table. But creating advanced interactive tables is only possible with a plugin.
Can I Make a Table in WordPress Without a Plugin?
Yes. In the past, creating tables in WordPress without a plugin was impossible. But thanks to the introduction of the new Gutenberg Editor, WordPress users can now make tables in WordPress without a plugin.
This tutorial will show you how to create tables in WordPress with and without a plugin.
What You’ll Need to Create Tables in WordPress
- WordPress Admin Access: To add a table to a post or page on any WordPress site, you need access to the admin dashboard. You get this access with an admin or super admin role on the WordPress website.
- A WordPress Table Plugin: Apart from making tables simple to implement, the plethora of advanced features that come with some table plugins make them the best way. We’ll show you some of the best WordPress table plugins and how to use them soon.
How to Create Table in WordPress: 3 Methods
- Method #1: Create Tables in WordPress with the Block Editor
- Method #2: Create Tables in WordPress with a Plugin
- Method #3: Create Tables in WordPress with Table HTML Generator
Method #1: Create Tables in WordPress with the Block Editor
If you need basic tables with no special features or complex functionality or interaction or do not fancy adding a new plugin to your site, the best way to add a table to your WordPress post or page is via the text editor.
Thanks to the arrival Gutenberg block editor, WordPress users can now incorporate basic tables to their WordPress content from within the editor.
Let’s see how to step by step.
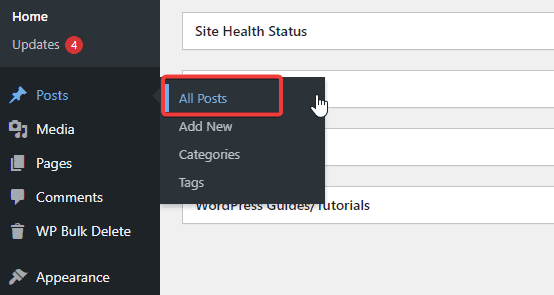
Log into your WordPress dashboard, go to Posts on the left panel, and click on All Posts.
You’ll be taken to the page where all your posts are listed.
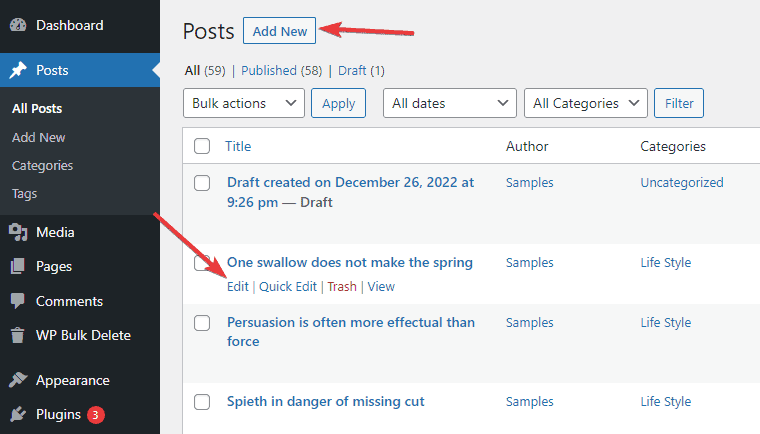
To add a table to a new post. Click the Add New button at the top of the page and proceed with the steps below.
For this tutorial, we’ll be adding tables to an existing post. So we’ll click Edit underneath the post to open the block editor.
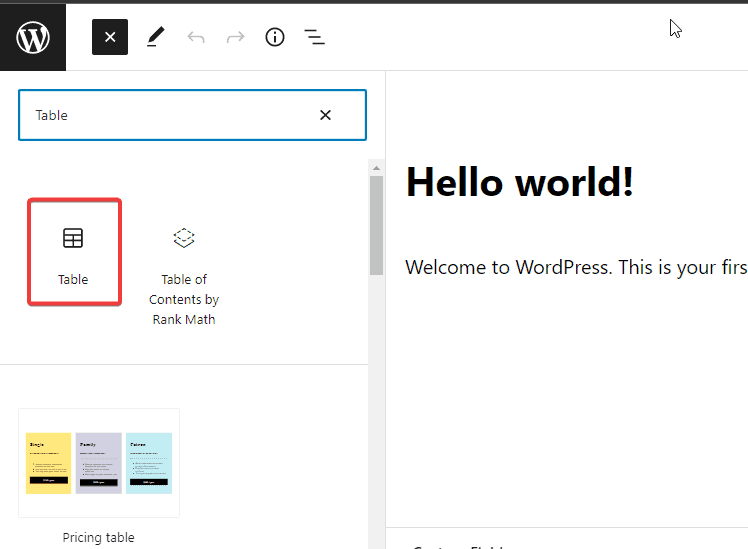
Once the post or page opens in the block editor, click the plus icon at the top left to add a new block.
You’ll find the Table block under the Formatting section. Or you can simply search for Table in the Search for a block bar.
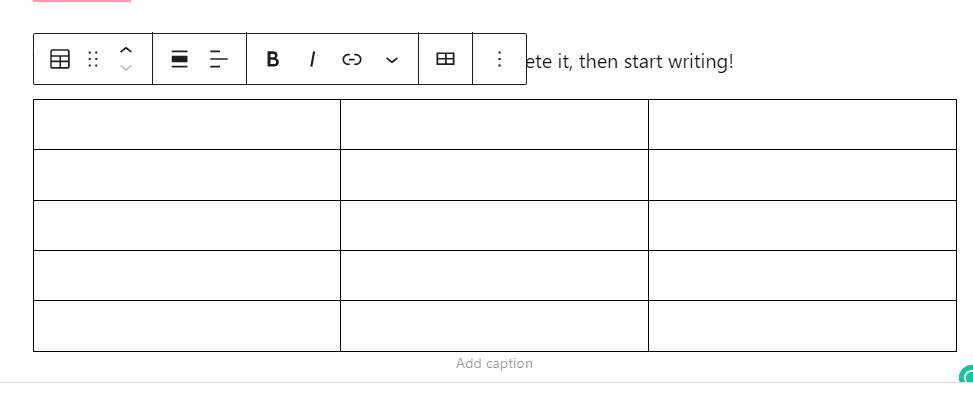
Once you select it, you’ll be prompted to enter the number of rows and columns you want on your table. The default row-by-column count is 2 by 2.
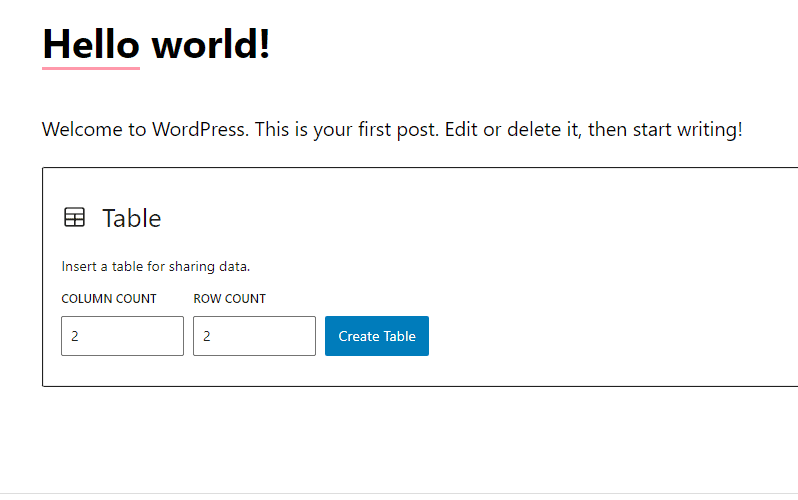
Change this number to what you want. We’ll use 5 rows and 3 columns for our example, as shown below.
You may not be sure how many columns or rows you’ll eventually need. Don’t worry.
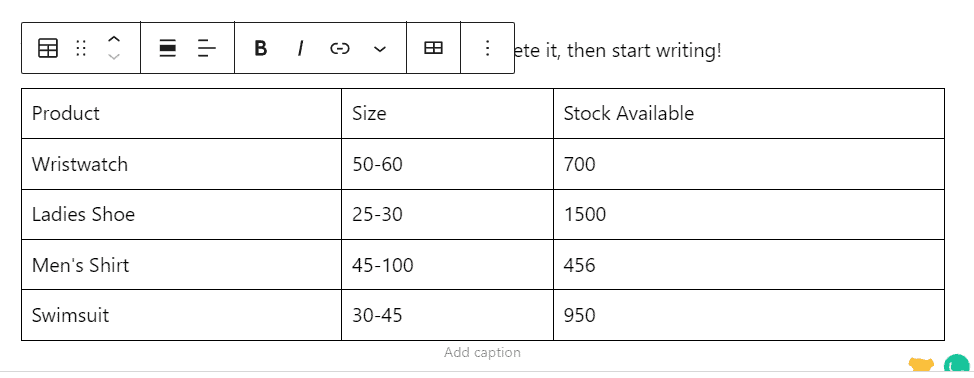
You can add rows and columns later. For now, let’s add some information to the table.
As you type into the table cells, the size will adjust automatically to accommodate the content.
If you’d like to set the table to a fixed size, you can do that on the right panel.
Click the Gear icon at the top right and tap on the radio button.
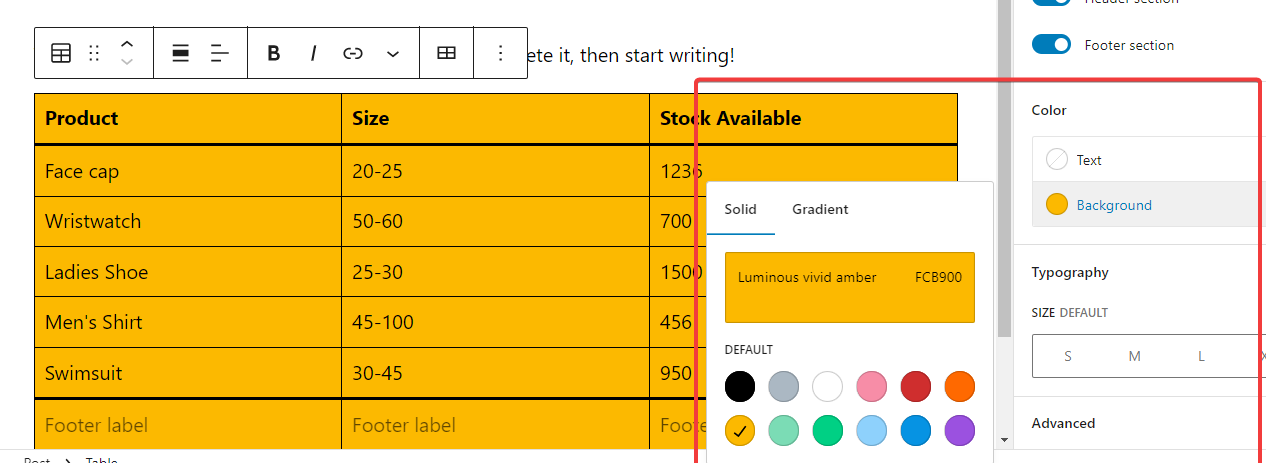
You can also set the table header and footer here by toggling their respective buttons.
To change your table background color, scroll down to the Color section on the same panel and select a color from the Background options.
For this example, we set the background color for this table to yellow. Likewise, you can change the Font color and Size under the same settings.
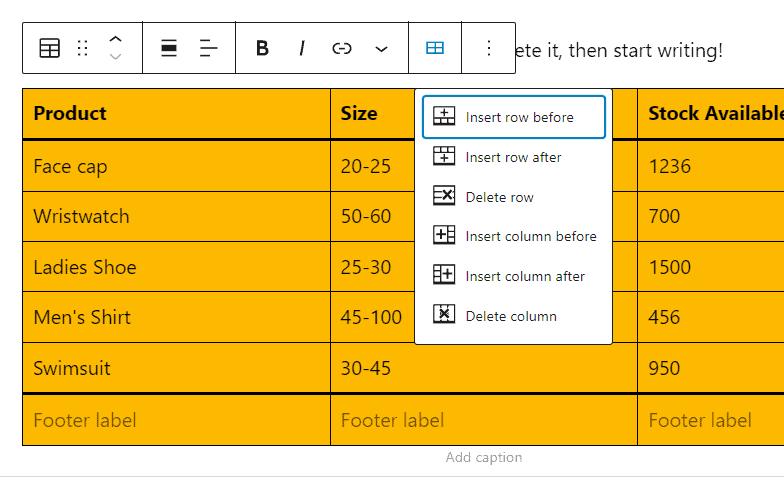
To add columns or rows to your table, simply select the cell where you want to add it and click the Edit Table icon at the top.
You’ll see options to insert a row or column before or after the selected cell. You’ll also see the option to Delete a particular row or column here.
Select a cell on the row or column and use the Delete Row or Delete Column in the menus to remove it.
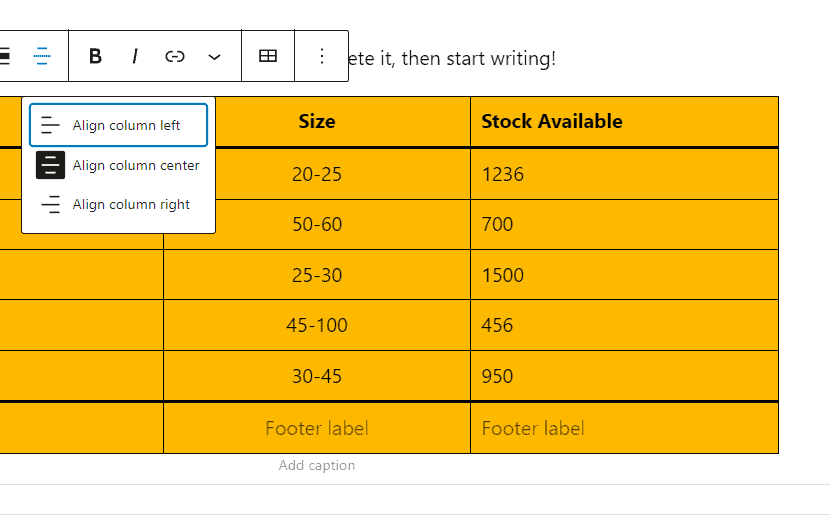
By default, the content in your table cells aligns to the left.
You can change this alignment by selecting a column and clicking on the Alignment icon. Then you can choose an option.
We’ll select the Align column center option.
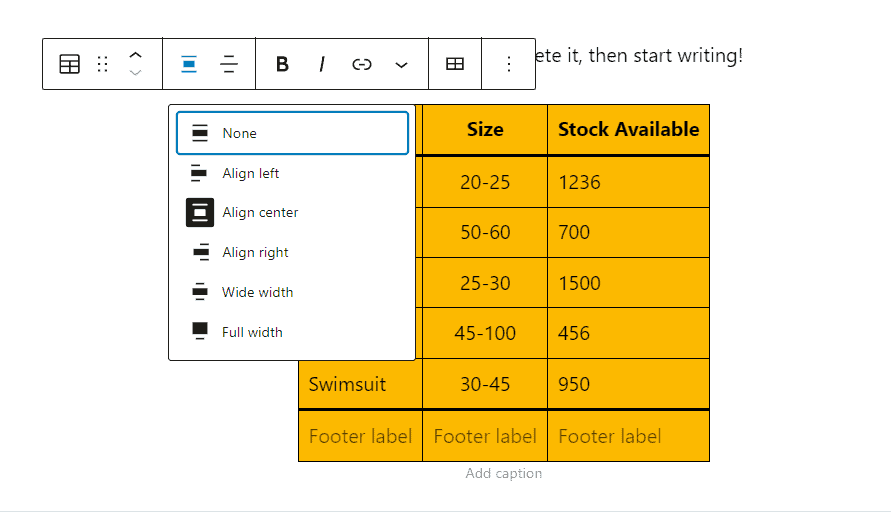
Finally, you will now determine your table’s placement within the post or page using the Change Alignment icon. Here you can align your whole table to the left, center, right, wide width, or full width.
We’ll select Align center option.
And that’s about it. You’ve learned how to create a table in WordPress using the Gutenberg block editor.
Then, before publishing your table, you can preview it by clicking the Preview link at the top of the page.
While this is a simple way of adding tables in WordPress, it doesn’t offer advanced table features such as custom sorting and searching.
And you can’t use the table except inside a post or page.
To use your table on other areas of your site, such as in WordPress widgets and sidebars, or if you want more advanced tables that allow all the above perks and more, you’ll need to turn to a WordPress plugin.
Method #2: Create Tables in WordPress with a Plugin
If you want more customization or use the old classic WordPress editor, which does not offer table functionality, you can easily create a table in WordPress with a plugin.
There are many plugins, free and paid, that you can use without dealing with a single line of code.
For example, TablePress is the most popular table plugin for WordPress, with over 800,000 active installations. With Tablepress, you can create tables that can quickly be sorted by content and with extra advanced features such as filtering, links, pagination, and images added.
Unlike the block editor, this plugin allows you to embed tables into text widgets and sidebars using shortcodes.
Tablepress allows you to export tables created into CSV files, which can be opened using any spreadsheet tool like Google Sheets and Microsoft Excel.
Likewise, you can import tables and spreadsheets data in Excel and CSV files into TablePress.
Let’s see how easy it is to create a table in WordPress using the Tablepress plugin.
Using TablePress to create WordPress Tables Step by Step
First, you need to install and activate the plugin. If you need help, check out this detailed guide on how to install WordPress plugins.
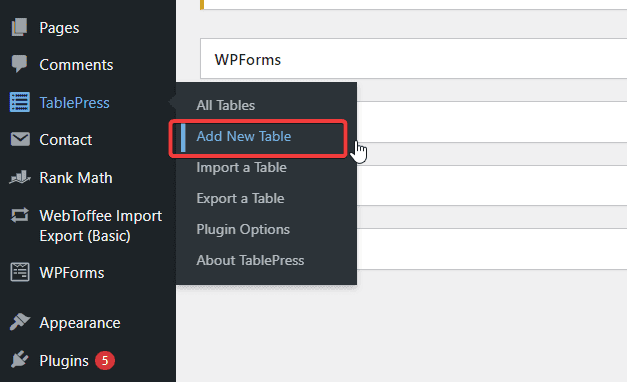
Once you activate the plugin, a new tab, TablePress, will be added to your admin dashboard.
Locate it on the left panel and select Add New Table from its menu.
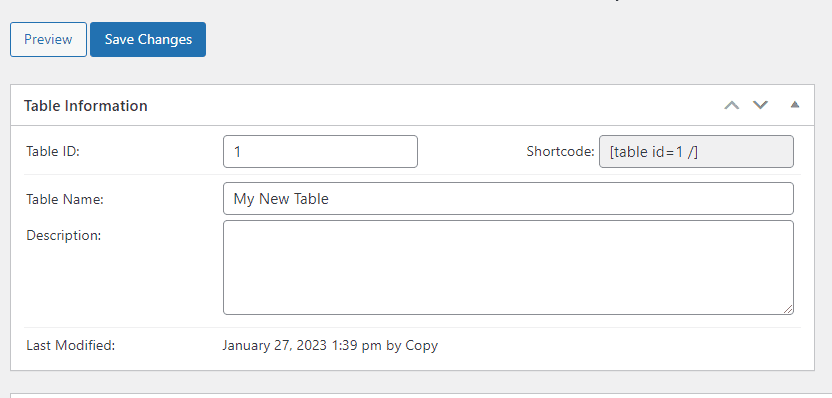
Under the Add New tab, enter the name of your table into the Table Name field. You can also add a Description if you like.
Next, set the number of rows and columns you want on your table.
If you don’t know the exact number you need, go ahead and add any number, you can always add/remove rows and columns later.
Once you set the number, click the Add Table button to proceed. A new screen will appear with your table information.
Your table is automatically assigned an ID and a shortcode; you’ll see both at the top of the Table information section.
Next, scroll down to the Table Content section, where you’ll add data to your table. Then, simply type in your content into the cells of the table.
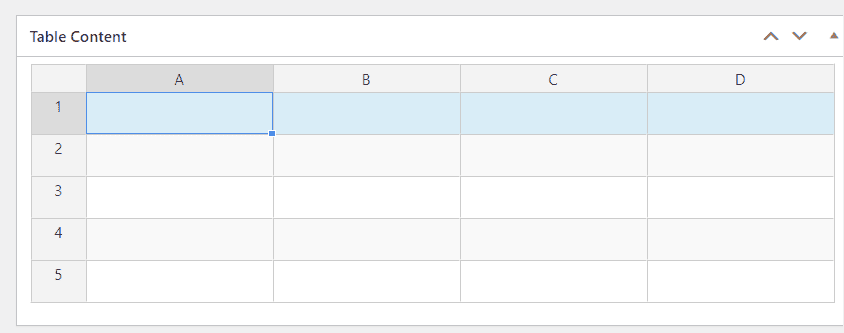
Once done, you can sort the table alphabetically or numerically using the arrow above each column.
Under the Table Content area, you’ll see the Table Manipulation section, where you can customize your table.
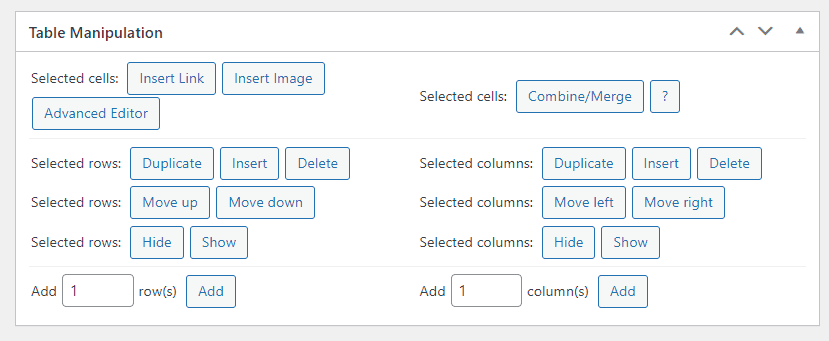
Here, you can experiment with features such as adding links and images to your table cells and duplicating, deleting and merging.
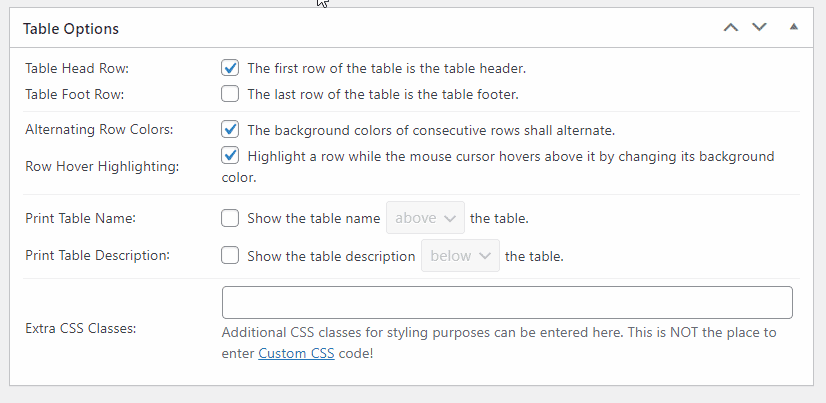
Next is the Table Options section, where you can set your table header and footer.
You can choose where you want the table details to appear. And as well you can add Extra CSS clauses for styling.
The last section is the Table Feature for Site Visitors. This is where you’ll configure your table so that visitors can interact with it.
For example, you can add filtering, searching, sorting, and other responsive options to your table.
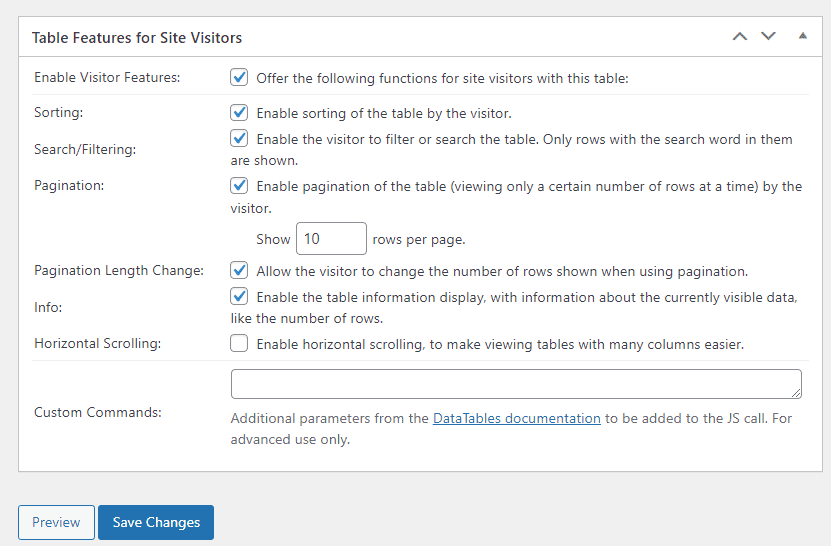
Once satisfied with your table configuration, click the Save Changes button.
Now you can use the table anywhere on your website, post, pages, sidebar, and widget areas.
Just copy your table shortcode and paste it where you need it.
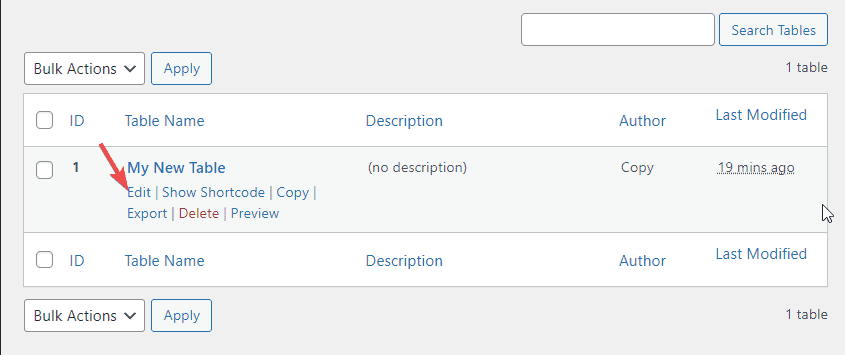
If you want to edit any part of this table later, simply click the TablePress tab on your dashboard.
You’ll see a list of all your tables. Then, click the Edit link under the table name, make changes, and save your settings.
Anytime you edit a particular table, it automatically updates anywhere it’s placed on your site. And that’s all about using TablePress to create tables in WordPress.
Other WordPress table plugins you can try out include WP Table Builder, Visualizer, and Ninja Tables.
Method #3: Create Tables in WordPress with Table HTML Generator
Another non-plugin method of adding tables to WordPress is to use HTML Table Generator.
Behind the scenes, every WordPress table, created in the block editor or with a plugin, is made of HTML codes and some CSS classes for styling.
Table Generator allows you to create a table and generate your table’s HTML code, which you can then copy and paste into your WordPress website.
If you need help adding your table code to WordPress, this guide on how to insert HTML into WordPress will be of great help.
There are many online table generators. However, we recommend Rapid Table and Responsive Table Generator Tool as 2 of the best options.
Both services allow you to create responsive tables that fit well on all devices and screen sizes, albeit with some styling limitations.Another problem with table Generator is that you may run into technical issues while using them, and the customization is also limited.
More Helpful WordPress Tutorials:
- How to Use Gutenberg Blocks: WordPress 5.0 comes with a major update – the new Gutenberg block editor. To get the most out of this tool, you’ll need to learn how to create posts and pages with the Gutenberg blocks system.
- How to Add a Button in WordPress: Buttons are a great way to boost website conversion on your WordPress website. If you have yet to figure it out, this detailed guide will show you how to add call-to-action buttons in WordPress.
- How to Add a Shortcode in WordPress: Do you want to add shortcodes in WordPress but are not sure where and how to start? Then, this guide is for you.
Wrapping up
Tables are simple ways to present what could otherwise be boring, hard to comprehend, and scattered data in a user-friendly and logical format.
Now you know 3 different ways to create tables in WordPress with the limitations of each method. We hope you find this article helpful.
Have you used any of the above methods to create a table in WordPress? Feel free to share your experience in the comment below.


