
Pingbacks are enabled by default in WordPress. But you may not notice it until you start receiving nonstop notifications about other blogs trying to link to your posts.
No doubt, getting backlinks and interlinking is great for SEO.
However, pingbacks can quickly become frustrating as spammers leverage them to place malicious and deceptive links. The more annoying thing is that they are automated.
Luckily, there’s more than one way to disable pingbacks in WordPress.
In this guide, we’ll show you how to disable those annoying pingbacks cluttering your comment section and hurting your website reputation and SEO.
- What is the Purpose of Pingback?
- Do Pingbacks Affect SEO?
- Should I Disable Pingbacks?
- How to Disable Pingbacks in WordPress
- Disable Pingbacks Globally on WordPress
- Disable Pingbacks in Specific Posts.
- Disable Pingbacks for Multiple Posts
- How to Disable Self Pingbacks
- More Helpful WordPress Tutorials:
- Wrapping up
What is the Purpose of Pingback?
In the early days of blogging, the purpose of pingbacks was to notify blog owners about links to their blogs. Then, bloggers use it to exchange links.
Today, spammers use it to send fake and malicious links. Even with a WordPress anti-spam measure in place, some pingbacks will still make it to your comment moderation queue.
Do Pingbacks Affect SEO?
One of the most powerful SEO tactics is getting more and more solid links to your site. And that’s what pingbacks are primarily meant to do.
But like so many things in WordPress SEO, spammers have found a way to abuse it. Low-quality pingbacks will hurt your SEO effort and trash your website.
Should I Disable Pingbacks?
Suppose you have the time to manage pingbacks and ensure that only the authentic ones make it to your blog. Otherwise, disable it.
The internet has evolved beyond pingbacks. You should spend your time on the more beneficial link-building efforts.
How to Disable Pingbacks in WordPress
You only need access to the WordPress admin dashboard to disable pingbacks in WordPress. You must be an admin or super admin of the website to have this access.
But before we show you how to disable pingbacks, let’s take a closer look at pingbacks and how they work.
A WordPress pingback is a notification sent from one WordPress blog to another when linking to any of its posts.
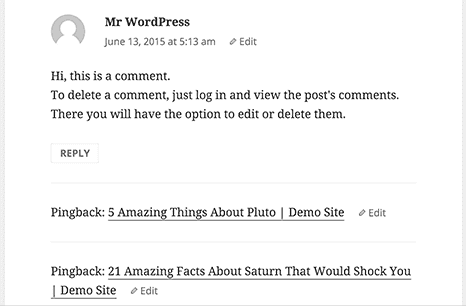
They are displayed as a special comment on the linked post as long as pingback is enabled on the other blog. Here’s how pingbacks work practically.
Say you created a new blog post containing a link to a post on a friend’s blog. If pingback is enabled on the site, WordPress will automatically send a pingback notification to your friend’s site.
The pingback will then be displayed below the comment section of their site. If it requires approval, it will be added to the comment moderation queue on the WordPress dashboard until approval.
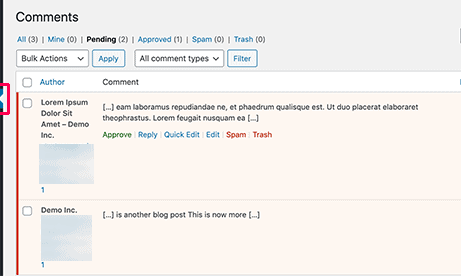
Once It’s approved, it will appear below the user’s comment.
It’s important to know that pingbacks also work within your website. So when you link to another post on your site, WordPress will still send you pingbacks. This type of notification is called self-ping.
Now that you understand what pingbacks are, their purpose and how they work, let’s show you how to;
- Disable Pingbacks Globally on WordPress
- Disable Pingbacks in Specific Posts
- Disable Pingbacks for Multiple Posts
- Disable Self Pingbacks
Disable Pingbacks Globally on WordPress
WordPress allows users to turn off pingbacks completely from within the admin dashboard.
Login to your admin dashboard, locate Settings on the left panel and select Discussion from its menu.
On the Discussion Settings screen, uncheck the box next to Allow link notifications from other blogs (pingbacks and trackbacks) on new posts.
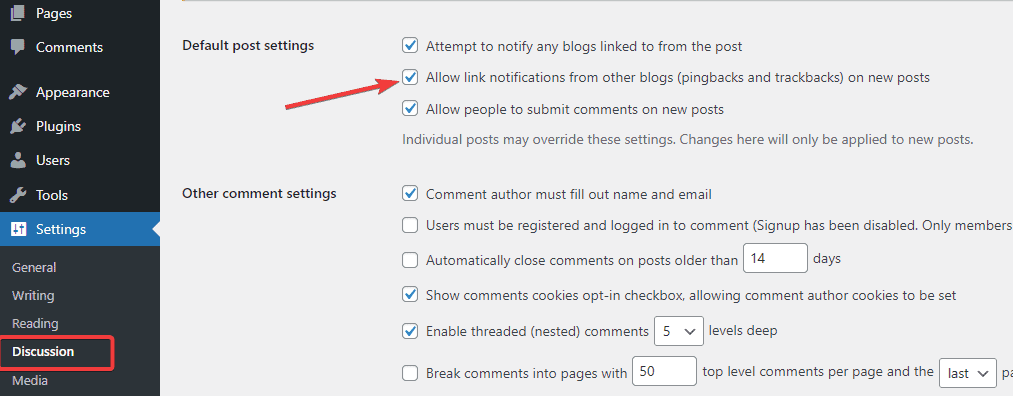
To stop WordPress from sending pingbacks from your site to other blogs, uncheck the box next to Attempt to notify any blogs linked from the post.
Once done, scroll to the bottom to click the Save Changes button.
Disable Pingbacks in Specific Posts.
You may not be interested in disabling pingbacks sitewide.
One or a few of your posts could get an influx of spam pingbacks, and you want to disable pingbacks for that specific post while enabling it for the rest of your site.
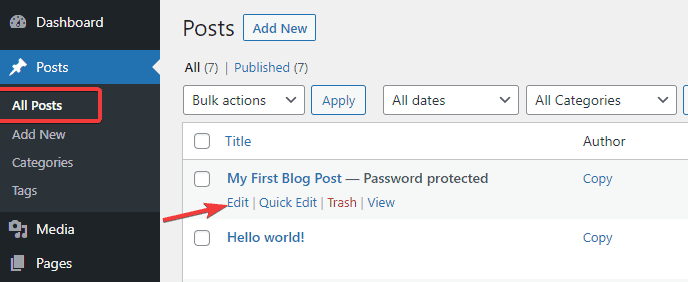
On your WordPress dashboard, go to Post, then All Posts.
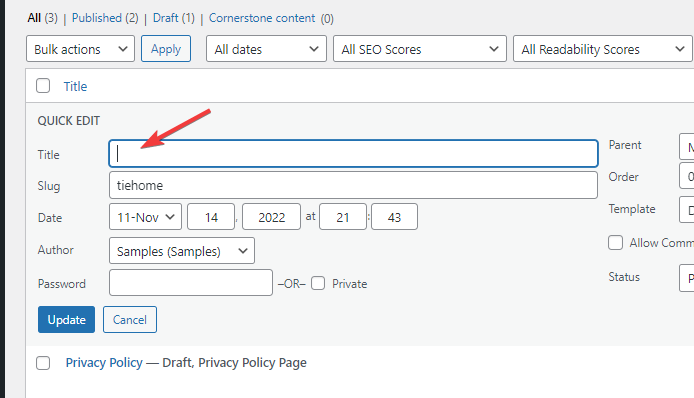
On the All Posts page, locate the post you want to disable pingbacks and click the Edit link under it.
Once the post editor opens, click on the Gear (Settings ) Icon at the top left corner to reveal the settings panel.
Locate the Discussion tab on the panel and expand it.
Next, uncheck the Allow pingbacks & trackbacks box.

Click the Update button to save your settings.
Disable Pingbacks for Multiple Posts
If you have a few hundred posts you want to disable pingbacks for, repeating the method above will be overly time-consuming.
Let’s look at how to disable pingbacks easily for multiple WordPress posts.
On your admin dashboard, go to Posts>All Posts. By default, you’ll see 20 items listed on the page.
To increase this number of posts displayed per page, click on the Screen Option at the top right corner of your screen, enter your desired number and click the Apply button.
This will reload the page, then you’ll see the number of posts you input.
(WordPress can display up to 999 posts per page).
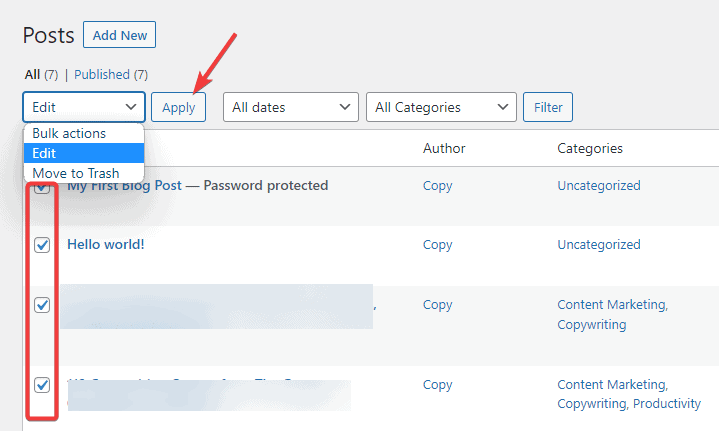
Next, you’ll have to select all the posts you want to disable pingbacks for by checking the box next to them one after the other.
Once you’ve selected all the posts, go to the Bulk action menu at the top, select Edit from the dropdown and click the Apply button.
Next, you’ll see the bulk edit box with all posts you selected. Navigate to Pings on the left and choose Do not Allow from the options.
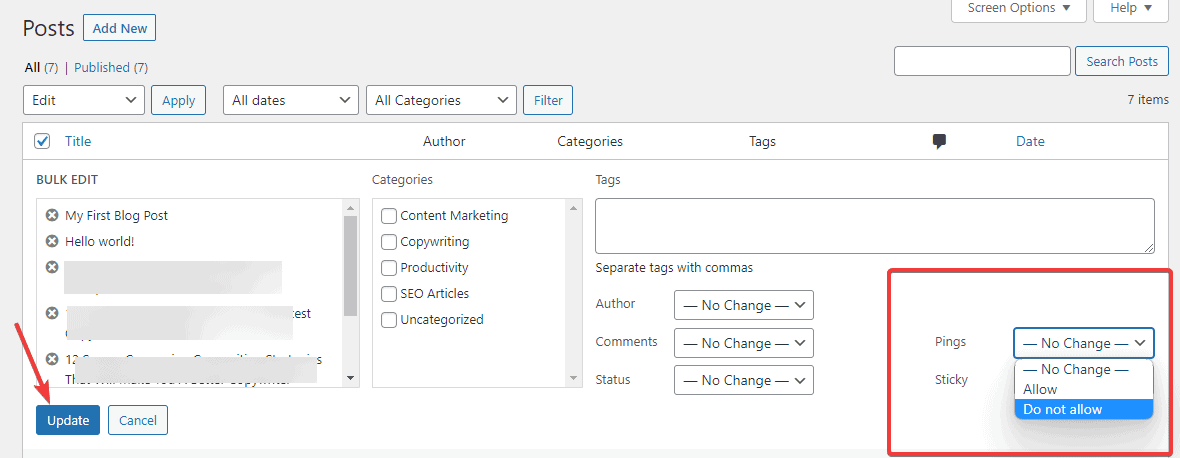
Next, click the Update button to save your settings.
That’s all. WordPress will disable pingbacks for all the selected posts.
How to Disable Self Pingbacks
When you interlink posts within your site, WordPress also sends pingbacks. This can be annoying, so you can disable self-pings if you like.
You should know that, by disabling pingbacks globally on WordPress, as shown above, self-pings are also disabled.
However, there are times when you’ll want to allow pingbacks from and to other websites but want to stop self-pingbacks.
Here’s how.
On your WordPress admin dashboard, go to Appearance and select Theme File Editor from its menu.
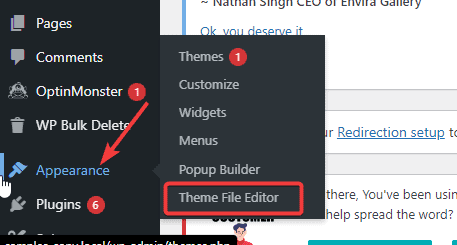
On the next screen, go to the Theme File sidebar and locate Theme Function (function.php) file under it.
Once it opens, paste the following code inside it.
// Disable self-pingbacks

function stop_self_ping( &$links ) {

    $home = get_option( 'home' );

    foreach ( $links as $l => $link )

        if ( 0 === strpos( $link, $home ) )

            unset($links[$l]);

}

add_action( 'pre_ping', 'stop_self_ping' );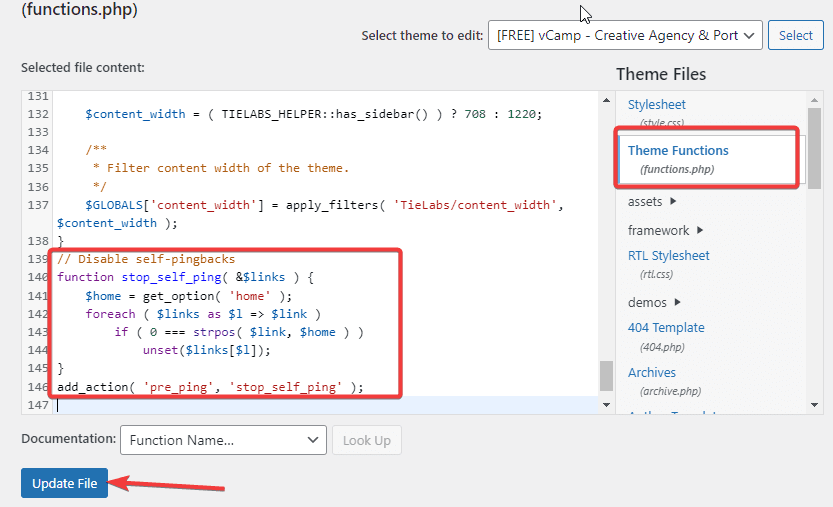
Click the Update button to save the changes.
And that’s all. You’ve successfully disabled self-pingbacks.
More Helpful WordPress Tutorials:
- How to Disable WordPress Comments: Whether you want to turn off comments on WordPress due to necessity or preference, Find 5 stepwise ways to disable WordPress comments here.
- How to Use Cloudflare With WordPress: Want to speed up your site with a CDN, secure it with SSL and safeguard it with bot protection? Setting up Cloudflare for WordPress is the way. Learn the how.
- How to Remove Malware From WordPress: Malware in WordPress can affect a website’s performance on every level. Learn how to get rid of malware before they get rid of your site.
Wrapping up
That’s all about disabling pingbacks in WordPress. Now you know how to fully or partially disable pingbacks when they no longer serve your purpose.
We hope you find this article helpful.
Are pingbacks still worth it? Share your thoughts in the comment section below.


