
If you can operate a computer, you can set up a WordPress blog in less than 30 minutes.
YES! You read that right.
WordPress is a free, open-source Content Management System anyone with an internet connection can use to create a website.
The good part is that it requires no coding or technical skill.
This tutorial will show you how to set up a WordPress blog easily.
We’ll also fortify with screenshots.
So you’ll never get stranded.
- Frequently Asked Questions
- What You’ll Need to Set up a Blog on WordPress
- How to Set up a WordPress Blog in 5 Steps
- Step 1: Register Your Blog Domain Name
- Step 2: Hosting Your WordPress Blog
- Step 3: Customize Your WordPress Blog Appearance with a Theme
- Step 4: Add Features to Your WordPress Blog with Plugins
- Step 5: Create and Publish Your First Blogpost
- More Helpful WordPress Tutorials
- Wrapping up
Frequently Asked Questions
Is WordPress Good for Starting a Blog?
WordPress is made for bloggers and is the best tool for starting a blog.
Over 70 million blog posts are published in WordPress every month.
And almost 80 million of all the blogs on the internet run on WordPress.
WordPress is not only good for starting.
It’s the most affordable option
How Much Does It Cost to Start a Blog on WordPress?
Without a dime, you can start a blog on WordPress.
You only have to pay for hosting and domain name if you want to.
Once you have those (free or paid), WordPress costs you nothing.
You can even start with free hosting and domain, then upgrade later as your business grows.
What You’ll Need to Set up a Blog on WordPress
After you choose your blogging niche, getting your WordPress blog live requires only three things:
- A Blog Name/Domain Name
- A Web Hosting Platform
- An Internet Connection
A Blog Name/Domain Name: A domain name is your blog address on the internet. It’s what takes people to your website. Our domain is bloggingtips.com. Yours can be anything. Check out this guide if you need help on choosing a domain name.
A Web Hosting Platform: A web hosting platform is the location of your WordPress website. It’s where your website files are stored. Every website uses a hosting platform to make its content accessible.
Choosing the best web hosting for your WordPress website is crucial to your blogging success.
A Stable Internet Connection: You need a stable internet connection to set up your blog quickly on WordPress. A poor connection will frustrate you.
How to Set up a WordPress Blog in 5 Steps
- Step 1: Register Your Blog Domain Name
- Step 2: Hosting Your WordPress Blog
- Step 3: Customize Your WordPress Blog Appearance with a Theme
- Step 4: Extend Your WordPress Blog Features with Plugins
- Step 5: Create and Publish Your First Blogpost
Step 1: Register Your Blog Domain Name
Once you’ve settled for the right domain name that meshes well with your brand and niche, it’s time to register the domain.
Before registering a domain, here are a few points to remember as a beginner.
One Platform Is Better: Having your domain and web hosting registered on a single platform is better.
The first benefit is that you can easily connect your domain with your hosting, unlike if hosted elsewhere.
Secondly, most hosting platforms give you free domain registration in the first year.
- Prepare Domain Alternatives: Check your desired domain availability before you start working on your blog. If it’s taken, you should opt for alternatives. You can try a domain name generator to get more options.
- Make It One: Ensure your blog name is the same as your domain name. You don’t want to confuse your blog visitors.
- Look Beyond .com: Although .com is the most popular domain extension. You aren’t restricted to that. There are .com alternatives such as .net .blog. .tech and so on. So if myblog.com is not available, go for myblog.net.
The cost of registering a new domain starts at an average of $10 per year while the cost of hosting ranges between 5- $20 per month.
That might be too weighty on your pocket when starting.
We suggest managed WordPress hosting.
Apart from being affordable, the provider takes charge of the security of your website and other backend tasks such as updates, malware detection, and backups.
Below, we listed three companies that offer free domain plus dedicated WordPress hosting at discounted rates.
Step 2: Hosting Your WordPress Blog
These platforms offer a 1-click WordPress installation from within your hosting account dashboard.
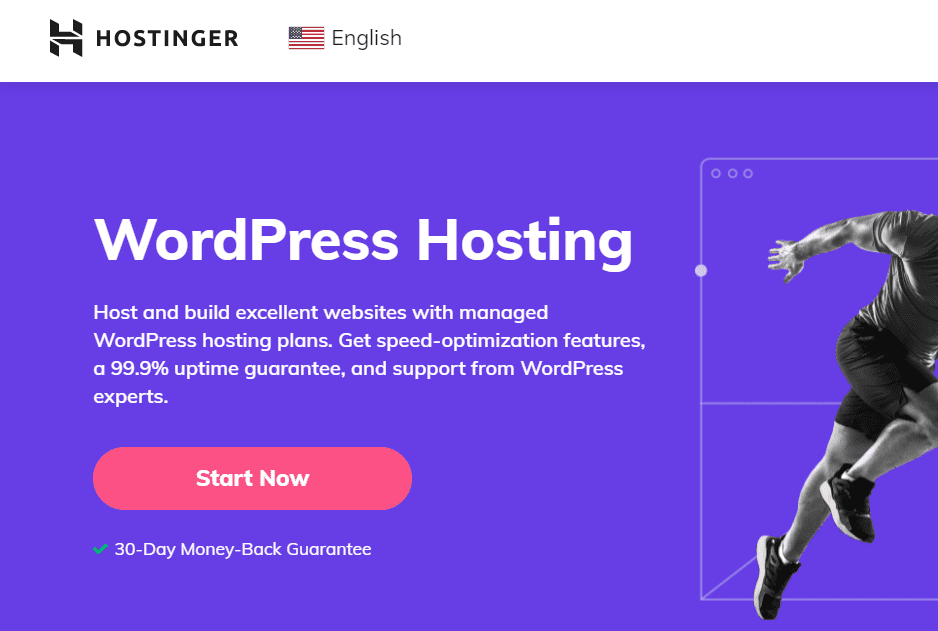
- Hostinger: Hostinger WordPress hosting starts at $1.99/month for beginners, plus a free domain and SSL certificate.
- Bluehost: Bluehost is a household name when it comes to WordPress hosting. You get a free domain, SSL certificate, and hosting at $2.95/month.
- Dreamhost: Dreamhost has an entry-level price for new WordPress users with a free domain at $2.59/month.
The process of purchasing a domain and hosting on these platforms is somewhat similar.
Let’s get practical with Hostinger.
How to Host Your New WordPress Blog on Hostinger Step by Step
Go to the Hostinger WordPress hosting page and click the Start now button.
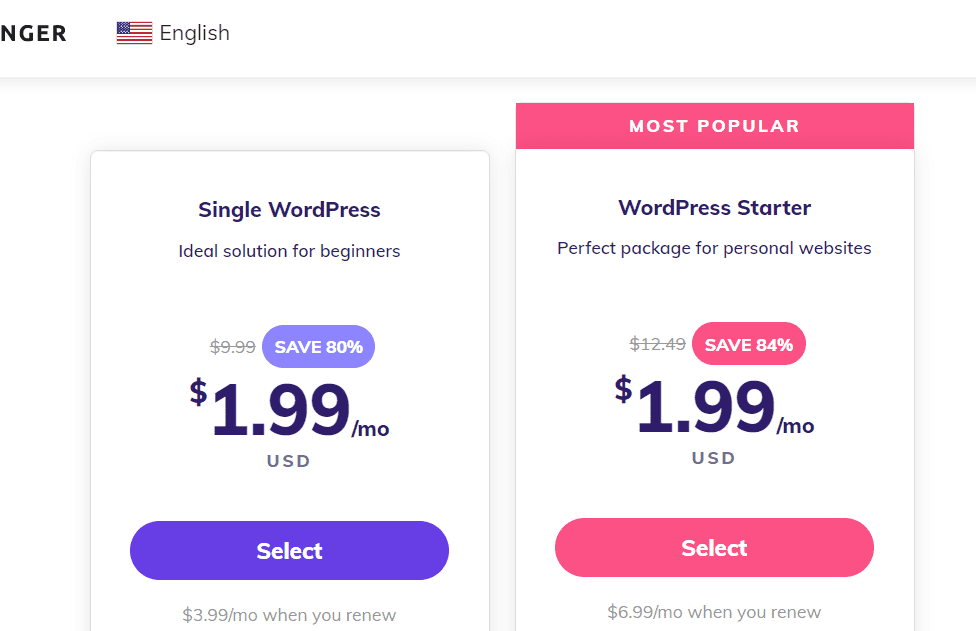
On the next screen, select either of the the beginner plan, Single WordPress or WordPress Starter.
After selecting your plan, proceed to select the period.
Hostinger offers a 1, 12, 24 and 48-month hosting plan.
Choosing any of the higher plans will save you money.
But It’s better to select only a 1-month plan to test how it works.
Next, scroll to Create your account by adding your email.
Select a payment option, input your payment details, and click the Submit Secure Payment button to complete your transaction.

You’ll receive a confirmation email.
Once your payment has been verified, the next step is to set up your account by creating a new password.
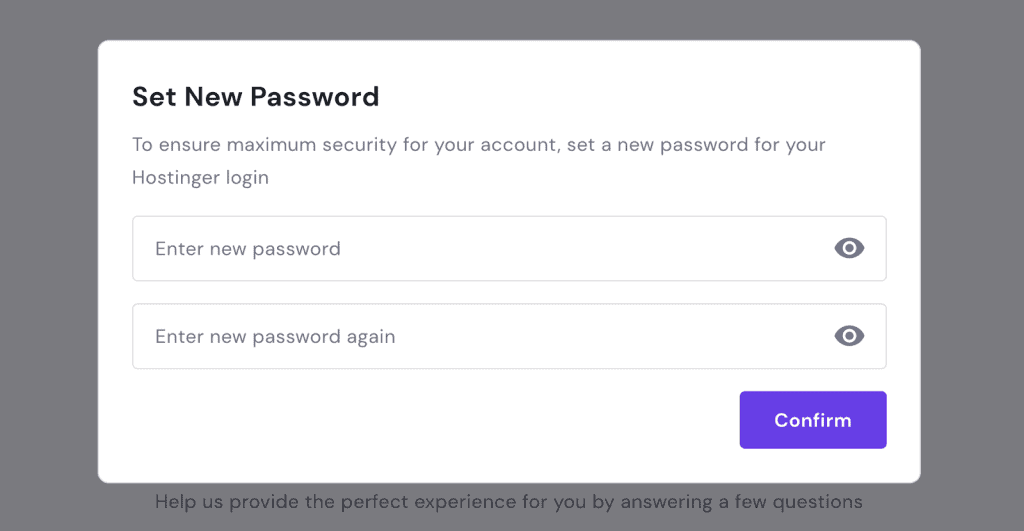
Complete the short questionnaire for Hostinger to offer the best experience or skip it.
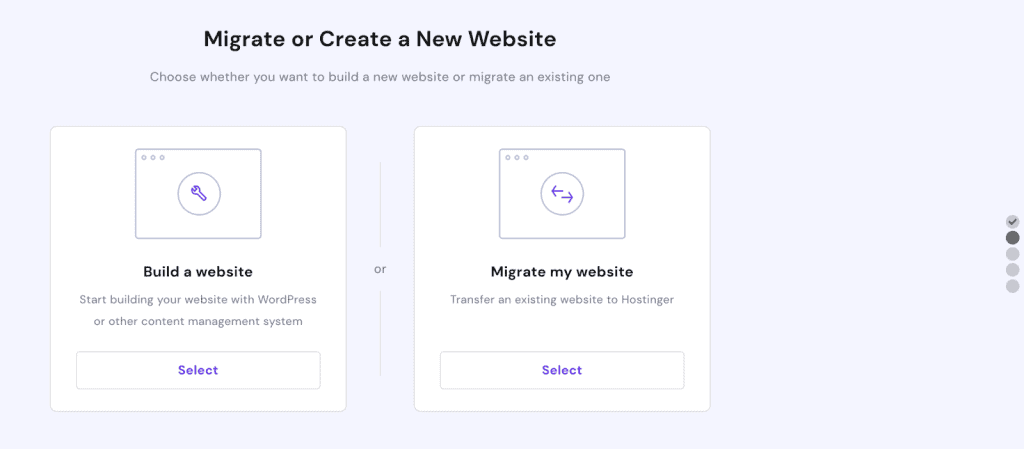
On the next page, select Build a website using WordPress
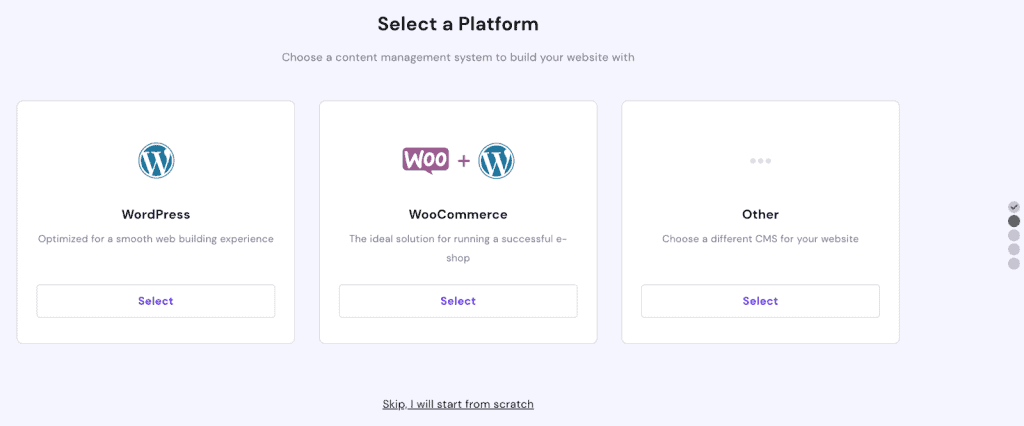
On the Select a Platform screen, choose WordPress.
Create your WordPress account by adding your Administrator email and Administrator password.
Click the Continue button.
Hostinger will suggest some WordPress themes for your website.
You can select one or skip them.
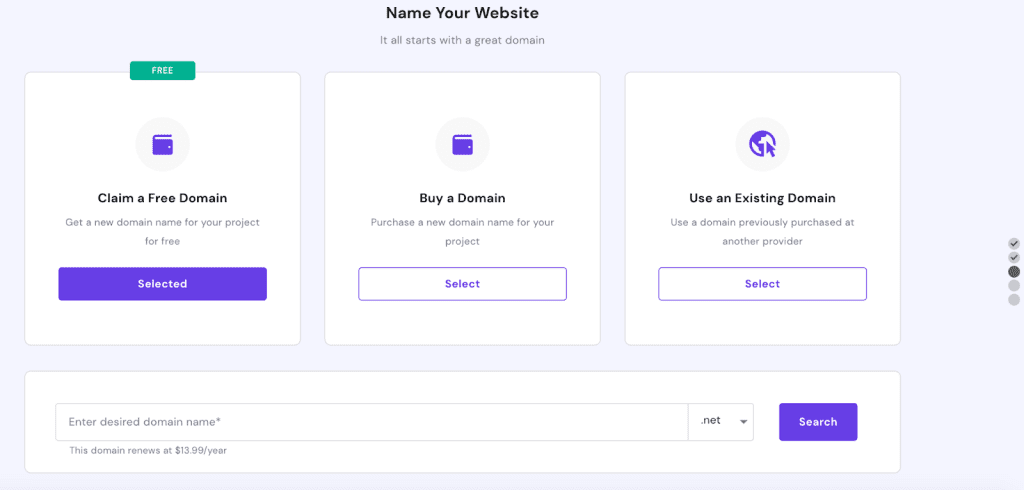
Now, you can claim your free domain.
Input your new blog name into the Enter desired domain name box and click the Search button.
After claiming your free domain, proceed to finish setup.
Check that the information is correct then click the Finish Setup button.

The last step is to register your domain.
Enter the required information in the appropriate field.
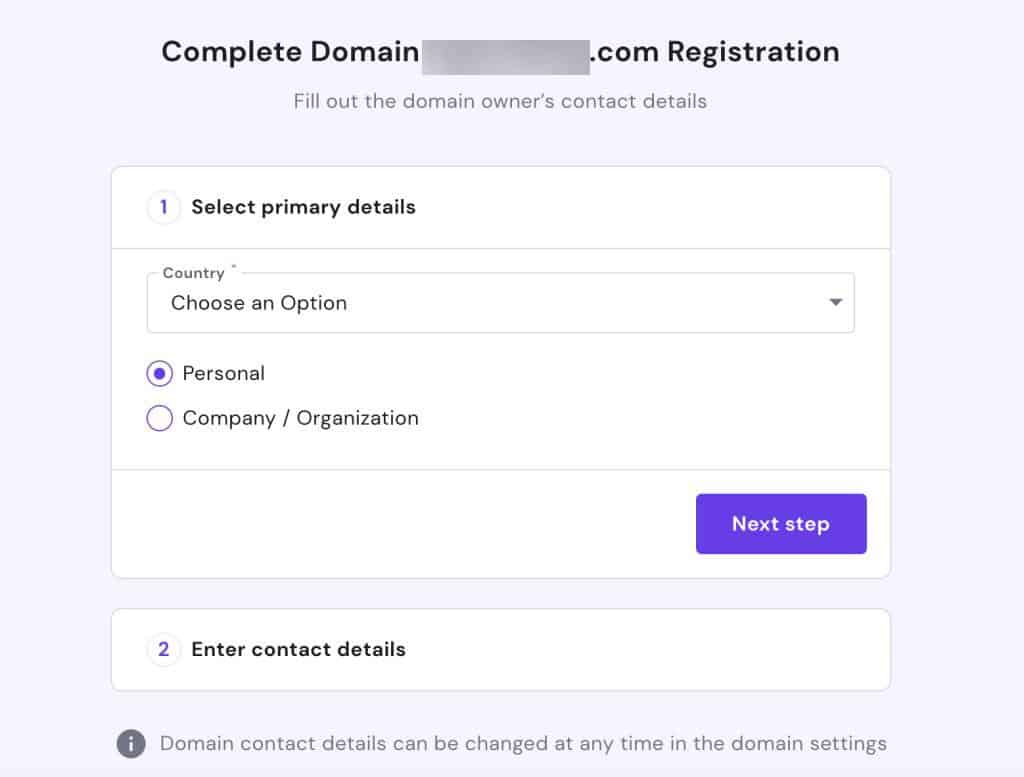
Done, you’ve successfully set up your WordPress blog.
You can now access your website by typing your domain into your browser.
You may not be satisfied with the appearance of your website when you first open it.
There’s no cause for alarm.
You can change your WordPress theme later.
Step 3: Customize Your WordPress Blog Appearance with a Theme
You can customize the appearance your blog from your WordPress admin dashboard.
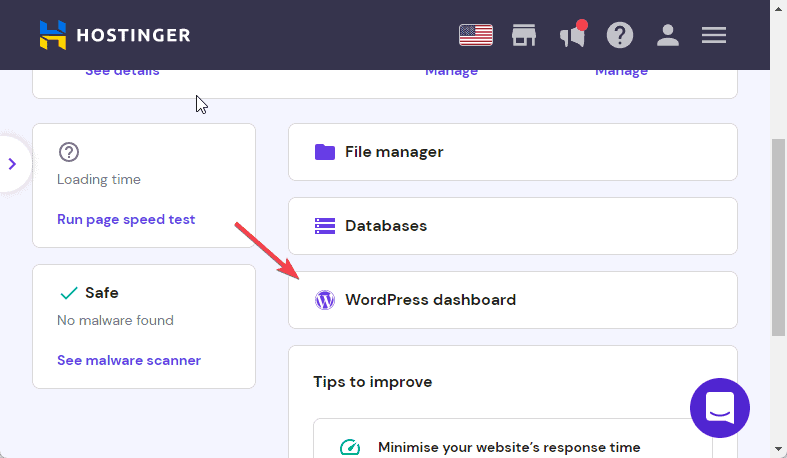
And there are two ways to access this dashboard.
One is from your WordPress hosting account dashboard.
The second way is by adding /wp-admin/ to your blog domain name to open the login page, then use your WordPress Administrator email and Password to log in.

Once you are in, you can choose a beautiful WordPress theme for your blog by following these steps below.
How to Select A WordPress Theme for Your Blog Step by Step
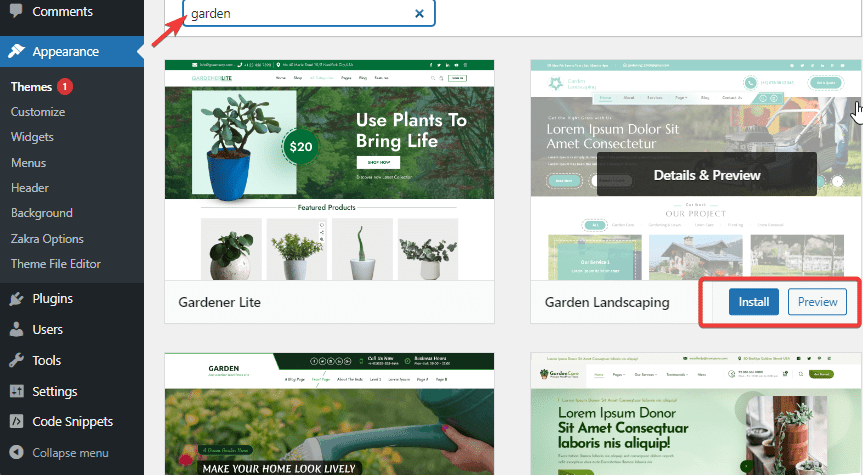
On the left pane of your admin dashboard, hover over Appearance and choose Themes from the options.
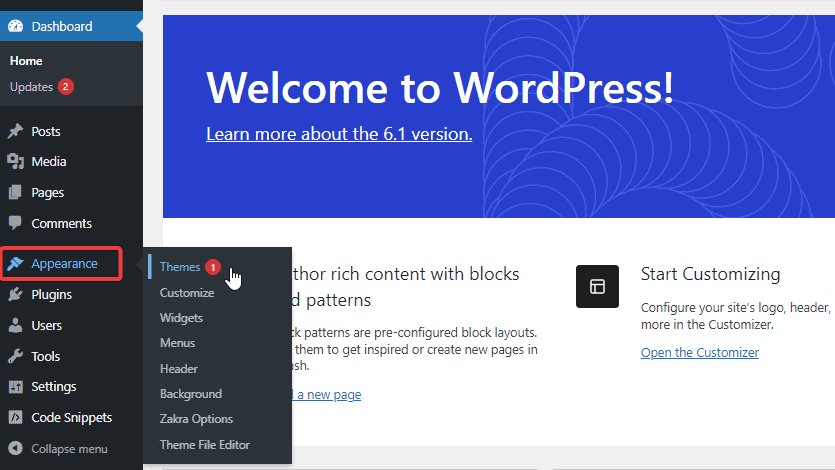
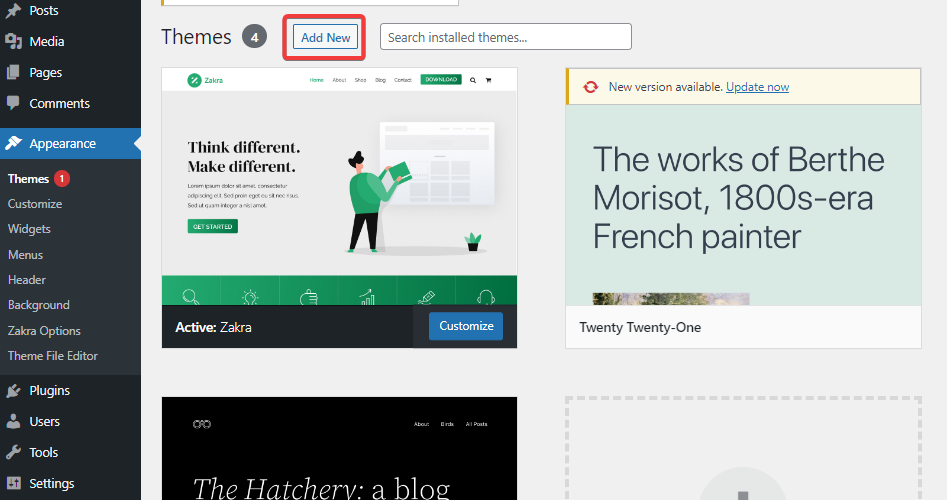
Select Add new at the top of the page.
This will open the WordPress Theme Directory.
You can filter the directory to find a theme for your niche.
Search for a keyword and WordPress will suggest relevant themes.
Select the theme you want and click Install.
You can Preview the theme before installing it to see if it’s the best WordPress theme for your blog.
Activate the plugin once installed.
If you can’t find a theme you like in WordPress directory, you can visit site like themeforest and themeisle to get a customizable wordpress theme and upload it to your website.
Here’s a comprehensive guide on how to upload theme to your site.
Step 4: Add Features to Your WordPress Blog with Plugins
After setting up a WordPress blog, your blog will come equipped with the basic functionalities of WordPress.
You can add any special features you can think of to your blog with the help of plugins.
Plugins are structured codes with an intuitive interface that allows you to extend the capability of your blog without writing codes.
There are thousands of WordPress plugins, free and paid to make your blogging life easy.
Some of the most common plugins for bloggers include:
- WordPress Comment Plugins
- WordPress SEO Plugins
- WordPress Newsletter Opt-in Form Plugins
- WordPress Backup and Database Plugins
- WordPress Cache Plugin
- WordPress Security Plugin
Once you find a plugin you need, compare it with others to ensure it has the features you need.
After then, you can install and activate the plugin.
How To Find the Best WordPress Plugin for Your Blog
Say you want to start building your email list from your blog.
You can add a newsletter plugin to your site by following these steps:
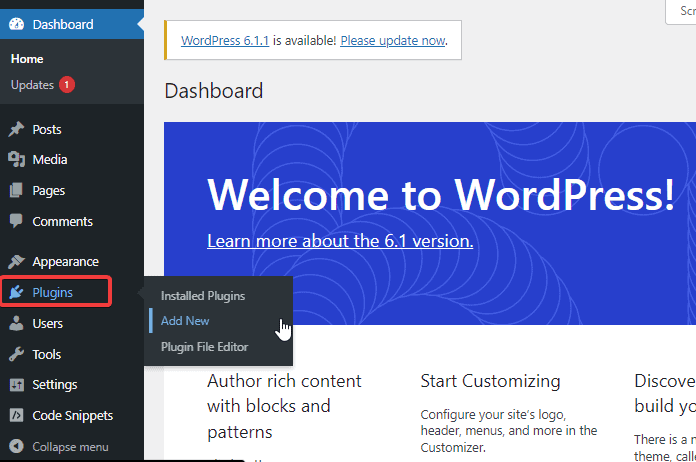
Open your WordPress dashboard, go to Plugins and click on Add new.
Now enter your keyword into the WordPress plugin directory Search box.
E.g., newsletters, sign up, email list.
WordPres will show you relevant plugins.
Narrow your search by checking the most installed and reviewed plugin.
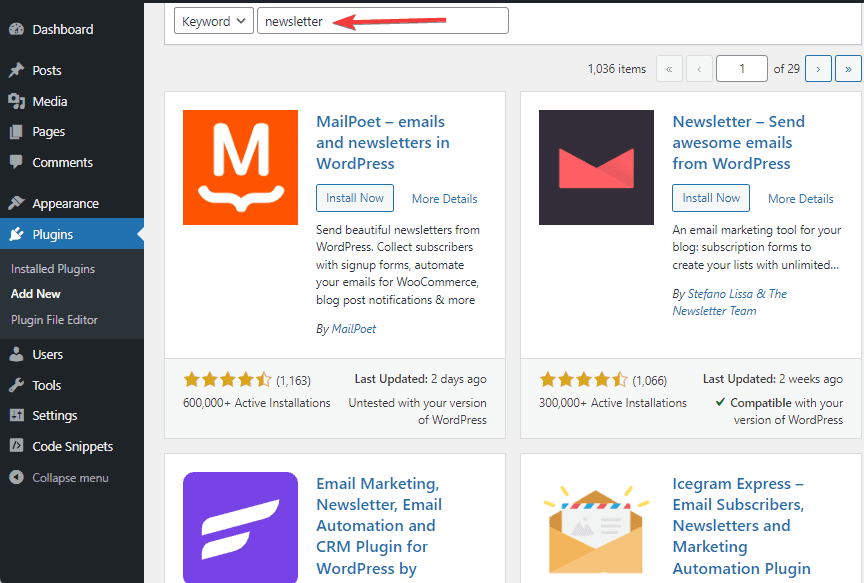
Click on More Details and visit the plugin developer website to check out how it works.
Once you are satisfied, return and install the plugin on your blog.
Check out this post to know more about WordPress plugins.
Step 5: Create and Publish Your First Blogpost
Congratulations.
You’ve set up your WordPress blog.
You are getting acquainted with customizing appearance with themes and adding features with Plugins.
It’s time to start blogging.
Don’t wait for everything to be perfect before you start publishing.
Let’s show you how to publish your first WordPress blog post.
How to Publish Your Fisrt WordPress Blog Post Step-by-Step
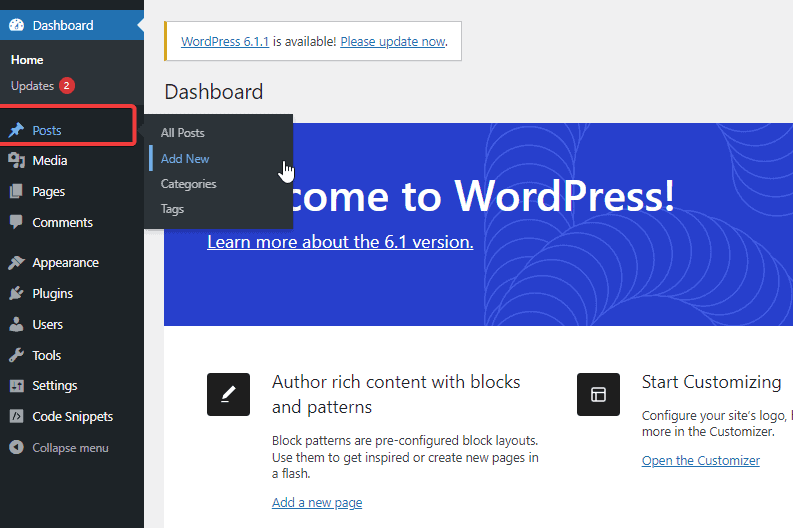
Login to your WordPress dashboard.
Go to Post and select Add new.
This will open the WordPress Block Editor.
WordPress Block Editor allows you to add content, text, images, gallery etc. to your post in block style.
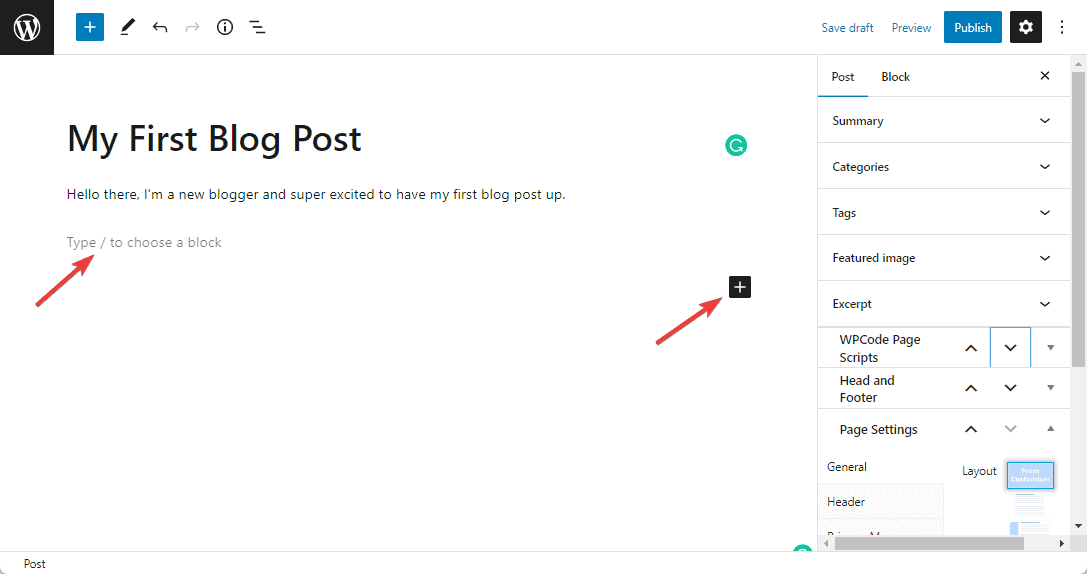
To add text, start typing on your keyboard.
For other elements like images, click the + icon to and select the a block from the resulting options.
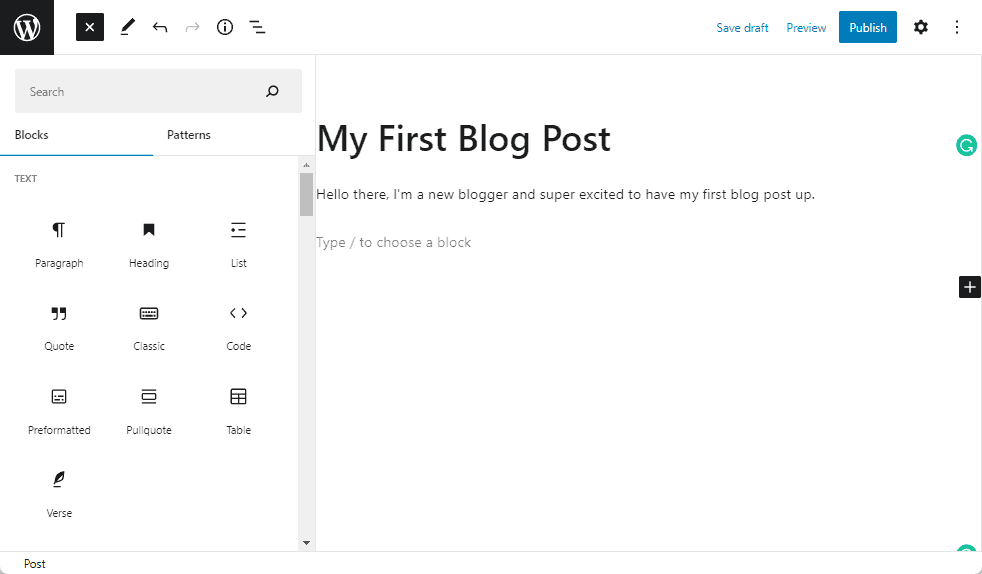
Continue adding block for every element you want on the page until you finish your post.
You will have to play around with the Block Editor to master it.
Once you are done with writing your post.
Click the Preview button to check it and return to the Block Editor to make adjustments, if any.

Satisfied? Hit the Publish button.
Again. Your first post won’t be perfect. Don’t get stuck.
If you want to no more about working with WordPress Editor, this how to add a new post in WordPress tutorial will come in handy.
More Helpful WordPress Tutorials
- How to Install A WordPress Theme: Learn 3 simple methods to install a new theme on WordPress. These methods work for both free and premium themes.
- How To Install WordPress Plugins: Plugins are beloved companions of WordPress blog owners. Learn all the methods to install plugins in this guide.
- How To Install WordPress Locally: Do you want to experiment with various plugins and themes before you launch? Installing WordPress locally will giive you the perfect test environment.
Wrapping up
Thumbs up! You have completed setting up your WordPress blog. Now you can start thinking about your blog growth, how to increase blog traffic and how to monetize your blog.
And let’s face it. Launching a blog is simple on paper.
You should be ready to put in the effort if you want a fruitful blogging journey.
That said, the first step is the most crucial.
Set up your WordPress blog today. Happy blogging!


