
With the release of WordPress 5.0 in 2018 comes the new Gutenberg Block Editor.
Since then, the editor has evolved into a full site editing tool with various customization aspects, making it compete more closely even among the best WordPress page builders like Elementor and Beaver Builder.
Today, Gutenberg is a default and core feature of WordPress. Unlike its predecessor, the TinyMCE classic editor, creating content with Gutenberg blocks is less intimidating.
Gutenberg block system makes page building and designs more visual thanks to its library of prebuilt elements, called blocks.
If you are new to Gutenberg Editor, this guide will show you how to use Gutenberg blocks in WordPress to build visually appealing pages and posts for your website.
- What are Gutenberg Blocks in WordPress?
- How do Gutenberg Blocks Work?
- Is Gutenberg the Same as Block Editor?
- What is the Use of Gutenberg in WordPress?
- What You’ll Need to Use Gutenberg Blocks in WordPress
- How to Use Gutenberg Editor Step by Step
- Adding a New Block to Your Post
- Customizing Bocks in Gutenberg Editor.
- Rearranging Blocks in Gutenberg Editor
- Saving and Reusing Gutenberg Blocks
- Deleting Blocks in Gutenberg Editor
- Publishing Your Post
- More Helpful WordPress Tutorials:
- Wrapping up
What are Gutenberg Blocks in WordPress?
Gutenberg blocks are page components that make it easier than ever before to design pages in WordPress.
Each block represents a piece of content you can insert on a page and edit independently of other blocks.
How do Gutenberg Blocks Work?
Gutenberg block system works as a WYSIWYG (what you see is what you get) drag-and-drop visual editor that allows you to design, structure, and organize page components with simple clicks and drags with your mouse.
As a result, the Gutenberg block allows users to create beautiful web pages without writing a single line of code.
Is Gutenberg the Same as Block Editor?
Yes. The WordPress block editor is named in honor of Johannes Gutenberg, who invented the printing press.
It’s called different names, which include WordPress block editor, block editor, Gutenberg editor, and Gutenberg block editor.
What is the Use of Gutenberg in WordPress?
Gutenberg makes it easy for non-techy users to create pages and post in WordPress using a block-based approach.
There are blocks for typically all elements you need to create a web page, from the basic such as paragraphs, images, and lists, to the complex, such as buttons, tables, and embeds.
What You’ll Need to Use Gutenberg Blocks in WordPress
- WordPress Admin Access: Before creating a post or page using the Gutenberg Editor, you need access to the admin dashboard. To get access, you must be a user with an admin or super admin role on the WordPress website.
- Compatible WordPress Version: Gutenberg Editor is only available from WordPress version 5.0 and above. You may need to upgrade to one of the latest versions if you use any version below 5.0.
How to Use Gutenberg Editor Step by Step
Creating a WordPress web page with the Gutenberg editor is quite easy. Each block functions as a standalone component on the page.
It can be edited, manipulated, customized, and deleted without affecting any other block on the page- Not even the block next to it. For example, you can change a block’s background color and width without affecting the other blocks.
In this tutorial, we’ll create and publish a blog post using the Gutenberg block editor.
Let’s start.
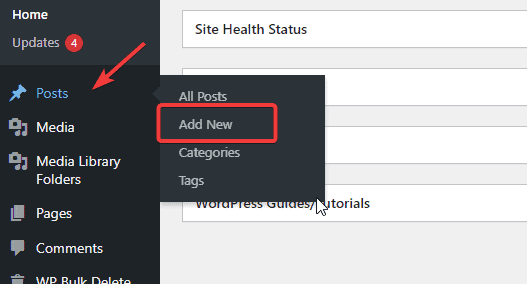
Log in to your WordPress admin dashboard, go to Posts on the left panel, and select Add New. The Gutenberg Editor will open.
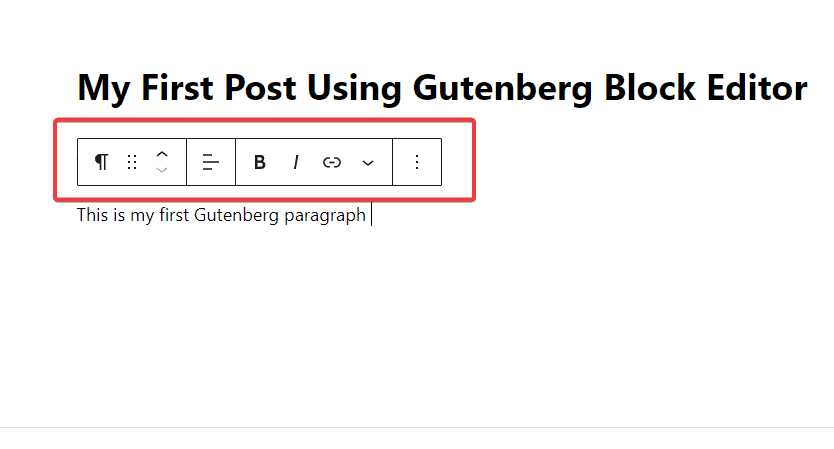
The first block you’ll see is the Title block. To add your post title, put cursor on the Add Title placeholder text and start typing.
Here, we’ll add My First Post Using Gutenberg Block Editor.
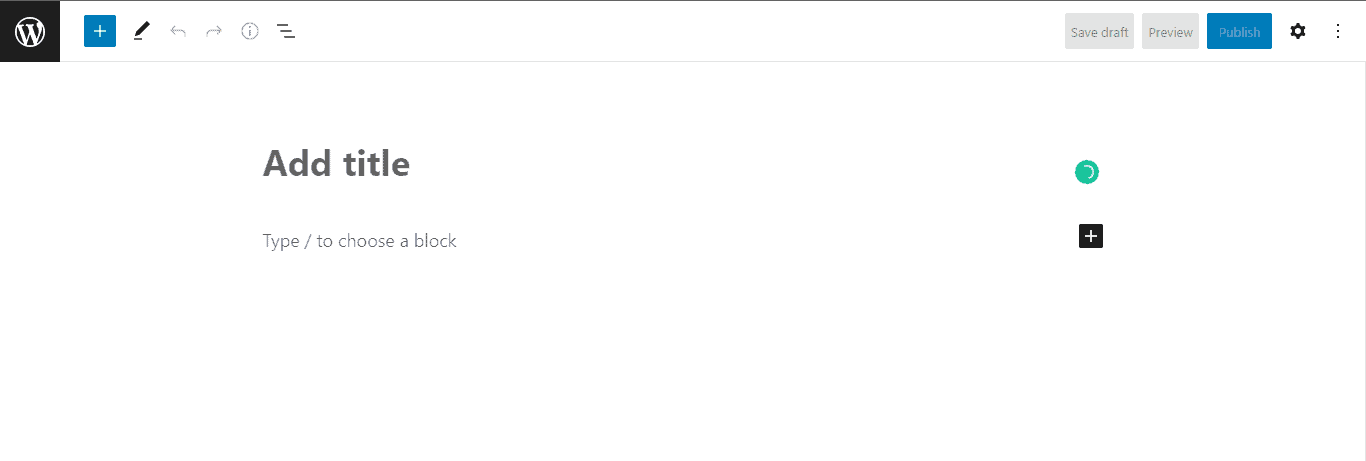
By default, the next block you’ll see under Title is the paragraph block.
Just place your cursor on it and start writing.
However, you can use any other block there.
Adding a New Block to Your Post
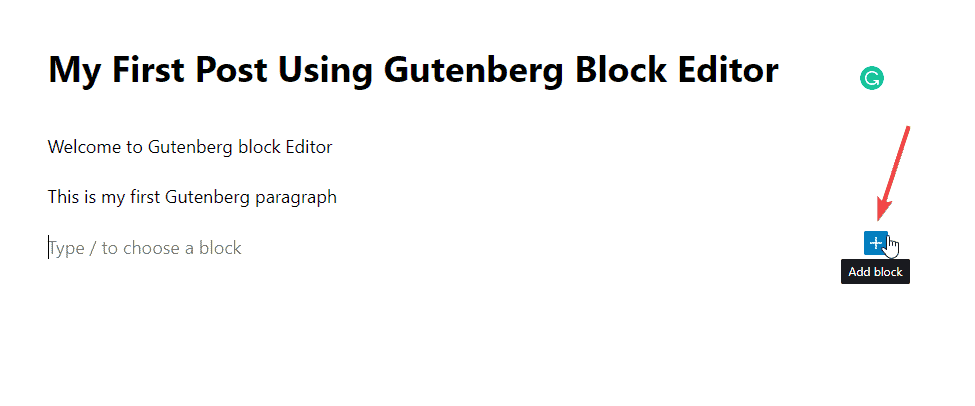
To add a new block to your page or post, click on the Block inserter (+) icon at the top left corner of the editor or on the right side of an existing block to see the most commonly used blocks.
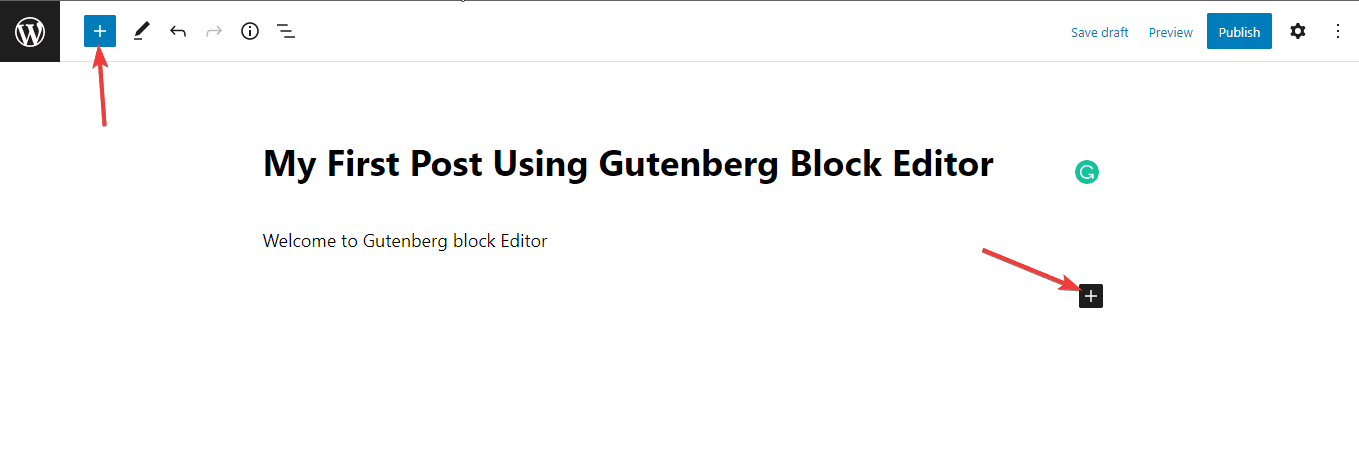
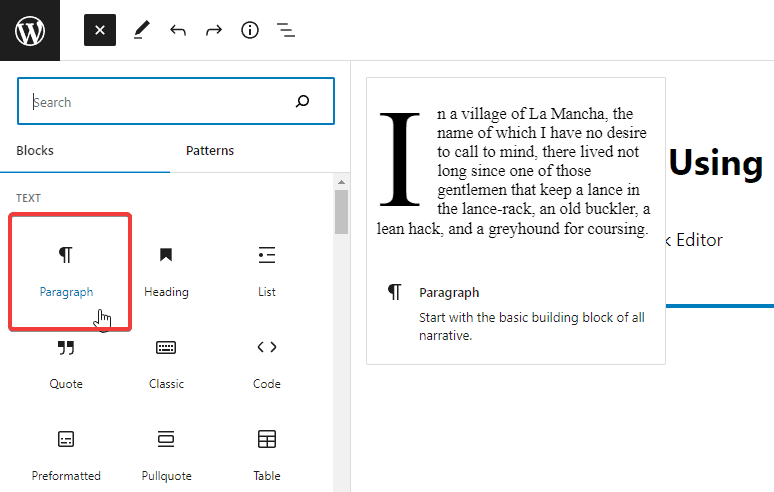
By clicking on the top corner icon, you’ll see a menu containing all Gutenberg blocks that the editor currently supports.
There are more than 50 blocks available in the Gutenberg editor. The top section of the menu will list your most used options.
Under it, you’ll see other blocks grouped into categories such as TEXT, MEDIA. DESIGN, WIDGET, etc.
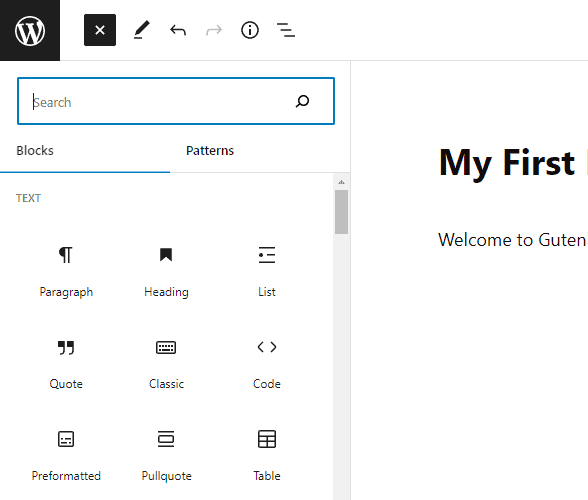
A search bar is also at the top to help quickly find blocks using keywords.
To add a new block, just locate the block you want to add from the lost and Double-click on it.
So click the Block Inserter (+) icon, locate the paragraph block, and double-click. Now you can enter your text.
Customizing Bocks in Gutenberg Editor.
You can modify all Gutenberg blocks to your preference.
Each block comes with its unique set of toolbar located at the top. The icons and functions in the toolbar will change according to the block you are working on.
In our case, we are working on a paragraph block, the formatting settings on the toolbar with icons for alignment, bold, italics, links, and more.
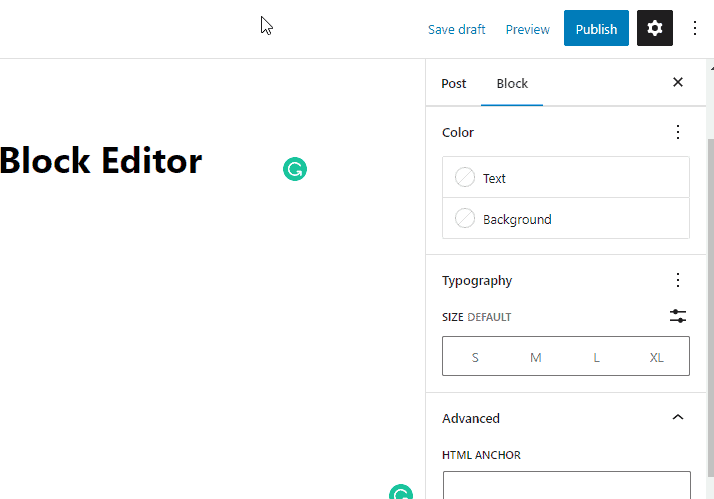
Also, you’ll see a panel on the right-hand side with various settings options related to the block you are editing. If the panel is hidden, click the Gear icon at the top right corner to reveal it.
For the paragraph block, you can change the Color of the text and the background.
Also, you can change font size and the type and use some advanced settings like adding HTML anchor and Custom CSS. The changes you make become instantly visible.
Both toolbar and block panel setting are unique to the paragraph block. When you add a new block, it will present its settings.
Let’s customize more blocks to help you understand better. Let’s look at the button block next.
Once you are done editing a block, you can hit enter to add a new block.
Instead of using the Block Inserter (+) icon, this time, we’ll use the plus icon on the right of the block we just finished editing.
Click the plus icon to see the list of blocks.
Next, locate the Button and double-click on it. Once It’s added, the block toolbar will appear at the top.
Also, you’ll see the block settings panel on the right sidebar.
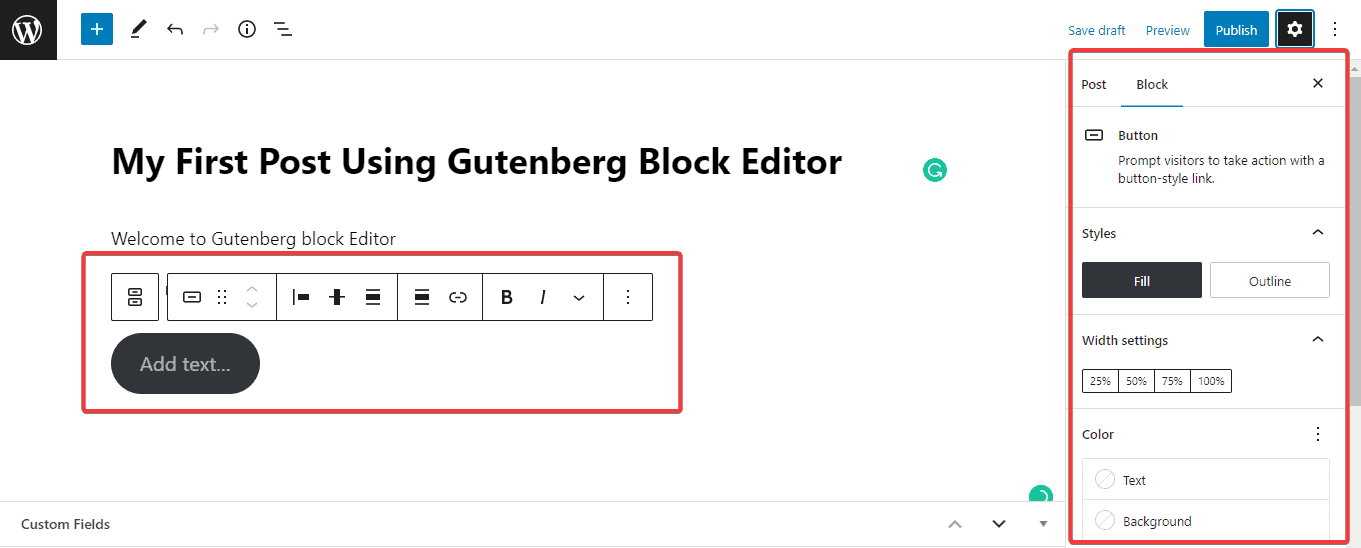
You can set the alignment on the top toolbar, add links, and bold or italicize the button’s texts. You can style the button on the block settings panel with the Fill or Outline section.
You can adjust the width settings between 25% to 100%. Under the color section, you can change the button text and background color.
There are also other options to set the border and typography. And under the Advanced section, you can add links and Additional CSS.
As you make these changes, you’ll immediately see the effect on the button block in the editor.
Before we move on, let’s look at one last block, the image block.
Add the image block using either of the two ways we’ve shown you above. Once It’s added, you’ll see three options to add images.
You can either Upload an image from your computer by clicking the Upload button, choose an image already in your Media Library, or add an image link.

Like in other blocks, you can customize the appearance of your image using the block toolbar and panel settings on the right sidebar.
Rearranging Blocks in Gutenberg Editor
Once you’ve added a few blocks to your page, you may want to put some finishing touches, like rearranging your content.
The Gutenberg editor comes with flexible tools to modify your page layout better.
There are two ways to rearrange blocks in Gutenberg Editor, the six dot icon in the toolbar or the up and down arrow.
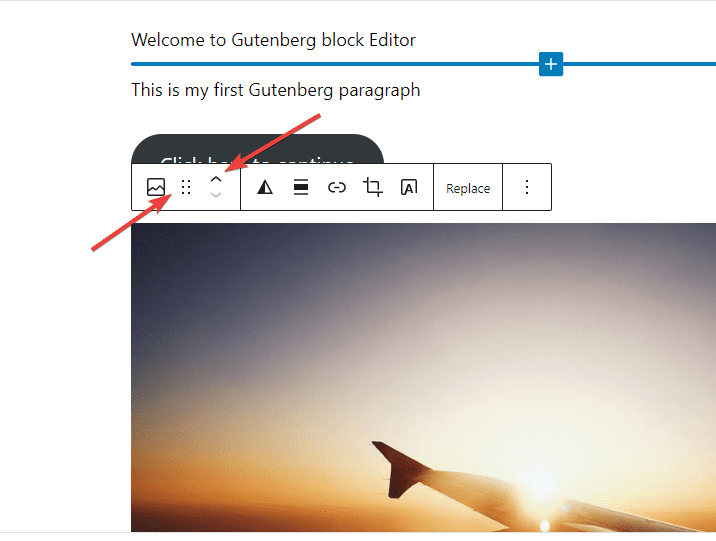
To move a block, use the six-dot icon to drag and drop it anywhere on the page.
Then, use the up and down arrow button to move a block up or down once.
Saving and Reusing Gutenberg Blocks
One of the biggest advantages of the Gutenberg block editor over the classic editor is that blocks can be saved and reused later anywhere on your website.
This feature is especially important for users who repeatedly use a particular content type.
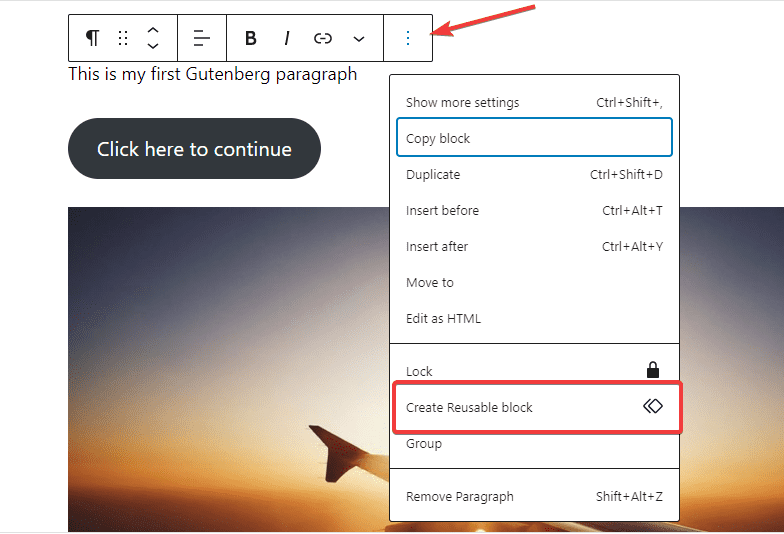
To do this, click the three-dot icon at the right edge of the block toolbar.
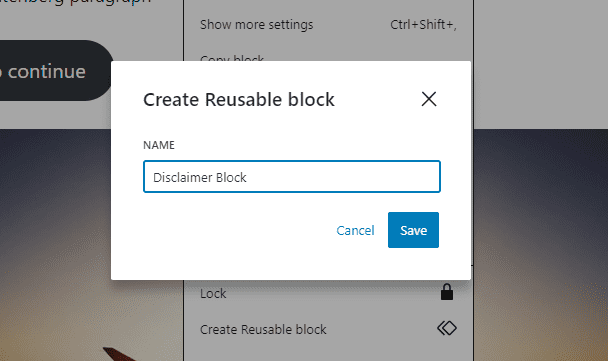
Then, from the menu that appears, select Create Reusable block.
You’ll be prompted to name the block. Use a descriptive name to find and reuse it when you need it easily.
Once you click the Save button, Gutenberg will save your block so you can reuse it later.
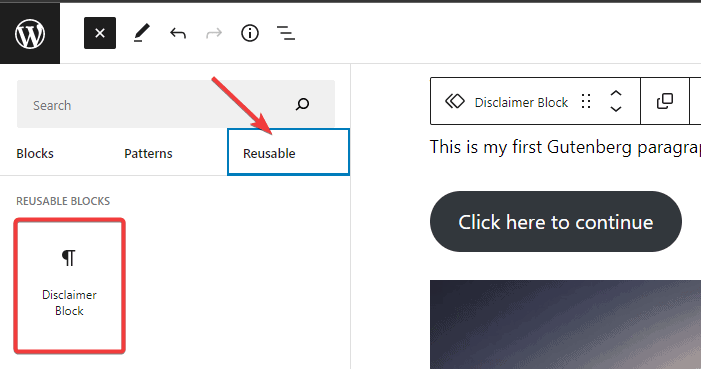
To reuse the block anywhere on your WordPress post or page, once you are on the post edit page, click the Block Inserter (+) icon to add a new block as you’d normally do.
Once the block menu appears, switch to the reusable tab. You’ll find your saved blocks there.
Click on it to insert it into your page or post.
Deleting Blocks in Gutenberg Editor
If you want to delete any block on a page, click on the three-dot icon on the toolbar and select the Remove block name from the options.
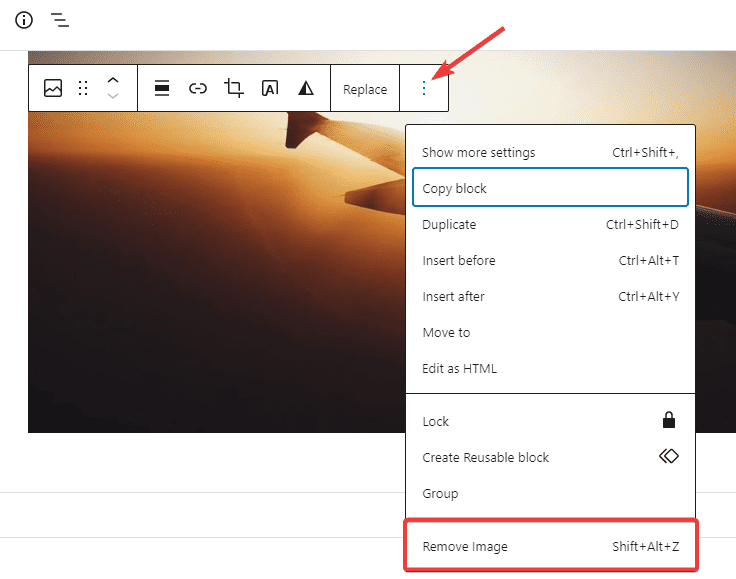
You’ll also see other block edit options from the dropdown menu.
For example, you can Duplicate the block, insert blocks before and after, and edit the block as HTML if you know how to code.
Adding Finishing Touches and Publishing Your Post
After editing all your blocks and you are ready to publish, there are still some post-wide settings you should look at before hitting the publish button.
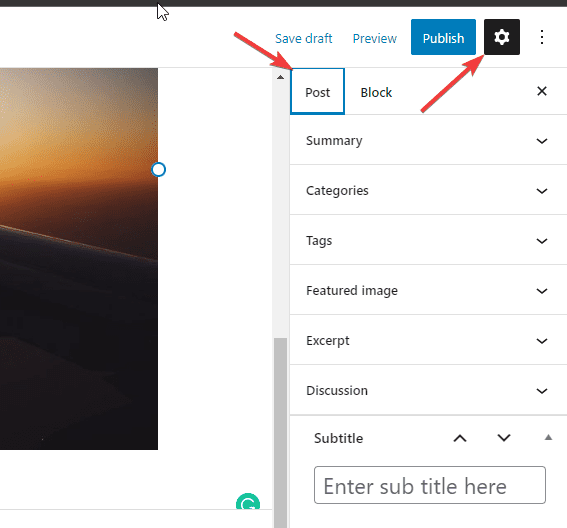
These settings are metadata, i.e., information about the post necessary for SEO and better user experience. They include Permalinks, Categories, Tags, Featured image, and more.
You’ll find these details on the right sidebar of your editor screen. If you can’t find it, click the gear icon at the top right corner and switch to the Post tab.
After that, you can modify each of the settings to your heart’s content.
Publishing Your Post
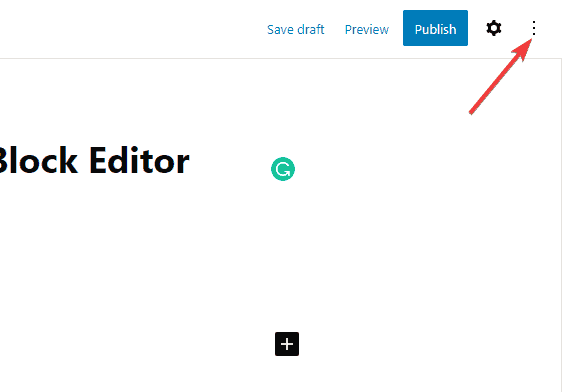
At the top right corner of your editor screen, you’ll see three options, Save draft, Preview, and Publish.
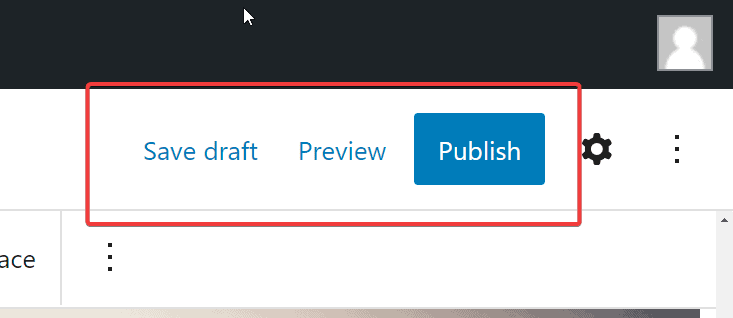
If you are not ready to publish or want to add more content to your page later, the Save draft link lets you save all post settings and customization so you can pick up where you stop next time.
The Preview button does what its name suggests– check how your live post will look before you publish.
And when you are done, use the Publish button to make your page live and available to visitors.
More Helpful WordPress Tutorials:
- How to Build a Website With WordPress: No prior experience? No problem. As a complete beginner, this guide will walk you through building a WordPress website from scratch.
- How to Change a Theme in WordPress: Changing themes in WordPress is more than just clicking on the Activate button. If you are not careful, you’ll introduce a new problem to your site. Learn the safest way in this guide.
- How to Create a Landing Page in WordPress: Do you want to create a stunning landing page without writing a single line of code? WordPress has everything you need. Check out this how-to guide.
Wrapping up
If you make it to this point, you should be comfortable using the Gutenberg editor on your next try.
Even though there are still a lot of blocks and settings to experiment with in the Gutenberg editor, what you’ve learned in this guide will make your journey easy.
We’ve shown you how Gutenberg blocks work and how to add and customize individual block settings.
But let’s be frank. No one article will teach you the A-Z of Gutenberg block editor.
So continue playing around till you master its usage. You have the foundation.
We hope you find this article helpful.
Is there any aspect of the Gutenberg editor you’d love to know more about? Reach out in the comment section below.


