
Google Drive and Google Docs are among the best productivity tools in the market right now.
With real-time editing and easy sharing, they make work super easy.
No surprise that they are used for everything from internal company documents to blog posts.
However, when you write blog posts in Google Docs, it gets a bit tricky.
You not only need to copy and paste the whole thing in WordPress but also take care of the formatting, uploading images, etc.
Fortunately, there’s a better way. You can import Google docs to WordPress websites within seconds. Let’s see how to do that.
- Frequently Asked Questions
- What You’ll Need to Import Google Docs to WordPress?
- How to Import Google Docs to WordPress: Step-by-Step Instructions
- Step #1: Create A Wordable Account
- Step #2: Connect Your Google Drive to Wordable
- Step #3: Connect Your Website to Wordable
- Step #4: Create Content in Google Docs
- Step #5: Import Content to Wordable
- Step #6: Optimize for Publishing
- Step #7: Export and Publish to Site
- Similar Tutorials to Check Out
- Wrapping Up
Frequently Asked Questions
Can You Upload a Google Doc to WordPress?
You can not directly upload a Google Doc to WordPress, but you can definitely upload the content of your docs to WordPress in an easy manner.
What is the Best Way to Upload Google Docs to WordPress?
There are dozens of methods available to upload Google Docs content to WordPress, including the good, old copy-and-paste method.
However, none of them is as efficient as Wordable. As you’ll see below, it takes seconds to export your Google Docs to WordPress using Wordable.
What You’ll Need to Import Google Docs to WordPress?
You’ll need the following 3 things to import Google Docs to WordPress:
- A Wordable user account
- Wordable plugin installed on your site
- A Google Drive account.
How to Import Google Docs to WordPress: Step-by-Step Instructions
Step #1: Create A Wordable Account
In life, everything starts with a dream.
On the Web, everything starts with an account (pardon me, I love being philosophical sometimes😂), so create a free Wordable user account to get started.
Navigate to their website and sign up with your email address and other essential information. You get 5 free exports with your new account.
Step #2: Connect Your Google Drive to Wordable
The next step is to connect your Google Drive with Wordable.
This is super easy — log in to your Wordable account and you’ll see a “Connect Google Drive” button on your screen.
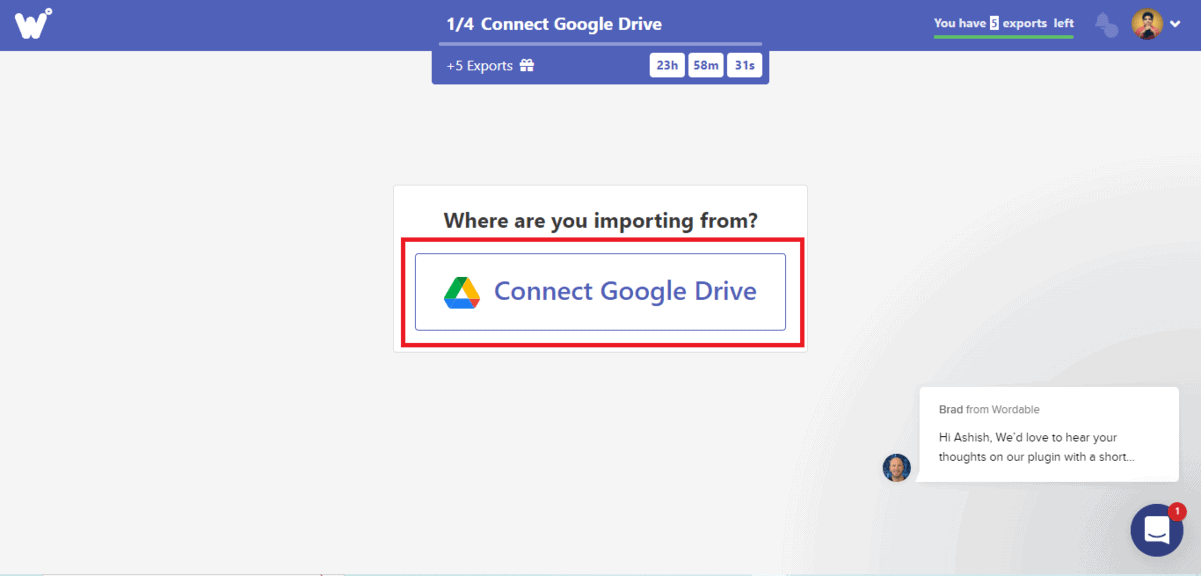
Clicking the button will bring you to a prompt like the one shown below, and you’ve to click on the big Blue button in this prompt.
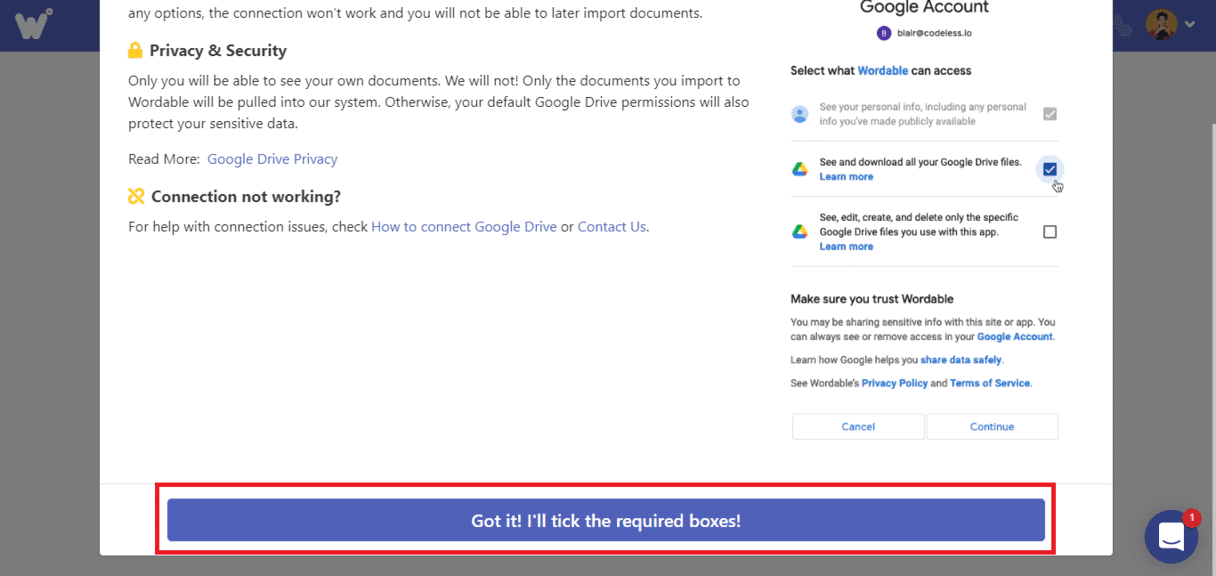
You’ll now arrive on Google’s authentication window.
If you’re not signed in with your Google account, you’ll have to sign in first.
Otherwise, you’ll land directly on the Google authentication screen.
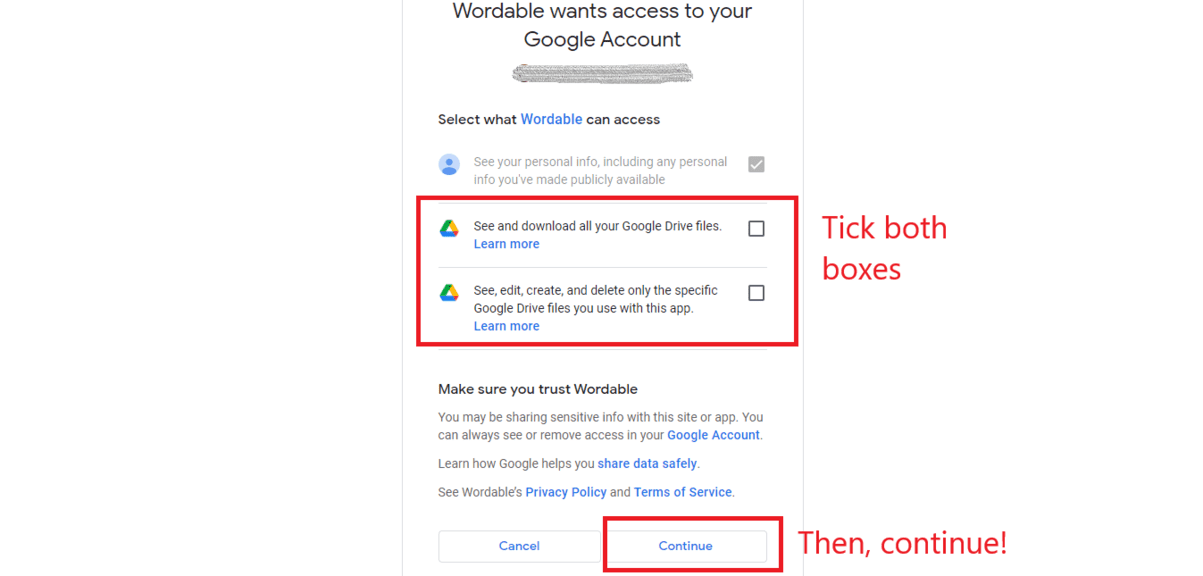
On that screen, check all the checkboxes and click on the “Continue” button to connect your Google account with Wordable.
That’s it!
If you work with multiple Google Drive accounts, you can connect your other accounts too in a similar way.
Just give a different name to each of your Drive connections, and then authenticate with the Google account of that drive to create your connection.
Step #3: Connect Your Website to Wordable
The next step is to connect your website with Wordable.
It’s worth noting that Wordable works not just with WordPress but also with Hubspot and Medium, but for the sake of this article, we shall stick to WordPress.
So log in to your WordPress dashboard, navigate to Plugins >> Add New, and install the Wordable plugin first.
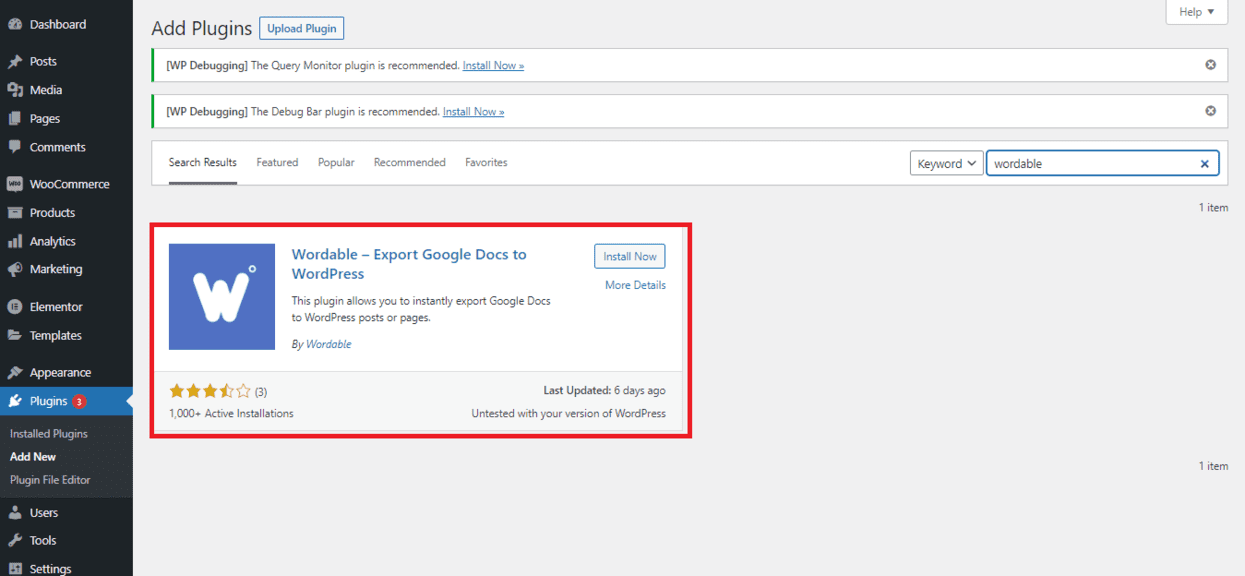
Activate the plugin by clicking on Activate button.
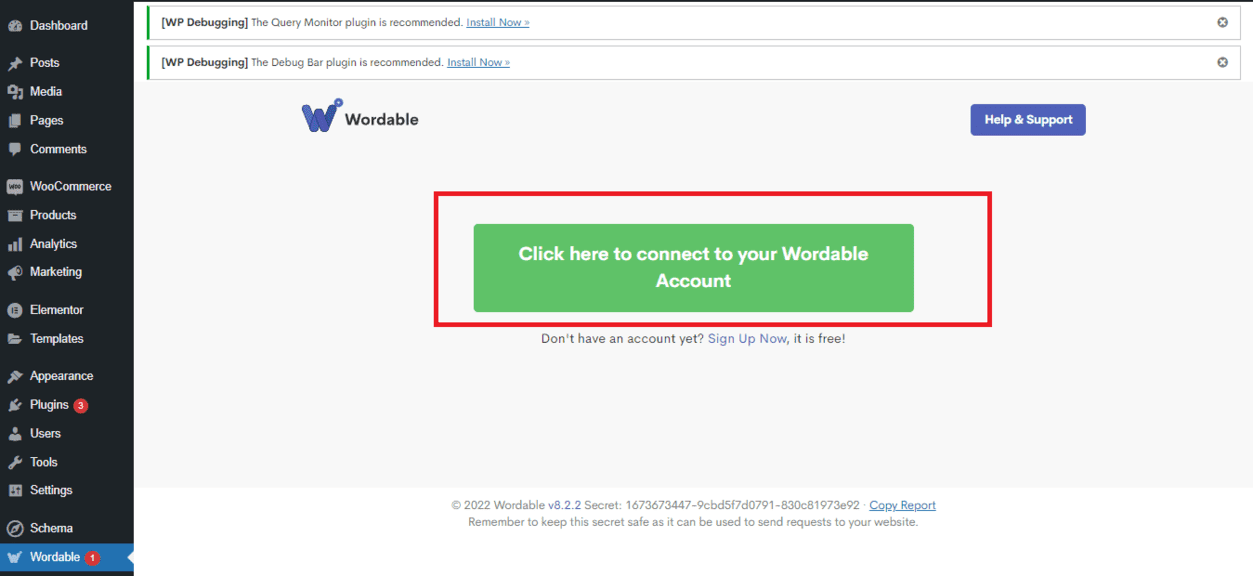
Now go to your WordPress site and navigate to Settings >> Wordable page.
Once you’re there, click on the Green “Click here to connect to your Wordable Account” button.
Your website will automatically connect to Wordable.
Step #4: Create Content in Google Docs
Now your Wordable account is connected to both Google Docs as well as your website.
You can start creating your content in Google Docs now. You can also ask your team members to collaborate while generating the content.
Include all the images, YouTube videos, GIFs, and everything else that you want to include in your content.
Step #5: Import Content to Wordable
Once you have created your content in Google Docs, log in to Wordable.
Since it’s connected to your Google Drive, you’ll be able to see your recent documents within the Wordable dashboard.
But if you created your post a while ago and didn’t edit it recently, you can also utilize the search functionality of Wordable to look up the document containing your post.
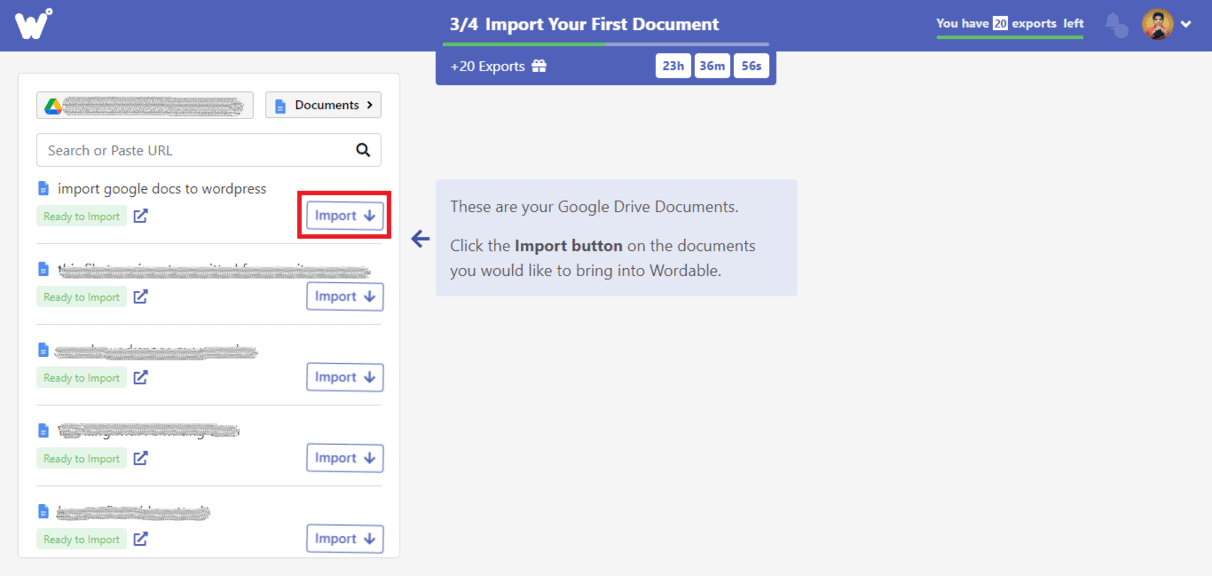
Once you’ve found the document containing your post, click the Import button to bring its content inside Wordable.
Once it’s imported, it’ll show up in the Wordable Documents list, as shown below:
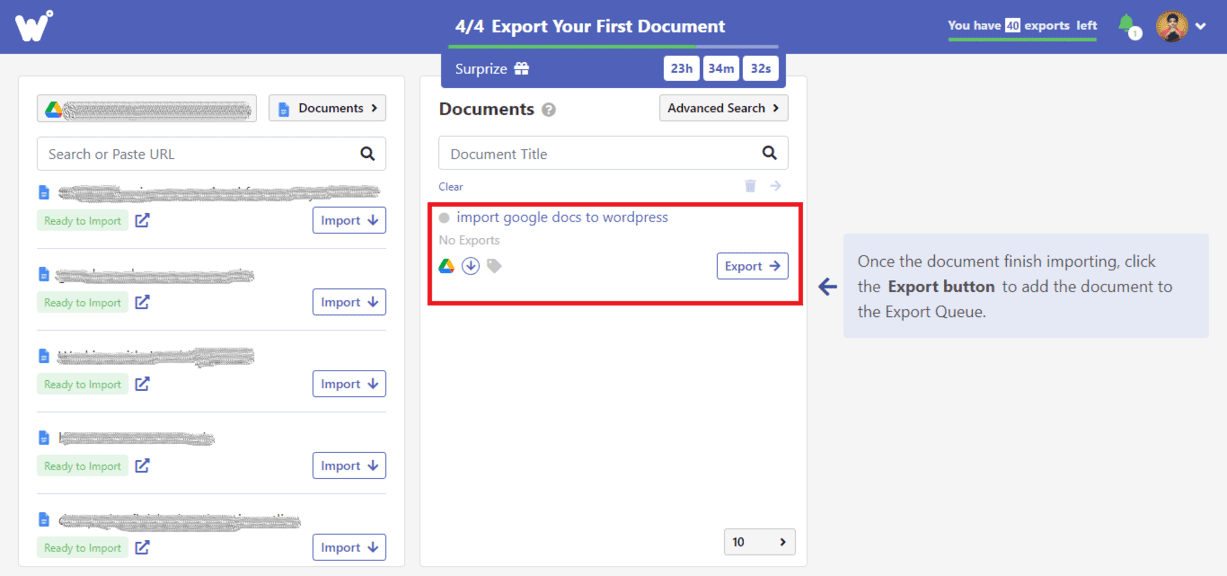
Clicking it will open a new popup window on your screen, where you can add, remove or edit post metadata like Title, slug, featured image alt text, etc.
You can also select which image you want to be used as a featured image if your document contained multiple images.
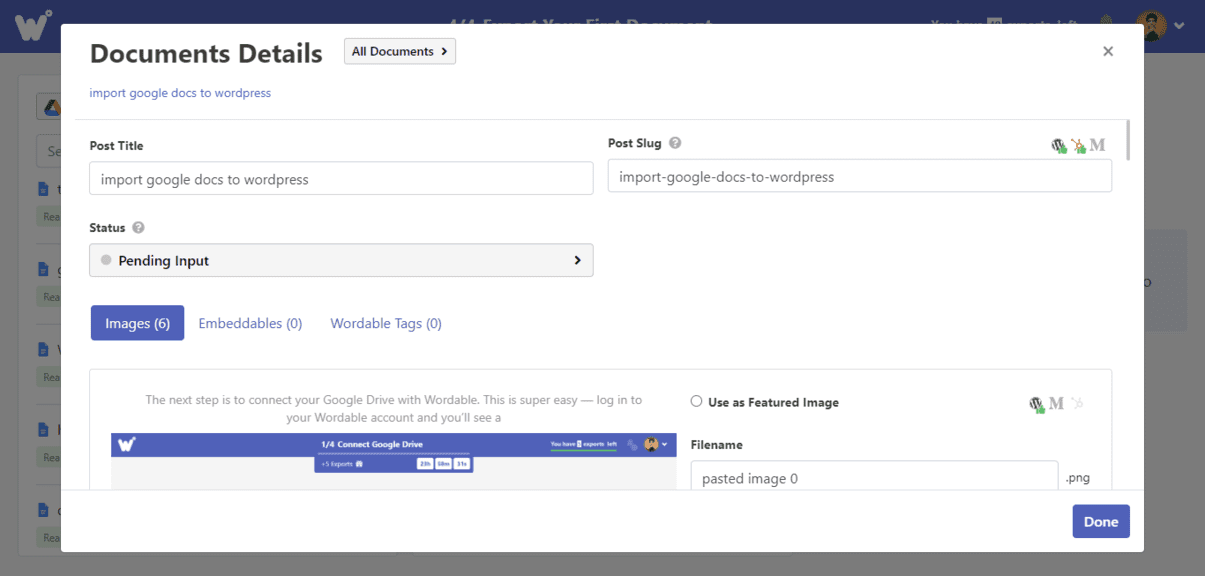
Once you’ve done all your changes, click the “Done” button, and then on the Export button.
Step #6: Optimize for Publishing
Your document will be added to the Wordable Export queue now, as shown below.
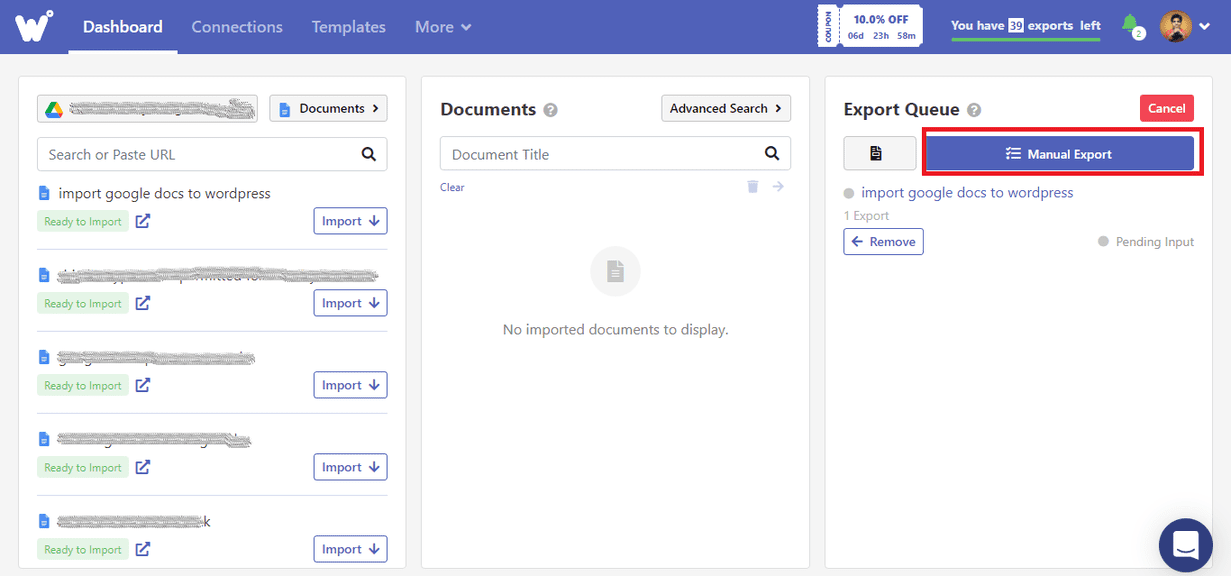
If you want to do more changes to your post before publishing it, such as adding a table of contents, saving the post as a Draft instead of publishing it right away, formatting the links, or setting WordPress metadata (i.e. post type, category, etc.) then you can do that by choosing the Manual Export option.
A new popup will open before you now, as shown below. In this popup, you can apply all those settings.
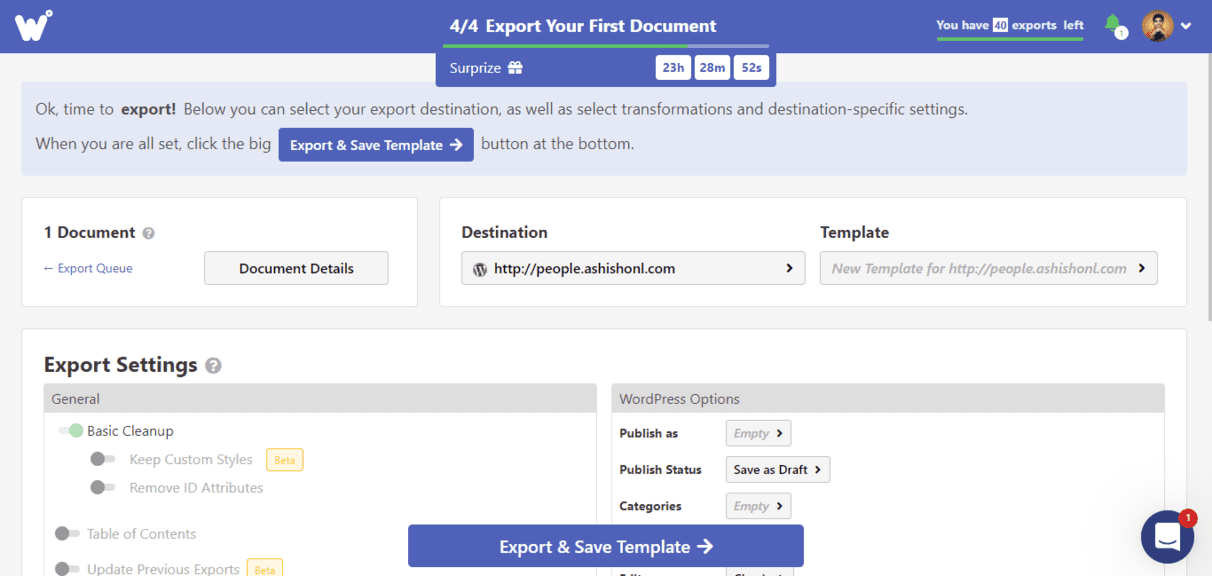
Do all the changes that you want to do, and then click on the “Export and Save Template” button.
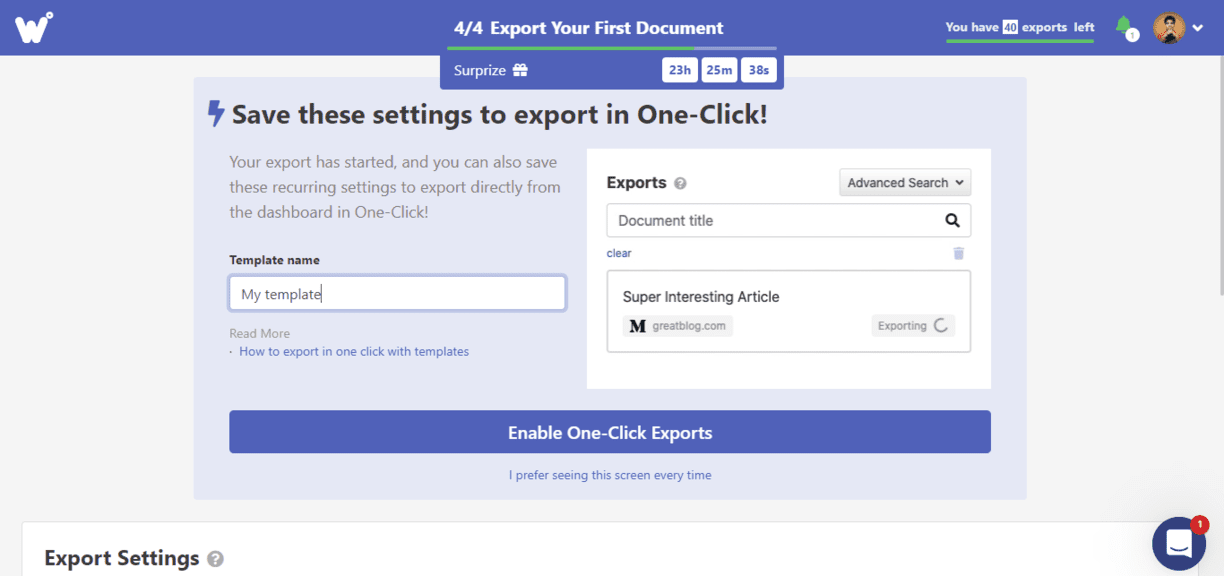
You’ll see another prompt where you can save the settings you just applied as a template.
Give a name to your settings template, and then click on the “Enable One-Click Exports” button.
Step #7: Export and Publish to Site
Wordable will now take all the content of your post to WordPress and publish it (or save it to draft, if that’s what you selected) in a few seconds.
You’ll see a success message in your Wordable dashboard once it’s done.
Similar Tutorials to Check Out
- How To Add A Page On Google Docs: This tutorial explains how can you add as many new pages as you want to on Google Docs, without necessarily having to type all the way down to your doc.
- How to Convert Word Docs to Google Docs: Google Docs is popular, but many people use MS Word too. Such people look for a way to upload their MS Word documents to Google Docs, but Google Docs uses a different file format than Word docs, which can limit what you can and can’t do with an MS Word doc uploaded to Google Docs. This tutorial explains how to convert Word docs to Google Docs for unlocking the full functionality.
- How To Duplicate A WordPress Page Or Post: Finally, this tutorial explains how can you easily duplicate a WordPress page or post without having to create it from scratch again.
Wrapping Up
As we said in the beginning, there are dozens of methods for importing Google Docs to WordPress.
However, few of them are as good as using Wordable.
It’s literally one of the best tools for content marketers, as it can not only save you time but also take care of image compression, content optimization, etc. right at the time of publishing your posts.
So what are you waiting for? Create a free Wordable account and give it a try with your 5 free exports. Have fun, and thank us later!


