

Emails from friends, family, coworkers, and organizations arrive in your Gmail inbox daily. Handling this could be a mess. Filtering some messages won’t prevent mixups in your main inbox folder.
You should have separate mailboxes or accounts to avoid missing essential messages. Fortunately, Google lets you create as many email addresses as possible without clogging up your primary address inbox.
But once you have multiple Gmail addresses, managing them could be a major nightmare. Switching from one account to another now and again could be a waste of time and tiring.
The good news is that Gmail has a built-in feature that allows you to manage multiple Gmail addresses from a single inbox.
In this guide, we’ll walk you through connecting and managing multiple Gmail addresses from your primary inbox.
Frequently Asked Questions
Can I Have Multiple Gmail Accounts?
Of course, Gmail is among the most secure email providers that allow multiple accounts. You may want to separate your personal email account from your official account.
The only thing to keep in mind is that Google imposes a limit on the number of Gmail accounts that a single user can verify with their phone number.
How Many Gmail Accounts are Allowed?
For a single phone number, Google allows up to four Gmail accounts.
This means that you can have 4 Gmail addresses verified with the same phone number.
If you need to exceed this limit, you’ll need a second phone number, which gives you four additional Gmail accounts. You can add more as you deem fit.
How Do I Keep My 2 Gmail Accounts Separate?
There are several ways to keep your 2 Gmail accounts separate. First, you can make sure they are logged in on separate devices.
Alternatively, you can use different browser tabs or set up 2 chrome profiles with each Gmail account.
That way, you can access one without interfering or mixing it up with the other.
What You’ll Need to Manage Multiple Gmail Accounts
- The Gmail Accounts: First, you must have your primary and secondary Gmail account to manage multiple Gmail accounts. If you don’t, follow this guide to create your Gmail accounts
- Your Device: We’ll set up Gmail Multiple Account management on a Computer. You can use either a Windows or MacOS device to follow this tutorial.
- A Web Browser: We’ll use Google Chrome web browser for this tutorial. You can use any other secure web browser if you don’t have Chrome. Better still, you can quickly download and install Google Chrome here.
How to Manage Multiple Gmail Accounts
Before we delve deep into the details, It’s essential to get you familiar with the following terms;
- Primary Email: This is the main email
- Secondary emails: These are additional emails you want to set up for particular purposes. Say you need a second email address for work. The primary email will be your existing email. The new email you want to set up for work and integrate with your primary email is called the secondary email.
- Primary Inbox: The primary inbox is simply the inbox of the primary email. It’s the one Gmail account you check more frequently than others.
- Mini inboxes: These are the new inboxes set up alongside the primary inbox to create multiple inbox sections.
Adding Multiple Gmail Accounts in One Inbox
Once your multiple Gmail accounts are ready, the first step is to pick a primary inbox to send and from and merge the secondary ones.
To do this, we’ll use the built-in Gmail features. Here are the steps involved;
Step #1: Open Settings in Your Primary Gmail Account
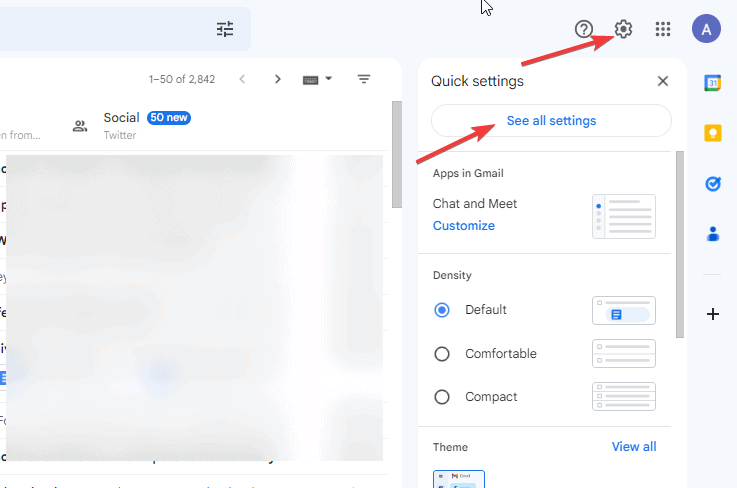
Open the inbox of your primary Gmail account. Click on the Gear (Settings) icon at the top left corner and click on See all settings.
On the top navigation, switch to the Account and Import tab and go to the Send mail as: section. There, click on the Add another email link.
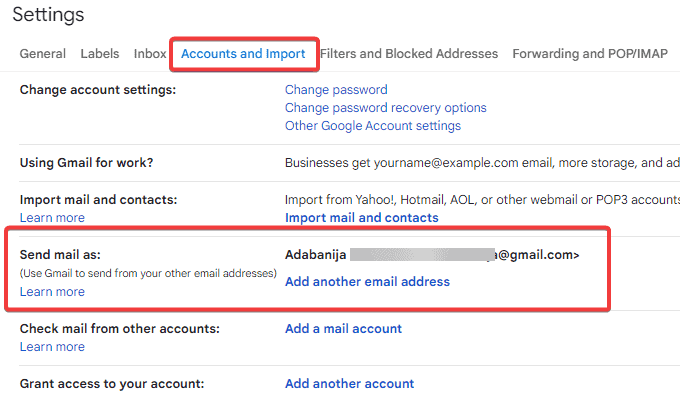
A new window will pop up to add your secondary email. That’s step #2.
Step #2: Add Your Secondary Gmail account
Enter the Full Name and the Email address of your secondary account into the available fields.
Check the Treat as an alias box. By doing so, every email sent to your secondary email will appear in your primary Gmail inbox.
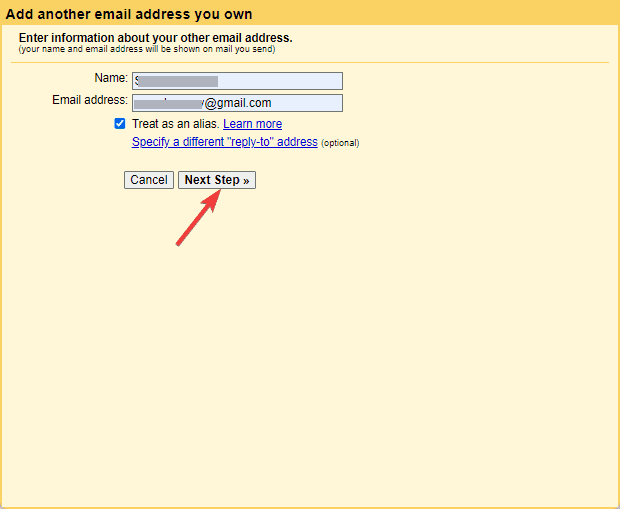
Once done, click the Next Step button.
On the next Window, click the Send Verification button. Gmail will now send a confirmation request to the secondary Gmail account you want to add.
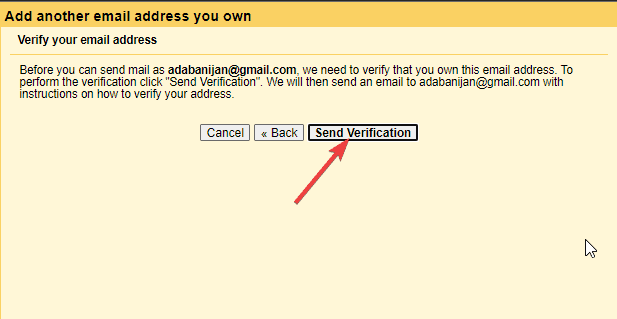
You need to confirm this request.
Step #3: Confirm Request on Your Secondary Gmail Account
To do so, open your secondary Gmail account in another browser tab.
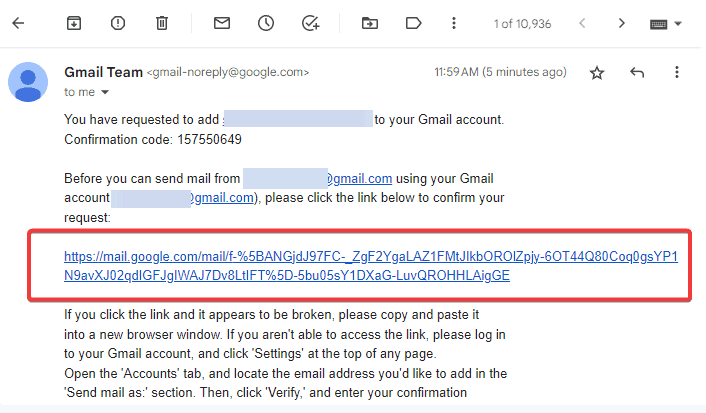
You should see the confirmation email from Gmail Team in your secondary inbox with the subject, Gmail Confirmation- Send Mail as…
It should be the number message in your inbox unless you’ve changed how you sort the emails.
Once you find it, open the message and click the provided link. The link should start with mail.google.com/mail
You’ll be taken to a screen that looks like the one below. Click on the Confirm button.
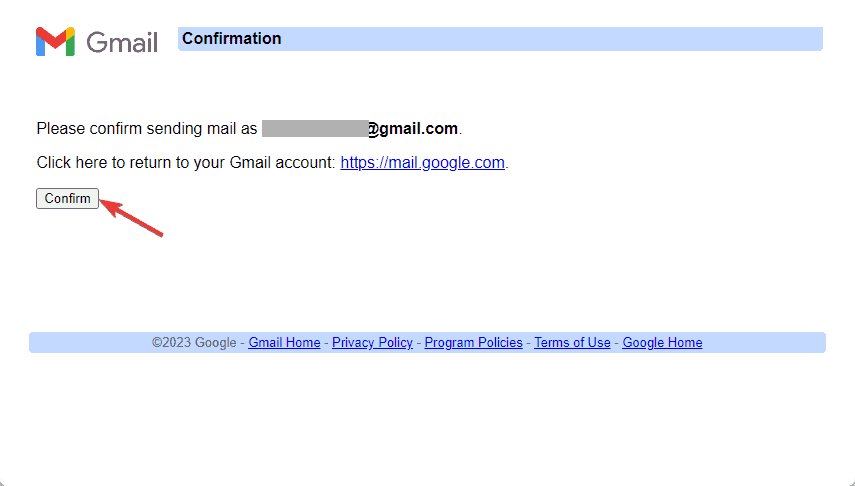
Next, you’ll see the Confirmation Success! Message
And that’s it. You’ve successfully merged your secondary Gmail account with your primary inbox. And you can now operate both accounts from that single inbox.
The settings you’ve just activated here are not limited to the browser version of Gmail.
Rather, on any device, Android or iOs. Once you log in to your primary Gmail accounts, you can operate the merged secondary account.
To add more than one secondary Gmail account, repeat the steps above.
Step #4: Test Multiple Gmail Accounts
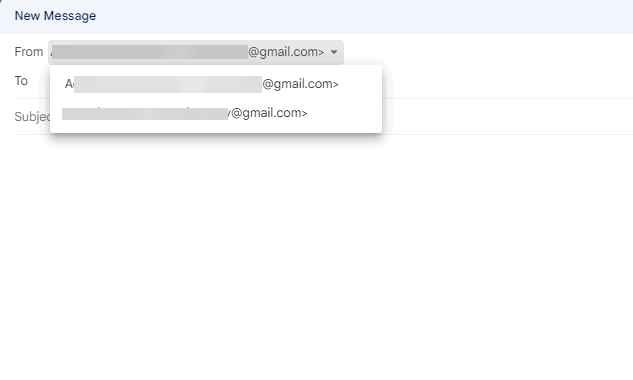
To confirm that the secondary email has been successfully merged. Click on the Compose button in your primary inbox.
Once the email composer opens, click on the “from” at the top to see if you can select multiple emails. If you see a dropdown with the secondary email you just added, then It’s a success.
And that’s it. You now have 2 Gmail accounts in one inbox. You can add as many Gmail accounts as you like and manage them with a single sign-in.
Setting up forwarding
Another way to manage multiple Gmail accounts is to set up forwarding on your secondary Gmail accounts.
This method is less robust than the one above because It’s one-directional.
It forwards messages in the secondary email account to the primary Gmail account inbox.
Unlike the method above, where you can send and receive emails with a secondary account in the primary inbox.
Forwarding only allows you to receive emails. You can neither send nor reply to emails.
Follow these steps to set up forwarding on your secondary email.
Step #1: Add a Forwarding Address to Your Secondary Gmail Account
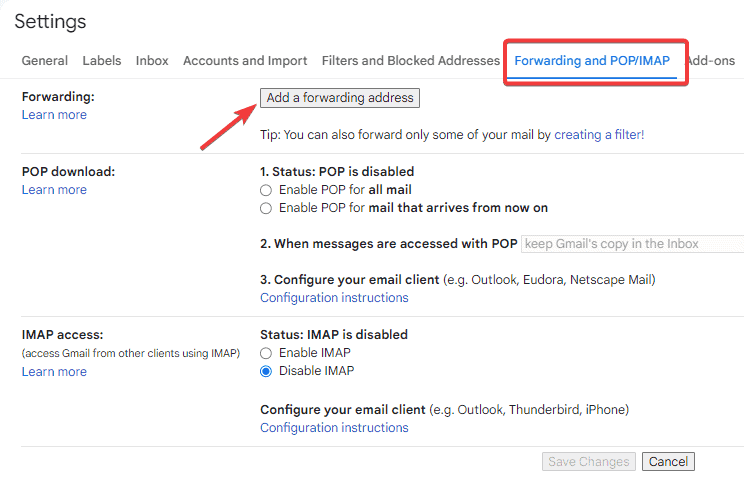
Login to your secondary account, click the Gear button at the top-right corner and select See all settings.

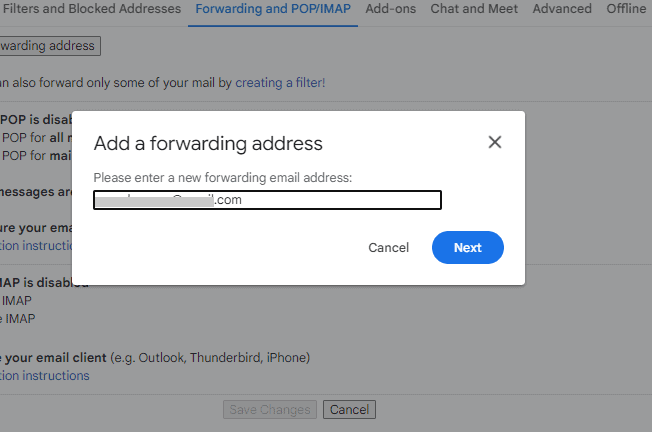
Next, switch to the Forwarding and POP/IMAP tab and click the Add a forwarding address button.
A window will pop up. Enter your mail Gmail account address and click on the Next button.
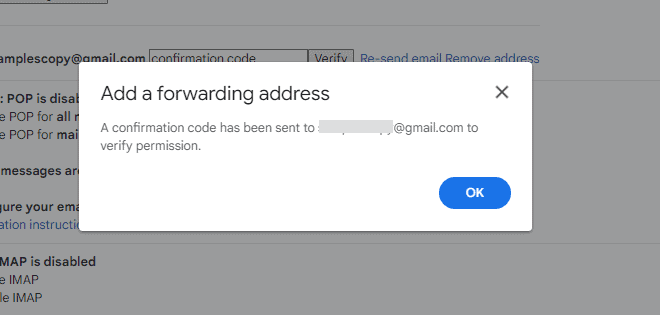
Another pop-up window will appear. Click the OK button, and a confirmation email will be sent to your primary Gmail account.
Step #2: Confirm Forwarding on Your Primary Gmail Account
Open your primary account inbox. You’ll see the Confirmation email from Google Team.
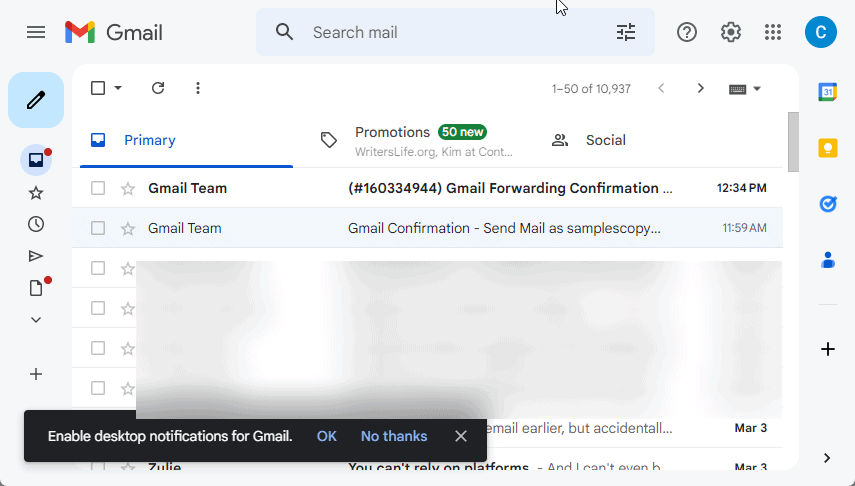
Next, Open the email and copy the Confirmation code inside the email.
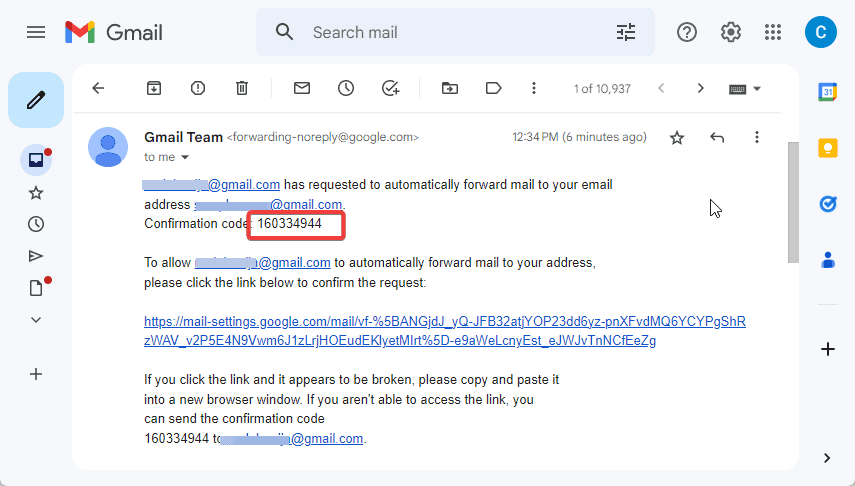
Now go back to the Forwarding settings on your secondary Gmail account, paste the code in the Verify email box and click the verify button.
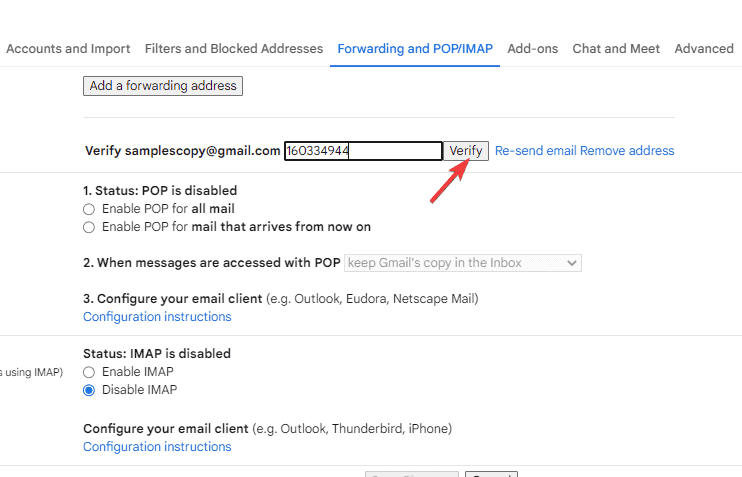
Once done, the last step is to activate forwarding and select a forwarding option.
Step #3: Enable and Select a Forwading Option
On the Forwarding settings page, choose Forward a copy of the incoming mail to…
Next to that, click on the options dropdown and select any of the 4 options as your deem fit.
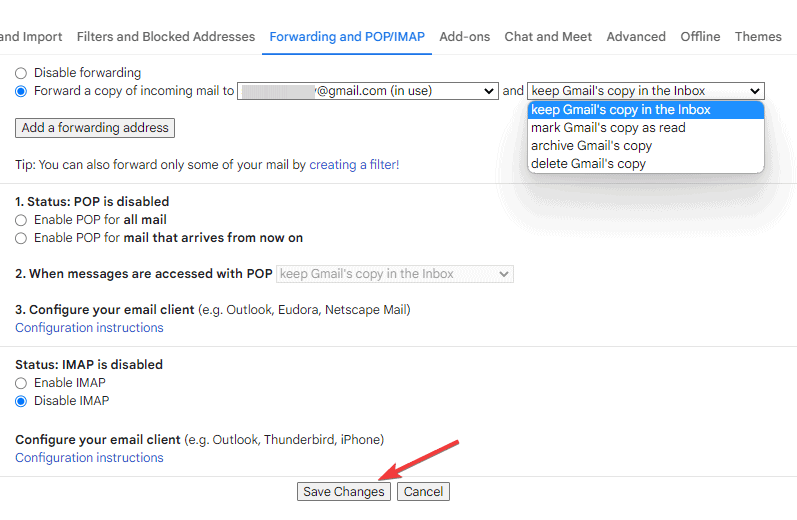
Once you’ve chosen an option, click the Save Changes button to apply your settings.
And that’s all. You can now manage both inboxes from a single login.
Follow the same steps to forward more incoming emails from a secondary to a primary Gmail account.
Now that you’ve understood how to merge secondary emails with multiple emails let’s look at how to organize these emails from multiple Gmail accounts in your primary inbox.
Setting up Mini Inboxes For Multiple Gmail Accounts
Once you start receiving emails from multiple Google accounts, your primary inbox can, in no time, become a lot to handle.
That’s why you have to organize into folders called mini inboxes for easy access and management.
Follow these steps to set up mini inboxes for your multiple Gmail accounts.
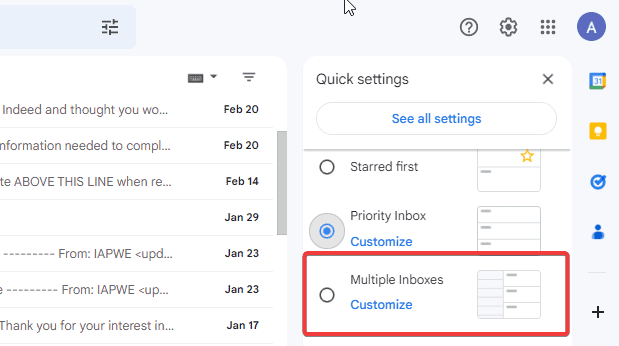
Log in to your primary Gmail account inbox. Click on the Settings (Gear) icon at the top right of your screen.
On the resulting menu, scroll to Multiple inboxes and click on the Customize link under it.
Next, you’ll separate email addresses using the to:[email protected] filter.
That will filter emails by recipients, and you can name each filter as you deem fit.
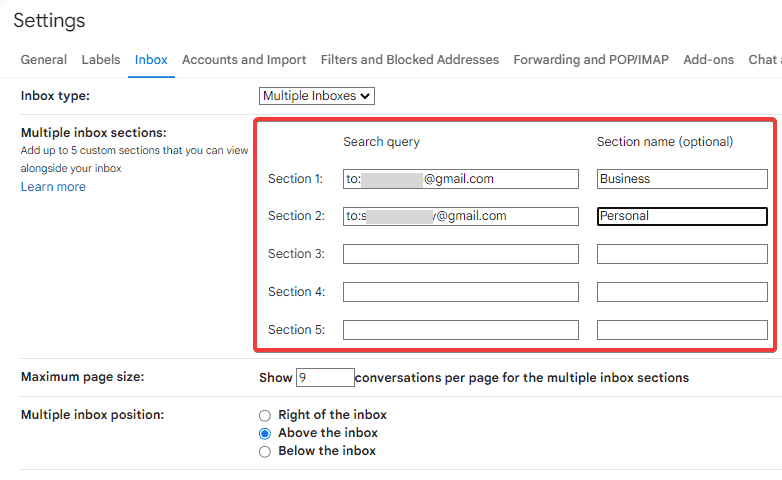
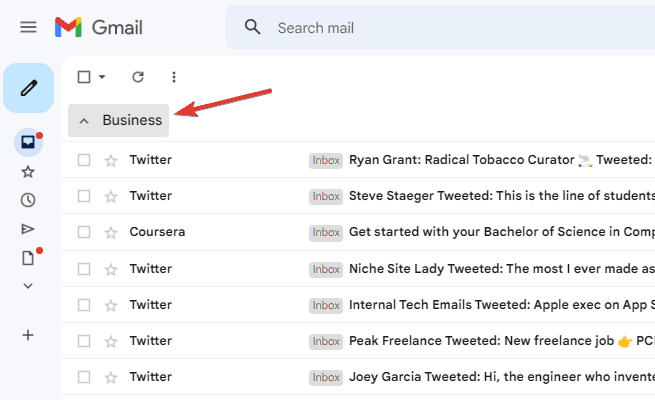
In our case, we added 2 sections and name them Business and Personal, respectively.
Once done, scroll down the page to click the Save Changes button. Gmail will automatically re-direct you back to your inbox.
You should immediately see the new layout, and you can switch from one inbox to another using the dropdown.
And that’s all. Henceforth, any email sent to your secondary emails will be stored directly in the named section. And you can easily sort and browse through them.
More Helpful Email Management Tutorials;
- How to Set Up an Email Address With a Blog Domain: Using a custom email address with your blog name makes you look more legit and professional. Use this comprehensive guide to set up an email account with your domain name.
- How to Build an Email List Without a Website: No website? No problem. There are effective ways to build an email list without a website. Learn the steps to do it in this guide.
- How To Write An Introduction Email: Writing an introduction email is an uphill endeavor. How do you introduce yourself without sounding overly salesy? And how do you avoid under-selling yourself? This professional introduction email writing guide is for you.
Wrapping up
Gmail makes it simple to manage multiple Gmail accounts.
Whether you want to do it for professional reasons or need extra email addresses for personal projects, you can create as many Gmail accounts as possible and manage them all from a single dashboard.
From the full-fledged inbox setting to the one-directional forwarding option, setting up multiple Gmail account management takes only a few minutes. Just add to your primary email, confirm on your secondary email and viola, you are good to go.
Do you find this guide helpful? Do you want to know more about Gmails and its amazing features?
Tell us what topic interests you, and we’ll gladly write a detailed guide. Use the comment section.


