
WordPress is inarguably one of the best website builders in the world. But the world’s most-used CMS has a few downsides that users fume about.
One of them is the WordPress media library. There’s virtually no way to organize and easily filter files in this default library.
While adding a new media file is fairly straightforward, looking for an old file in the media library can be a real pain in the neck.
If you’ve been looking for how to better organize your WordPress media library files into folders as you would on your computer for easy accessibility, then you’ve just landed on the right page.
- Can You Organize the Media Library in WordPress?
- What is the Best Way to Organize the WordPress Media Library?
- What You’ll Need to Organize WordPress Media Library
- How to organize Organize WordPress Media Library: The Basics
- Using Firebird Plugin to Organize WordPress Media Library
- Using Media Library Folders Plugin Organize WordPress Media Library
- More Helpful WordPress Tutorials:
- Wrapping up
Can You Organize the Media Library in WordPress?
Yes. You can organize the media library in WordPress.
Although the default media library doesn’t allow easy file organization, with a few workarounds and with the help of a media library management plugin, you can easily organize media files as you would with the traditional filing system.
What is the Best Way to Organize the WordPress Media Library?
The best way to organize WordPress media libraries is to use a plugin. Several WordPress plugins are dedicated and specifically developed for that purpose.
These plugins are often referred to as WordPress media library management plugins. We’ll show 2 of the best plugins and how to use them step by step.
What You’ll Need to Organize WordPress Media Library
- WordPress Admin Access: There are 6 user roles on WordPress, for you to organize the media library on a WordPress website, you must be an admin or super admin on the website.
- A WordPress Media Library Management Plugin: Since there.s no other way to organize the media library except with a plugin, you’ll need a dedicated plugin for media library file organization. You’ll see 2 of these plugins in action in the coming sections.
How to organize Organize WordPress Media Library: The Basics
Before we proceed to show you how to better organize your media library, let’s briefly take a look at how the default media library works on WordPress.
Anytime you upload a new media file to your site, WordPress automatically adds them to folders based on months and years of upload.
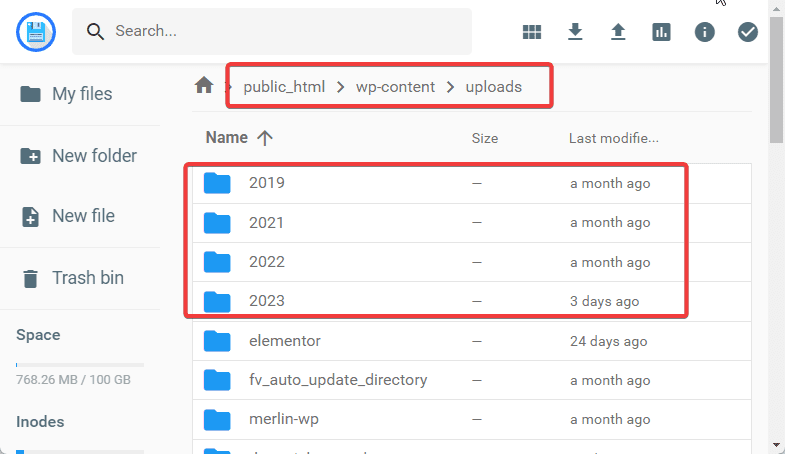
Typically, if you access your website’s root directory, media files are stored in the public_html/wp-content /uploads folder.
Inside these folders are subfolders named by year, and then the month of upload under them.
And if you go to Media>Library in your WordPress admin panel, you can see all the months and years available by clicking the All Dates dropdown.
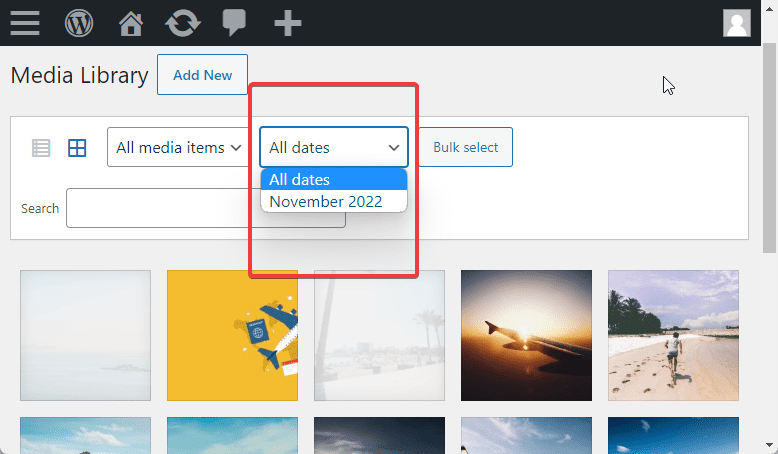
This format makes sense for users who prefer a time-oriented folder setup.
However, for most website owners, using the traditional filing system gives better control over the media library in terms of organization and ease of accessibility.
For example, an agency may want to organize media files by client, portfolio, and industry. Also, a blogger may prefer organizing WordPress media files by keywords, topics, or categories.
This gives them better control of how their media files are structured and they can easily browse through them when looking for an old upload.
That said, now let’s look at how to organize your WordPress media files using 2 of the most popular plugins, FileBird and Media Library Folders.
Using Firebird Plugin to Organize WordPress Media Library
Firebird is arguably the most popular WordPress media library folder plugin. This easy-to-use plugin features a drag-and-drop interface that allows users to upload and move files and folders around on WordPress in a breeze.
If you use a page builder on WordPress, FileBird is compatible with all popular page builders and image optimization plugins.
The plugin comes in free and premium versions. You may need to upgrade later, but the free version should be enough to get you started. Let’s see it in action.
You first need to install and activate the plugin. Upon activation, FileBird makes some changes to your WordPress media library.
So, if you navigate to Media>Library on your admin dashboard, instead of seeing only the default media library interface, this is what you’ll see;
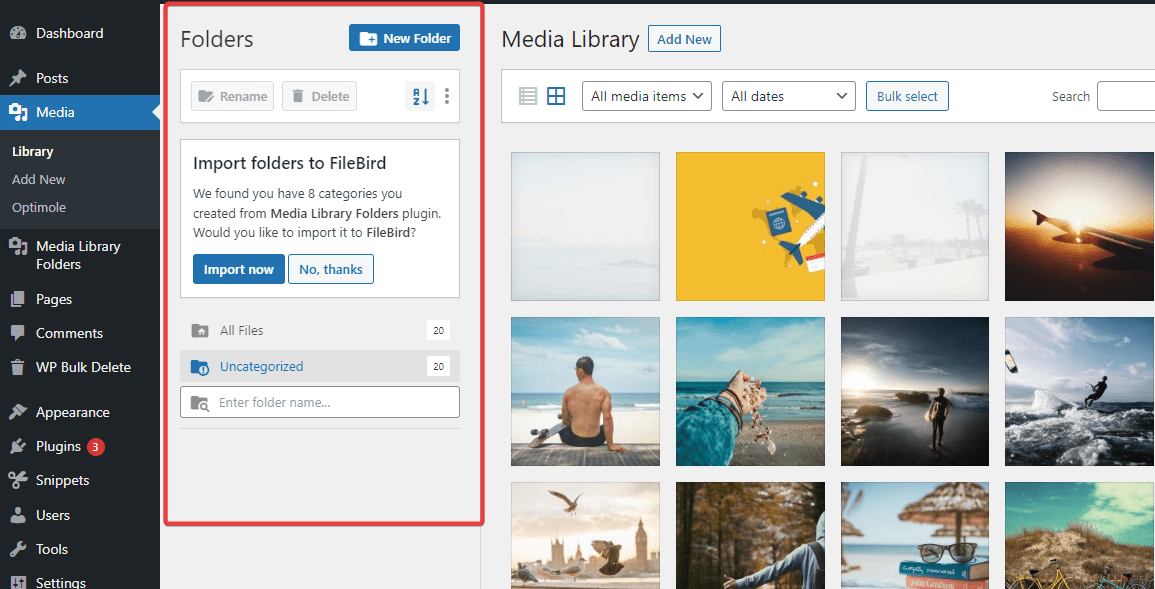
From there, you can organize your WordPress media library better. Let’s see what FileBird offers.
Creating New Folder in WordPress Media Library
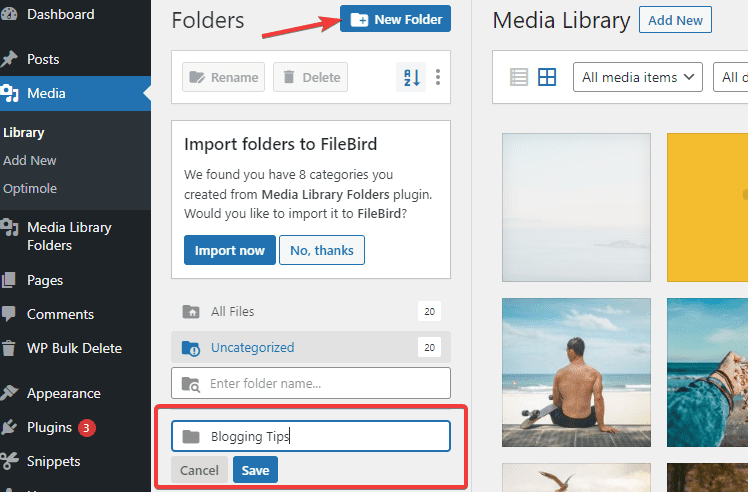
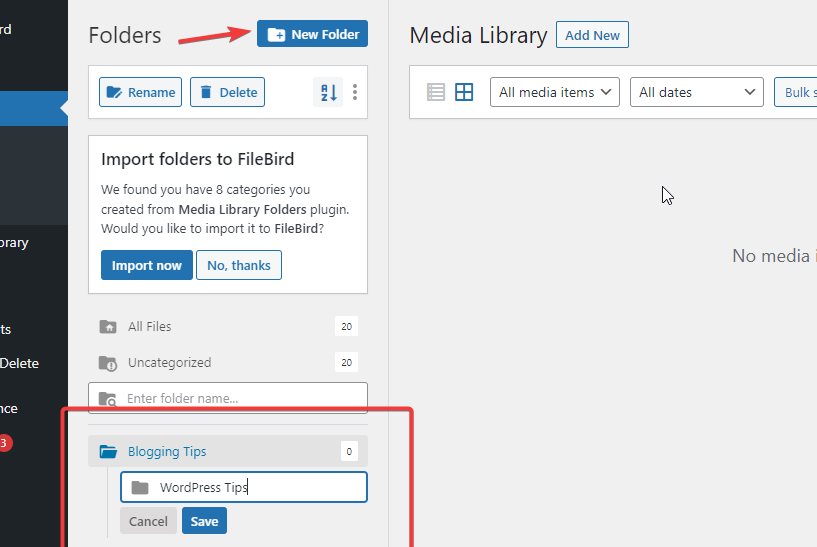
To create a new folder in FileBird, click the New Folder button at the top.
A new section will appear where you’ll enter your folder name. Input a name in the field and click the Save button. For this example, let’s just put Blogging Tips.
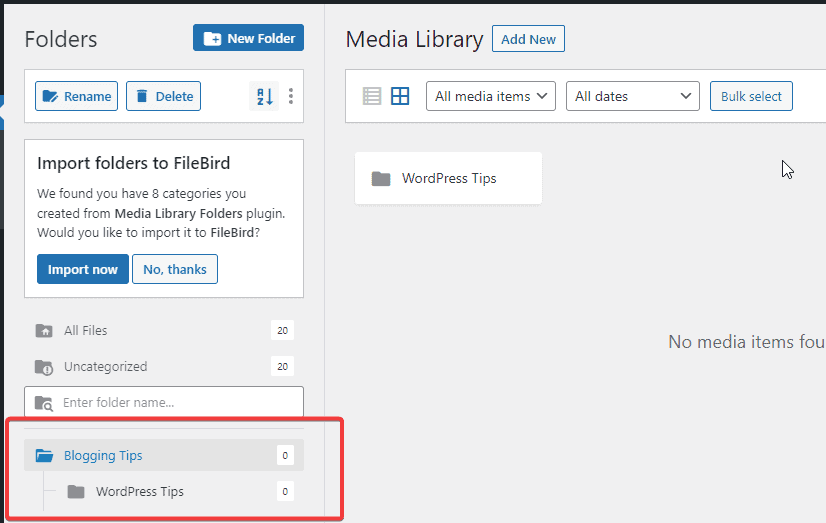
Once you save it, the folder will be added to the list. You can create as many folders as you want by following the same steps.
Creating a Subfolder in WordPress Media Library
You can as well create subfolders with FileBird. Here’s how.
Click on the parent folder to select it, then click on the New Folder button at the top. The Folder Name field will appear.
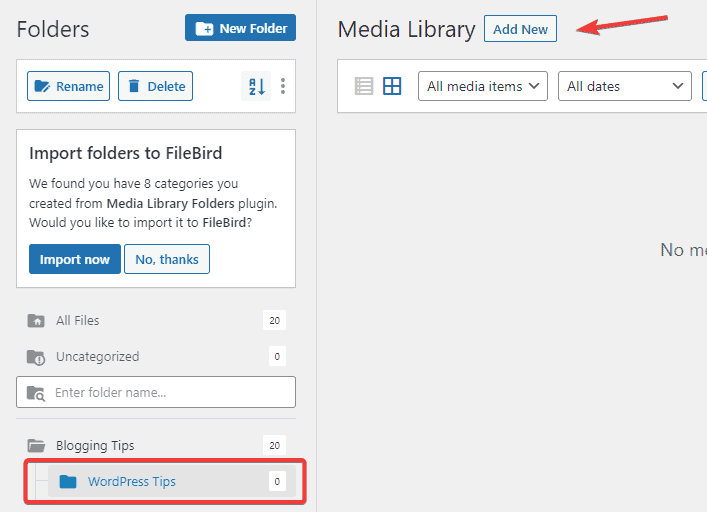
Give your subfolder a name and click the Save button. We name our subfolders WordPress Tips.
Once It’s saved, you’ll see it listed under the parent folder below.
Follow the same steps to create more subfolders.
Now that you have your folders in place, you can start adding files to them.
Here, you can either add existing files, files that are already uploaded to your WordPress media library, or add new files to the folder. Let’s start with the existing files.
Adding Existing Files to folders in Media Library
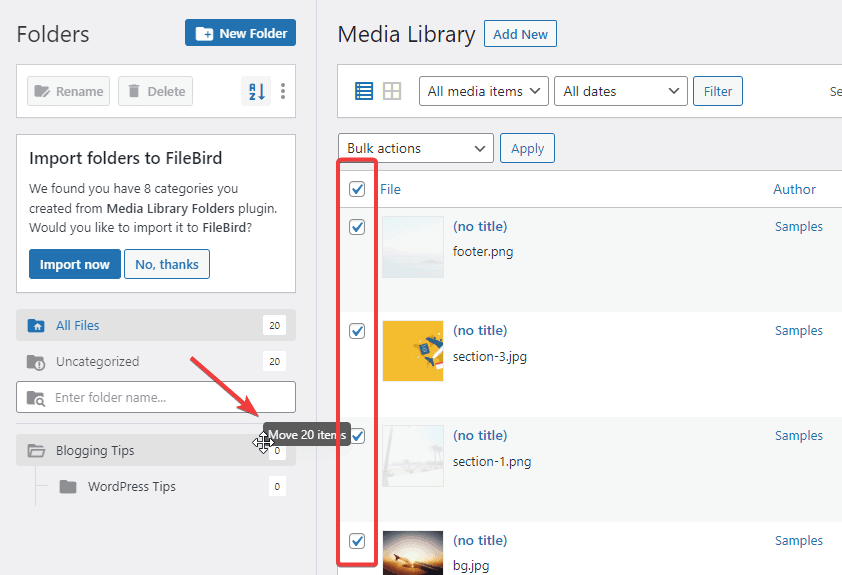
Select the destination folder and switch your media library to List View, you’ll see a box next to all images in the library.
Check the boxes beside all the images you want to add to the folder.
Once those images are selected, drag and drop them into the folder. As you do, a tooltip will appear indicating you want to move a certain number of files. Proceed till you reach the destination folder.
Once done, all the files you move will no longer be available in the All Files folder. To see them, you’ll have to open the folder you moved them to.
If your website library is in Grid View mode, click on the Bulk Select button at the top of the page. Then select the files by clicking on them.
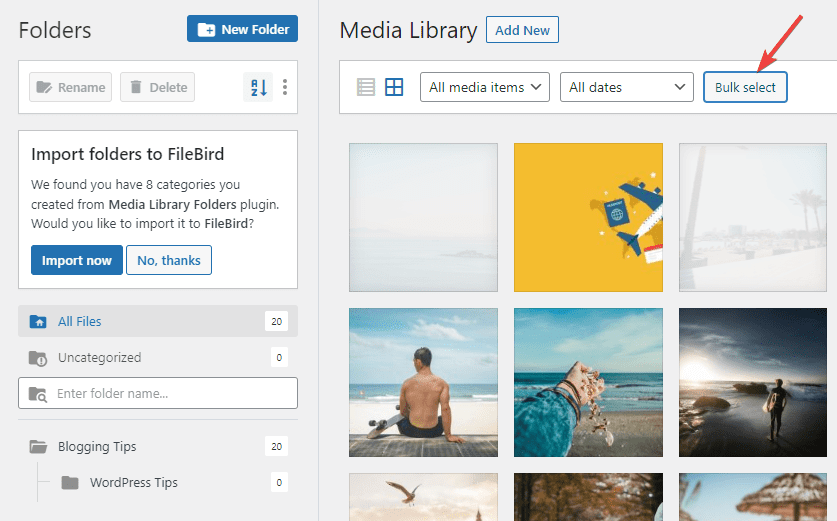
Next, drag and drop the files into your folder of choice.
Adding New Files to Media Library
If the files you want to add to the folder are not yet uploaded to the media library, you can still add them directly to the folder using these steps.
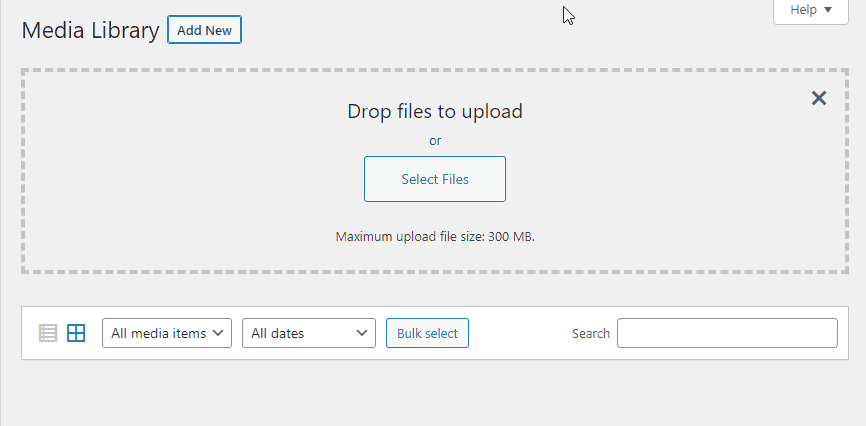
First, select the folder you want to upload the images to then click on the Add New button at the top of your screen.
After that, Drag the file from your computer and drop it inside the available box.
Alternatively, click the Select Files button. Your device storage will open, then you can locate and upload your file to WordPress.
Once the upload is complete, you will find the file inside the selected folder.
Deleting Folder in WordPress Media Library
To delete a folder in FileBird, right-click on the folder and select Delete from the options that appear.

A dialogue will pop up prompting you to confirm you want to delete the folder. Click the Delete button to continue.
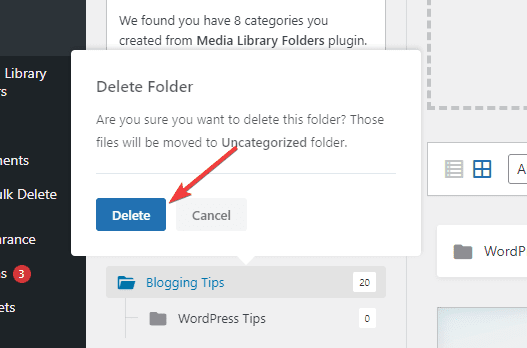
Deleting a folder in FileBird does not delete the media files inside it. Instead, all the images will be moved to the uncategorized folder and you can see them in the All Files section.
Insert Media Directly into Pages and Posts
Perhaps this is the most significant reason why FileBird is the media file management plugin of choice for most WordPressers.
Of all the media library plugins we’ve encountered, only FileBird has this feature.
You can insert images from folders into posts and pages without scouring the media library as in the default mode. Here’s how it works.
Open the post or page where you wish to add your image. Add the Image block and click on the Media Library.
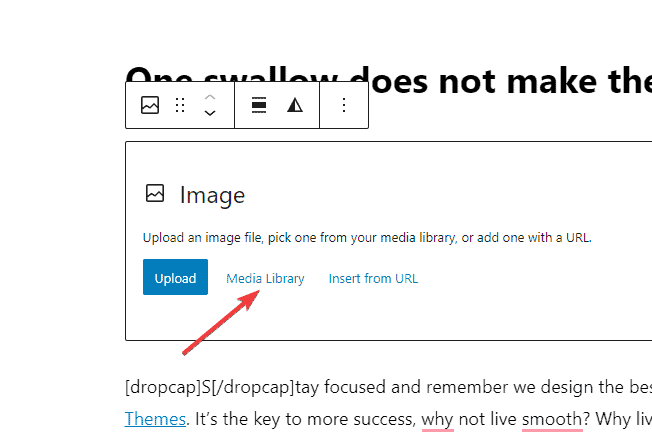
On the next screen, you’ll see all the folders you’ve created with FileBird.
Open the folder where your image is stored. Once you find it, choose an image and click the Select button to add it to the page.

That’s all. You’ve successfully inserted an image into WordPress using the files.
There are other features on Firebird. You can create a smart image gallery or document gallery.
To enjoy the full functionality of this amazing plugin, consider upgrading to the premium version.
Using Media Library Folders Plugin Organize WordPress Media Library
Media Library folder is another great file manager to help you organize and manage the WordPress media library professionally.
You can manage all media types supported by WordPress and organize them into folders and categories.
With its drag-and-drop interface, uploading, moving, copying, renaming, and deleting files and folders is easy-peasy.
The free version only allows up to 10 folders. To create more, you’ll have to upgrade to the pro version.
To use this plugin, your first line of action is to install and activate it.
Once you activate the plugin, a new tab named Media Library Folders will be added to the left panel of your admin dashboard. Click on it and you’ll be taken to the plugin folder page.
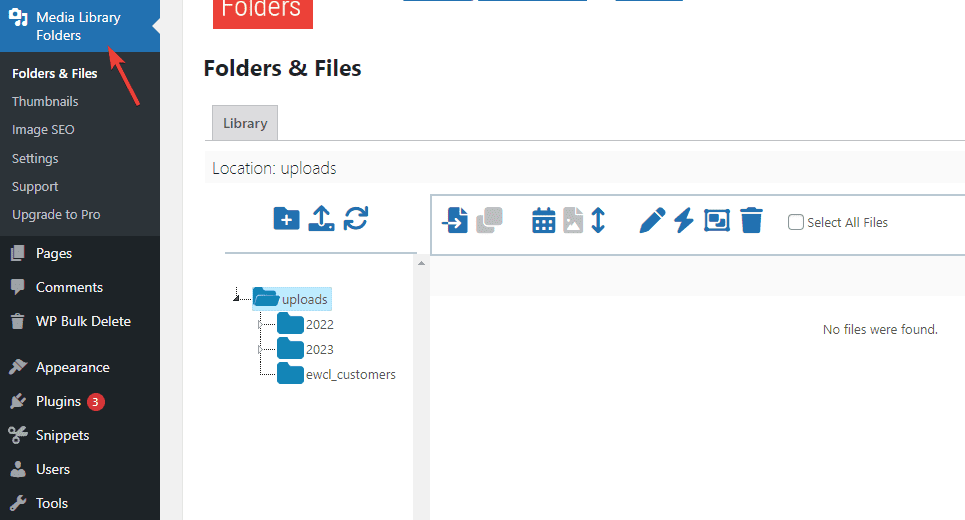
Here, you can add new files and folders. You can also move, rename, copy, and delete them.
For this example, we’ll use this plugin to create new folders and upload media files to them. Follow along.
Create Folders and Subfolders in WordPress
To create a new folder, simply click on the Add Folder button at the top.
A Folder Name field will pop up. Enter the name of your folder and click the Create Folder button next to it.
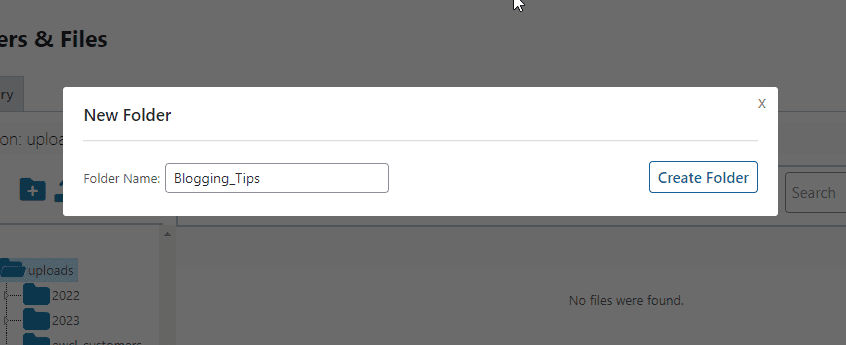
Note: You can’t space folder names in WordPress. If you need to use more than one word, use an underscore or hyphen to separate them. We add Blogging_Tips
Next, to create subfolders within a particular folder, select the folder and then click on the Add Folder button.
The Folder Name field will appear the same way, enter your subfolder. Name and click the create folder button.
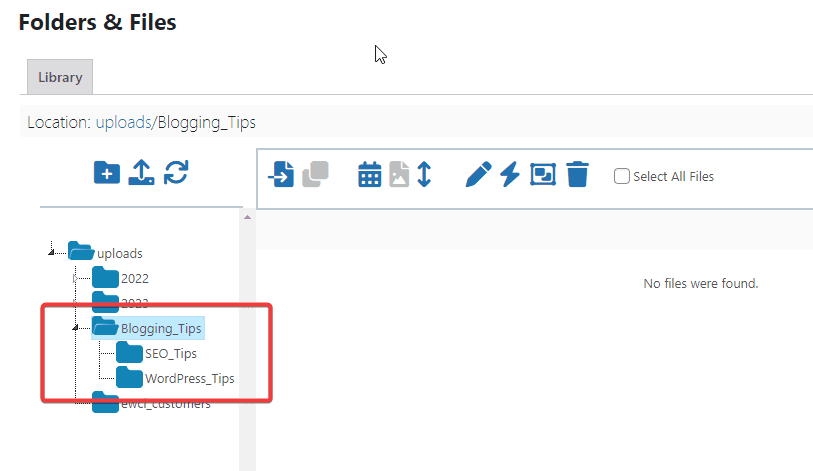
We’ve just created 2 new subfolders, WordPress_Tips, and SEO_Tips under Blogging_Tips using the above step.
To see them, click the small arrow button next to the parent folder, Blogging_Tips.
Now let’s add some files to your folders.
Adding Files to Folders in Media Library Folder
Select the folder where you want to add files by clicking on it then click on the Add File button at the top.
The file upload interface will appear. You can drag and drop the file from your computer into the box or click the Choose file button. Once you add your file, click the Upload image button.
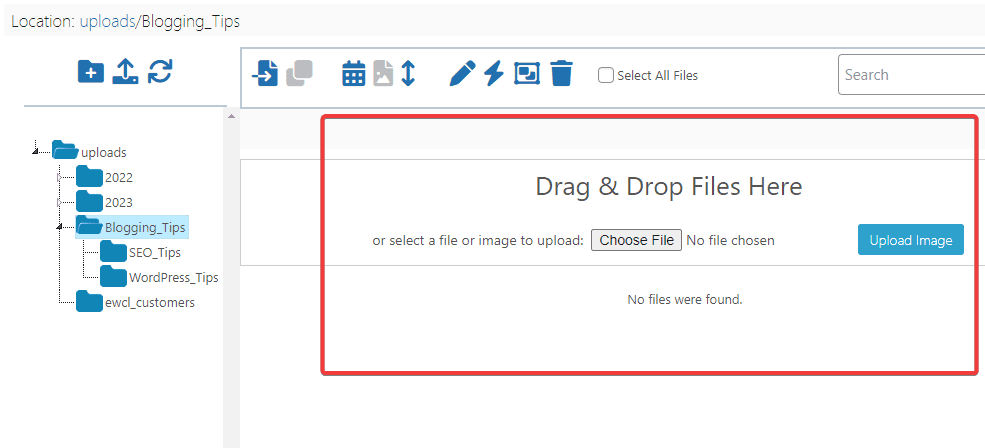
Once the upload is complete, it will appear on your screen as thumbnails with the filename underneath.
To use these images anywhere on your WordPress website is the same way you would with any other files in your media library.
Moving and Copying Files in Media Library Folder
At times, you may want to move some of your uploaded files to another folder. Here’s how.
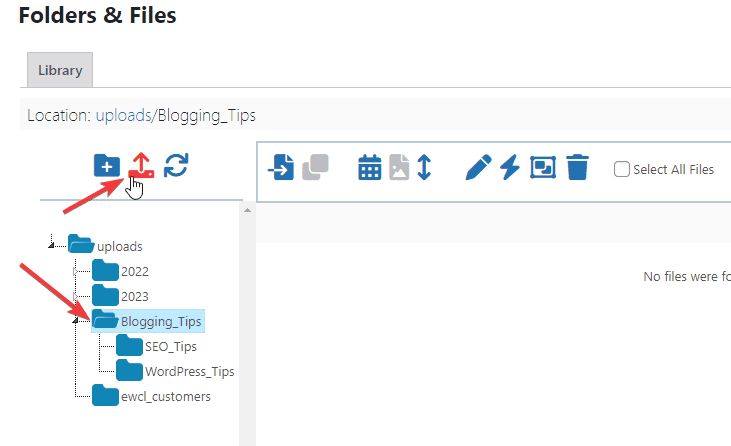
Click the Move icon at the top. The icon will turn to blue and you’ll see Drag and drop is set for moving files.
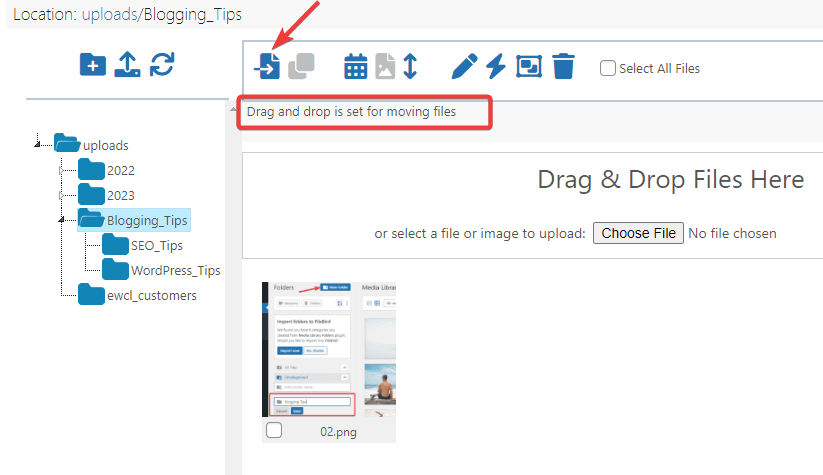
Next, locate the file you want to move then drag it to the destination folder on the left side panel.
To copy an image, click the Copy icon at the top. The icon will turn to blue and you’ll see Drag and drop is set for copying files.
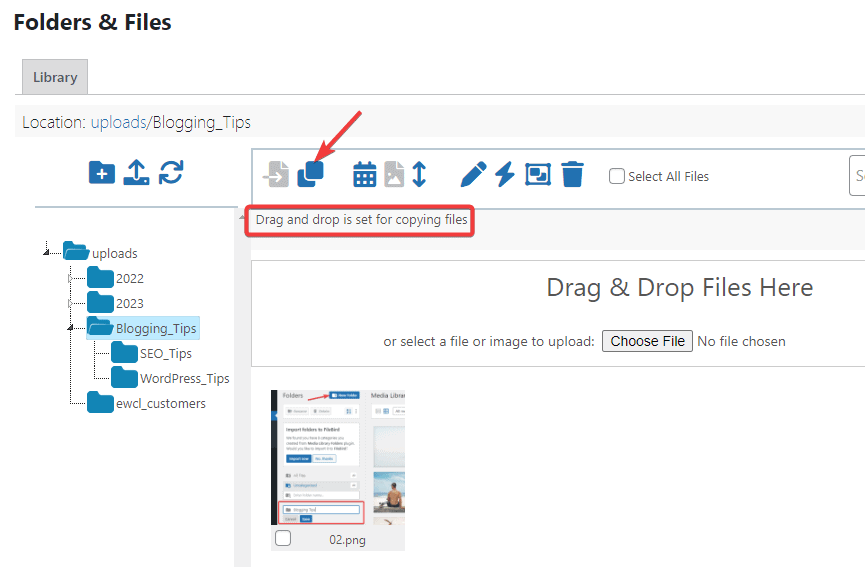
After that, drag and drop the file into the destination folder. With that, you’ve successfully copied the image to the folder.
Renaming Files in WordPress
Changing filenames and folder names in WordPress is super easy with the Media Library Folder plugin. It’s a matter of a few clicks. Let’s see.
To change the filename of an image, first, locate the image you want to rename in the plugin folder and check the box under it.
After that, click on the Rename button at the top of your screen.
The File Name field will appear. Enter the new name you want to use and click the Rename button next to it to save your changes.
Renaming Folder in Media Library Folder
Unfortunately, you cannot rename or move folders with the Media Library Folder plugin. You can only rename files.
However, there’s a simple workaround you can employ. Just create a new folder, move all the files in the folder you want to rename to the new folder, and then delete the old folder.
Deleting Files and Folders in Media Library Folder
To delete any folder in the Media Library Folder, right-click on the folder. Two options will appear, select Delete this folder?
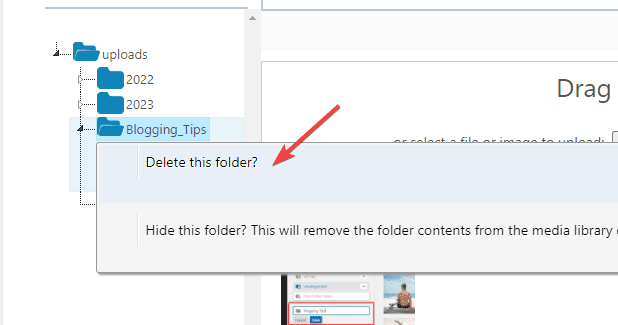
Next, a dialogue will pop up asking you to confirm. Click the OK button to continue. Your folder will be deleted.
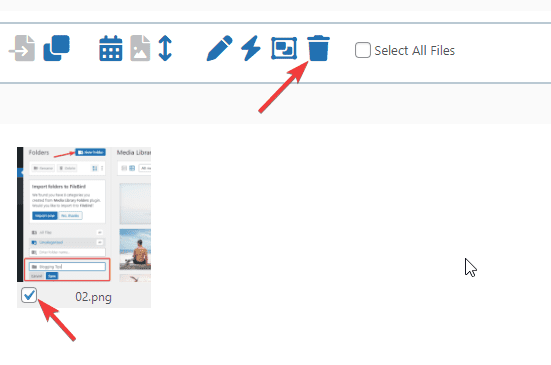
To delete a file, locate the file and check the box under it.
Next, click the Delete icon on the top toolbar. Confirm delete by clicking OK on the dialogue that pops up.
Other plugins you can check out include Enhanced Media Library, CatFolders, Real Media Library, and Media Library Assistant.
More Helpful WordPress Tutorials:
- How to Optimize WordPress for Performance: Without being an expert, you can improve your website’s speed by following the tips and tricks in this guide.
- How to Optimize Images for WordPress: Images use a lot of resources and slow down your site. That’s where optimizing images for WordPress comes in. learn it all in this guide.
- How to Use WordPress With a CDN: Want to make your WordPress websites load in a blink? Integrating a CDN content delivery network is the way. Check out this easy guide.
Wrapping up
If you’ve ever attempted to locate an old file on WordPress, you’ll agree that it’s a major pain. But it doesn’t have to be.
You can organize and manage your WordPress media library as you do with files on your computer.
We’ve shown you the best way to organize WordPress media library files into folders using 2 different plugins.
While these plugins offer several handy features out of the box, you may need to upgrade to their premium version as your site grows.
We hope you find this guide helpful. If you need further assistance, let us know in the comment section.


