
Looking for a way to password-protect WordPress sites?
Whether you want to password-protect your entire WordPress site or you just want to put certain posts or pages behind passphrases, you are just in the right place.
There are many ways to password-protect WordPress sites.
In this guide, we’ll cover the 3 types of WordPress password protection and how to use each of them on your WordPress website.
- Frequently Asked Questions
- What You’ll Need to Password Protect WordPress Site
- How to Password Protect WordPress Site: 3 Ways
- How to Password Protect an Entire WordPress Site
- How to Password Protect a Single WordPress Post or Page: 2 Methods
- How to Password Protect a WordPress Category
- More Helpful WordPress Tutorials:
- Wrapping up
Frequently Asked Questions
Can You Password Protect a WordPress Site?
Of course.
Whatever your reason might be, you can password-protect the entire or some part of your WordPress website.
Only users with your secret passwords will be able to access your site as they will be prompted to input the password before gaining access.
Can You Password-Protect a WordPress Site Without a Plugin?
Yes.
You can password-protect a WordPress site without a plugin.
There’s a built-in WordPress security feature that allows users to password-protect content.
Whether you want sitewide password protection or protection for a dedicated page or post, you can do it with and without a plugin. You’ll learn how to soon.
What You’ll Need to Password Protect WordPress Site
You only 2 two things to password protect WordPress site;
- WordPress Admin Access: Before you can password-protect a WordPress website, you must have access to the admin dashboard. This is only available for the admin or super admin roles in WordPress.
- A Password Protection Plugin: There are security plugins for WordPress password protection for more flexibility. Some of these plugins also come with extra security features.
How to Password Protect WordPress Site: 3 Ways
There are three types of password protection in WordPress;
- Sitewide password protection
- Specific post or page password protection
- And categories password protection.
Now, let’s walk you through how to implement all the 3 types of password protection on your WordPress website.
- How to Password Protect an Entire WordPress Site
- How to Password Protect a Single WordPress Post or Page: 2 Methods
- How to Password Protect a WordPress Category
How to Password Protect an Entire WordPress Site
The default password protection feature in WordPress doesn’t allow for sitewide protection.
You can only implement password protection for an entire website with the help of a plugin.
There are many plugins, free and paid, that you can use to password-protect your entire WordPress site.
After looking at a number of them, the free Password Protected plugin by WP Experts with 300,000 active installations is what we recommend.
It’s simple to use and has an intuitive interface.
Let’s see how to use this plugin to password-protect your entire WordPress site.
The first step is to install and activate the Password Protected plugin.
It’s available in the WordPress plugin directory.
After installing and activating the plugin, you need to configure the plugin.
Here’s how.
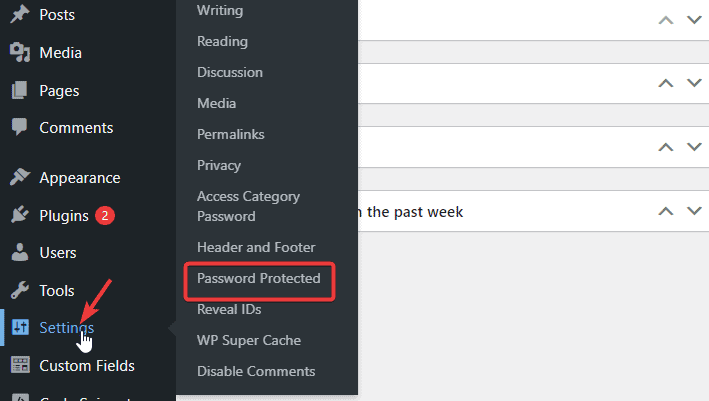
Log in to your WordPress admin dashboard, go to Settings on the left panel, and select Password Protected to open the plugin settings page.
Next, check the Password Protected Status box to Enable protection, enter the desired password in the New Password field and confirm your password.
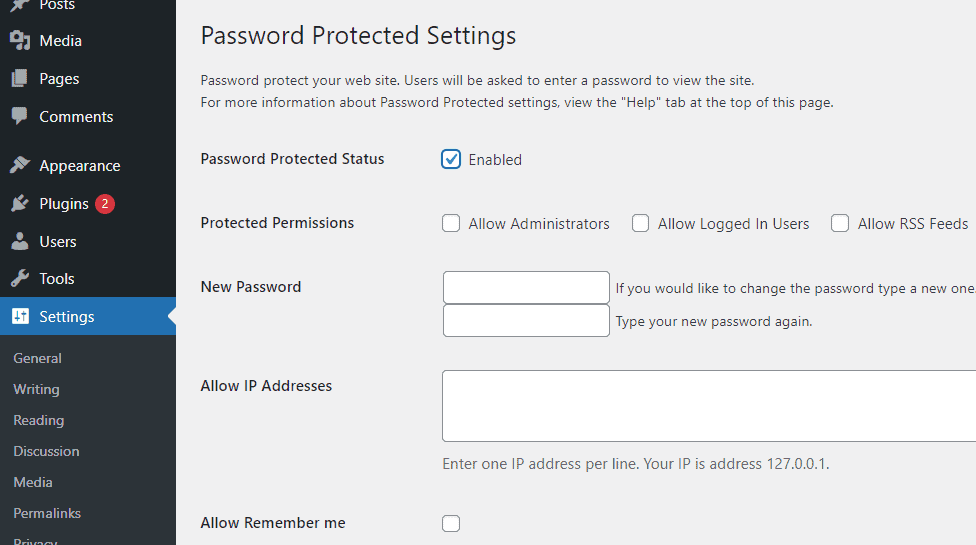
In the box next to Protected Permission, choose whether you like Administrators or Logged in users to access the website without a password.
This plugin also allows you to whitelist certain users and IP addresses.
Once you are satisfied with the settings, click on the Save Changes button to activate sitewide password protection.
Now visit your website in an incognito tab.
You’ll see that your entire site has been password protected.
How to Password Protect a Single WordPress Post or Page: 2 Methods
- Method 1: Password protect a WordPress post or page without a plugin
- Method 2: Password Protect a Single WordPress Post or Page with a Plugin
Method 1: Password protect a WordPress post or page without a plugin
Using the WordPress built-in functionality to password protect content is fairly straightforward.
You won’t have to deal with code or tweak any WordPress core whatsoever.
The following steps will guide you.
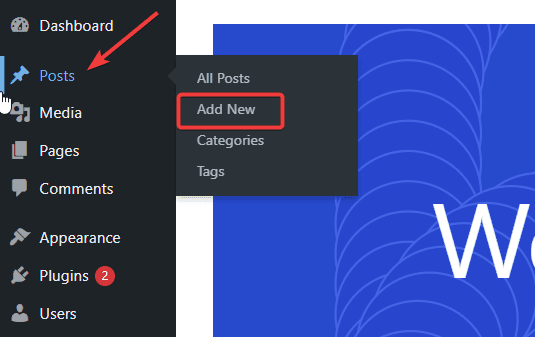
Log in to your WordPress admin dashboard, go to Posts, and select Add New from the option.
This will open the WordPress editor.
Add content to your post with the block editor.
You can learn more about how to use the block editor here.
Once your content is ready, click the Publish button.
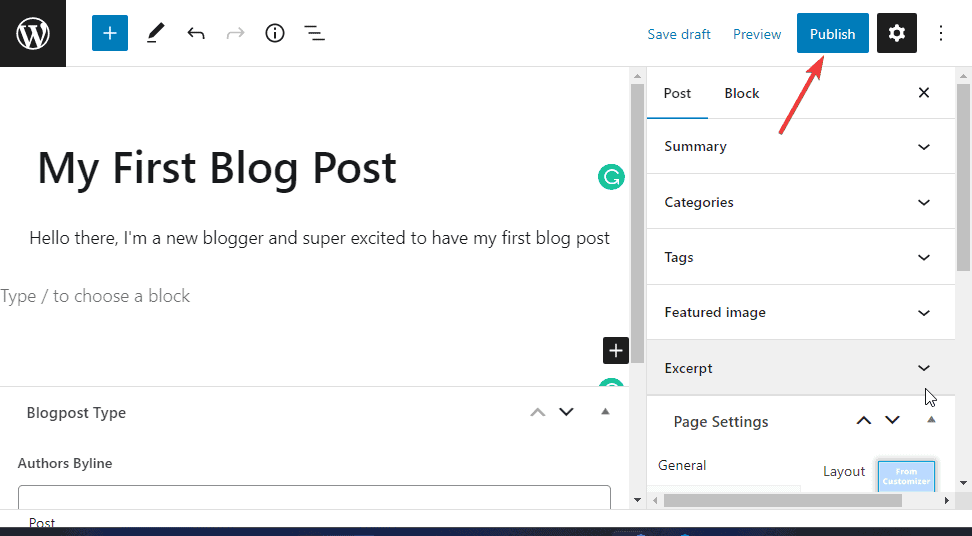
The post Visibility menu will appear.
Click to expand it.
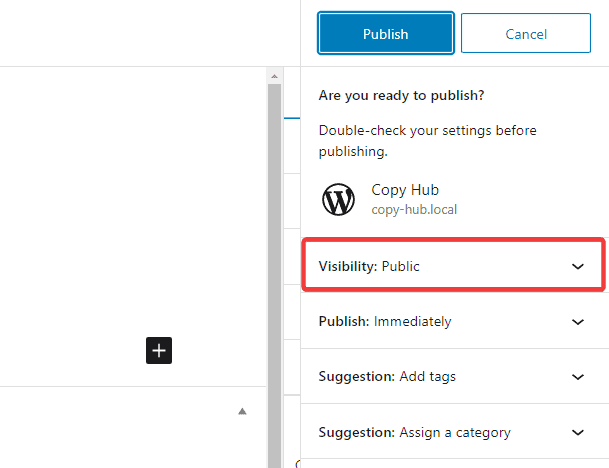
From the Visibility options, select Password Protected then input your password into the available text box and click OK.
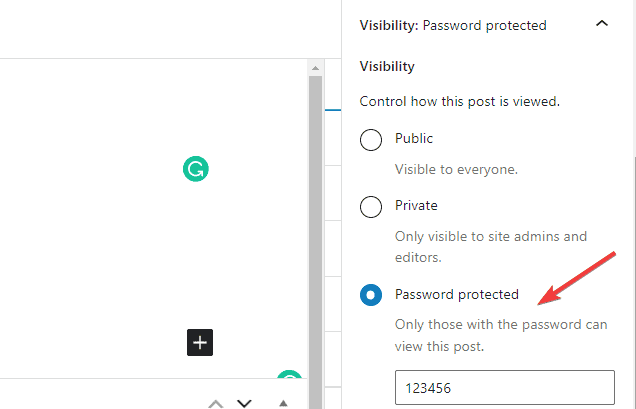
Lastly, click the Publish button to apply the settings.
Visit the published post to see if password protection has been activated.
The page will look like the screenshot below.
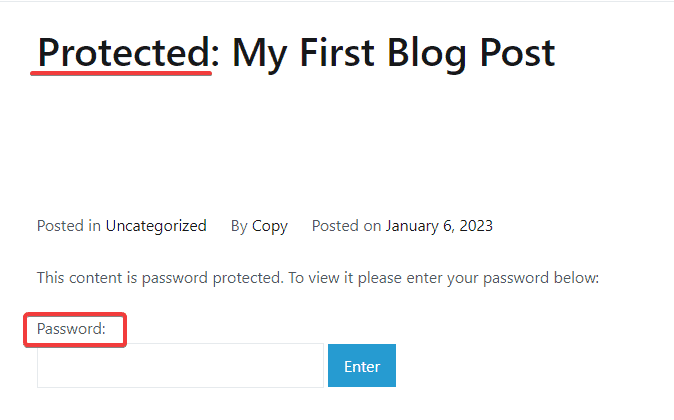
Now when people get to this web page, they must enter the correct password to see the content.
Method 2: Password Protect a Single WordPress Post or Page with a Plugin
The second method to password-protect a page or post in WordPress is to use a third-party plugin.
Unlike the built-in features discussed above which only allows you to password protect and nothing more, a good plugin comes with other verification methods and partial content restriction.
There are many plugins you can try.
For this purpose, we’ll use Passster, a freemium plugin that allows you to password-protect a page, post, area, or entire WordPress site.
To use Passter, you first need to install the Passster plugin from the WordPress official plugin directory.
After installing the plugin, follow these steps;
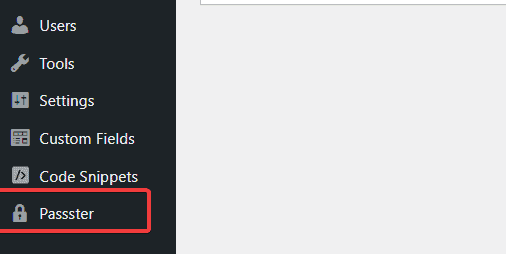
Login to your admin dashboard to activate the plugin.
Activating the plugin will add a new menu, Passster, to the list of menus on your admin panel.
Now that Passster is installed, go to your Post page and click to Edit any post you want to password-protect.
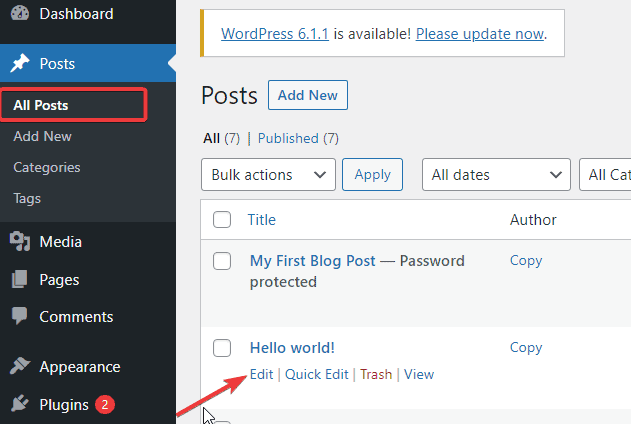
On the editor page, locate Passster (Page Protection) on the right sidebar.
Toggle on the button under it to Activate Protection.
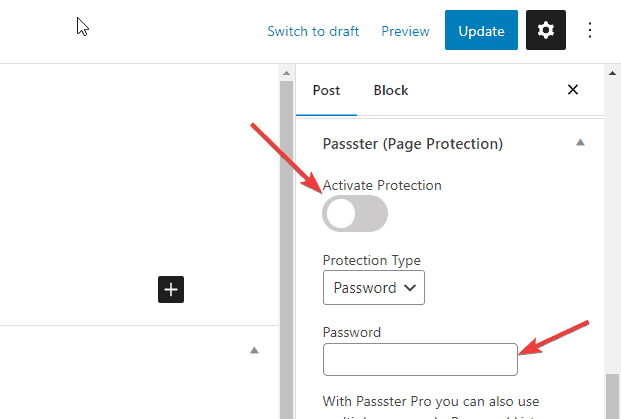
Next, select Password as the type of protection and add your password in the available box.
Once you are done, click the Update (or Publish button for a new post) to apply the settings.
Load the page in another tab to see if password protection has been activated.
You’ll see a page like this.
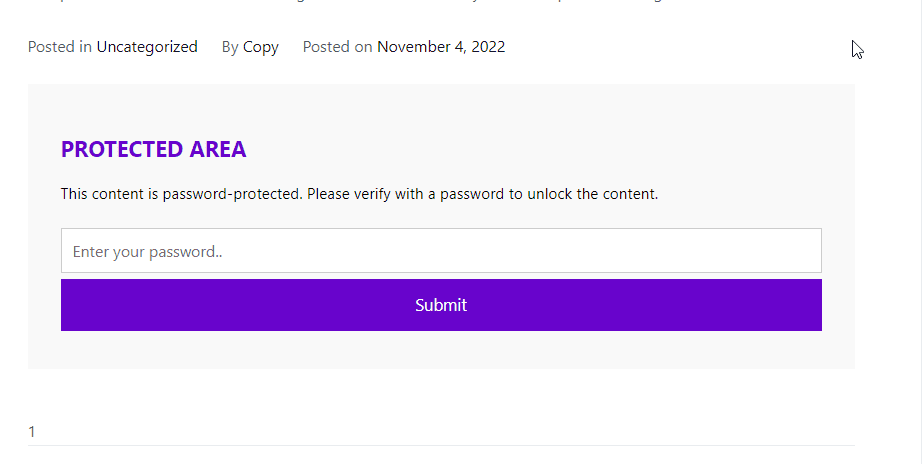
That’s it. You’ve successfully password-protected a WordPress page with a plugin.
People can only access the content by entering the right password.
How to Password Protect a WordPress Category
Instead of password-protecting individual pieces of content, you might want to password-protect all the content on a particular category on your website.
This approach allows you to password-protect multiple pages with a single configuration.
The advantage of this approach is that your users only need to input one password to access all the content in that category.
To add this feature to your website, you’ll need the free Access Category Password plugin.
Although It’s not the only plugin to achieve this feat, it is by far one of the user-friendliest out there.
Let’s show you how to use it.
You first need to install and activate the plugin.
You can get it free from the WordPress directory.
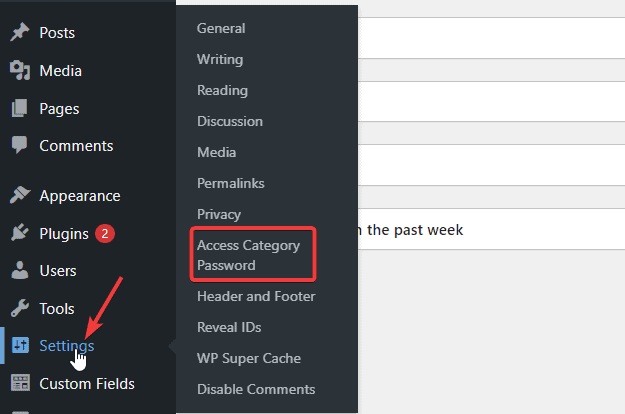
Activating the plugin will add a new settings menu to your dashboard.
Go to Settings, you’ll see Access Category password in the options.
Click to open it.
This will open the plugin Configuration page.
Here, you’ll enter your Password in the Password box.
Check the Impacted Category boxes to select the category to password protect.
You can select as many.
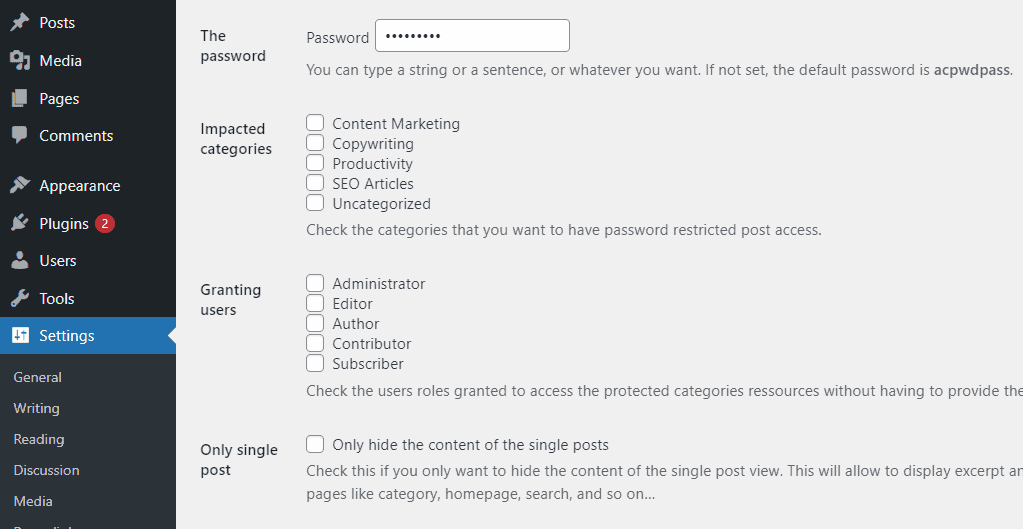
If you like, you can exclude some users from the restriction by using the Granting users checkboxes.
You can also customize a message for your users on the password page.
Use the Info message text box to do that.
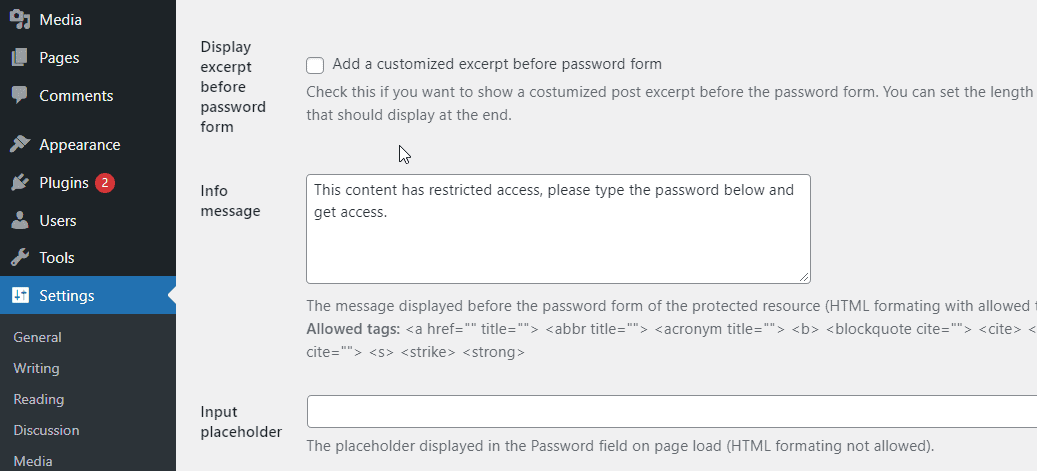
Once you are done, save your changes and that’s it.
You’ve password protected a WordPress post category.
Visitors will have to enter the correct password to access any content under the protected category.
More Helpful WordPress Tutorials:
- How to Block a Website: Want to stop access to a website on your browsers and computer? This guide contains straightforward methods of blocking a website with detailed instructions.
- How to Use WordPress With Cloudflare: Learn how to use Cloudflare protection for your WordPress website. This short guide will help you understand Cloudflare and how to set it up.
- How to Remove Malware From WordPress: Learn about the basics of malware removal in WordPress with the proven methods explained in this guide.
Wrapping up
Password protecting WordPress sites allows you to block the public from accessing the whole or some part of your website.
This functionality comes in handy when you want to;
- Create a private website that’s only available to invited users
- Create a staging environment for testing new features without making them visible to the public.
- Build a private database that is accessible to only your team.
Regardless of the goal you want to achieve, you are now equipped with the knowledge of password-protecting WordPress sites.
Do you find this article helpful?
We’ll like to hear your thought in the comments section below.


