
Are you searching for how to make an image transparent on Canva?
You’re not alone, as the tool to create a transparent background on Canva is a bit hidden.
As an avid Canva user, I also struggled with it at first.
Fortunately, it’s straightforward to edit the background of any image, and we’ll show you how in a few steps.
This tutorial will show you how. Let’s dig in!
Frequently Asked Questions
Can I Remove an Image’s Background on Canva?
Yes, you can remove an image’s background on Canva.
However, it is a premium feature alongside things like magic resize and file compression.
Is Transparent Background on Canva Free?
No, the transparent background on Canva is not free.
You can only access this feature if you’re on either Canva Pro or Canva for X tiers.
You would need to upgrade your account to access this feature.
Removing Background From an Image: What You’ll Need
The tools you’ll need to follow this guide include:
- Canva: Canva needs no introduction. It is one of the most popular and perhaps the best graphic design software on the Internet. You can create different graphics, including images, posters, presentations, videos, and animations.
- Stock photos websites: To practice, you’ll need images. There are multiple free stock photo websites, but our favorite is Unsplash. You can do whatever you want with the images you download on Unsplash under the Unsplash license.
Step-by-Step Instructions on Adding Transparent Background on Canva
There are two scenarios you may need to use the transparent option in Canva.
- The first is when you want to make an image’s background transparent.
- The other is when you want to make one or more element(s) in your design fully transparent or just opaque.
Add a Transparent Background to Your Image on Canva
It’s worth reiterating that you can only do this with the premium version of Canva.
It’s also worth pointing out that the result of using the background remover tool on Canva is not always 100%.
You may need to restore some pixels from time to time.
To remove an image’s background, here are the steps to follow:
STEP 1: Upload the image you want to edit into Canva. You can drag and drop the image to the editing canvas. You can see all the files you’ve uploaded on the left pane.
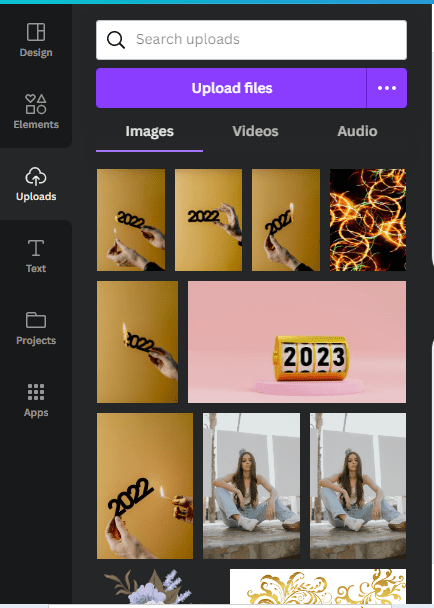
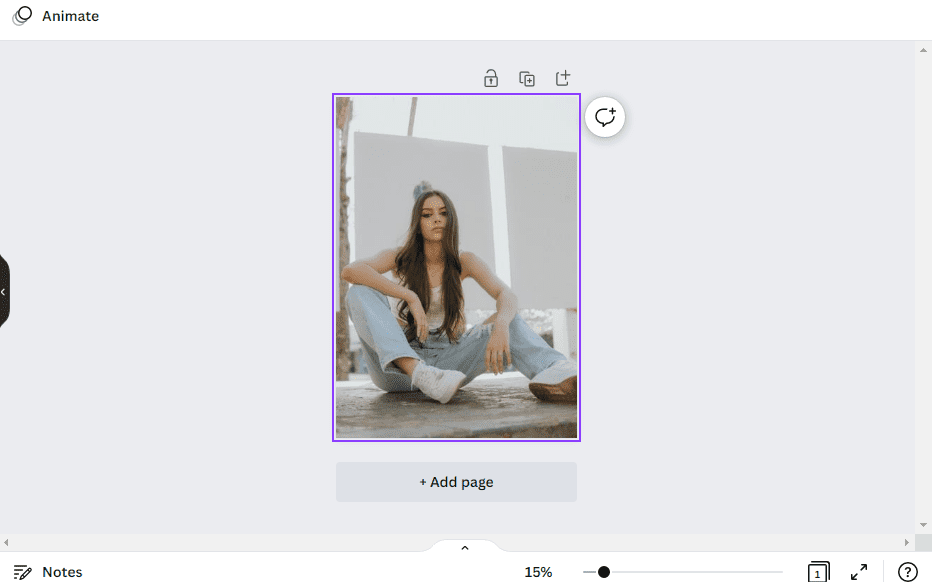
STEP 2: Select the image or drag it into the design canvas.
(Uploaded Photo by Guilherme Caetano on Unsplash)
STEP 3: Next, click on the image to show the “Edit Image” option.
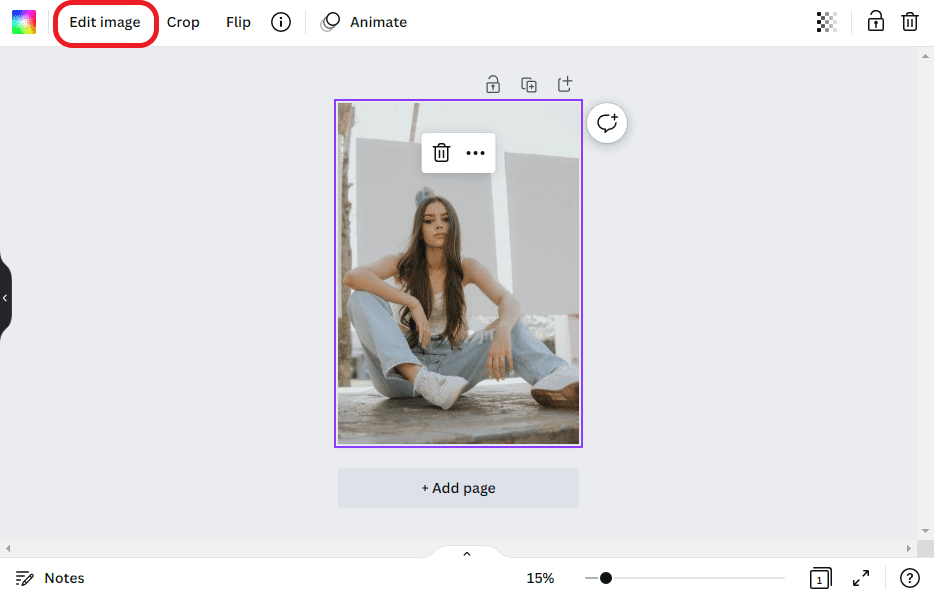
STEP 4: Click “Edit Image” to show the “Background Remover” tool.
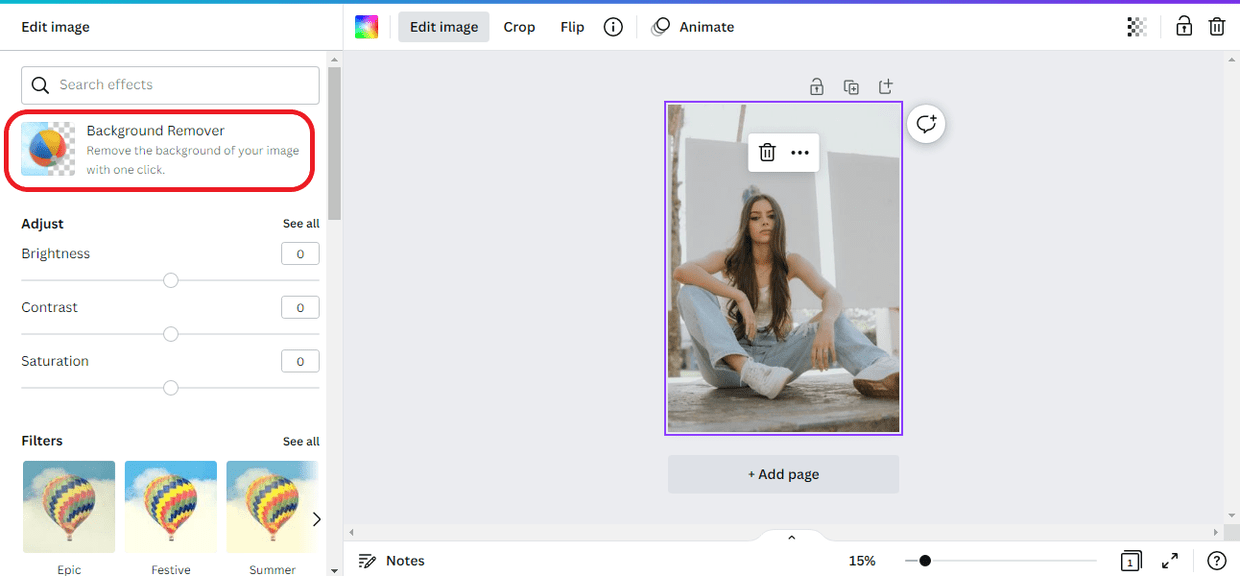
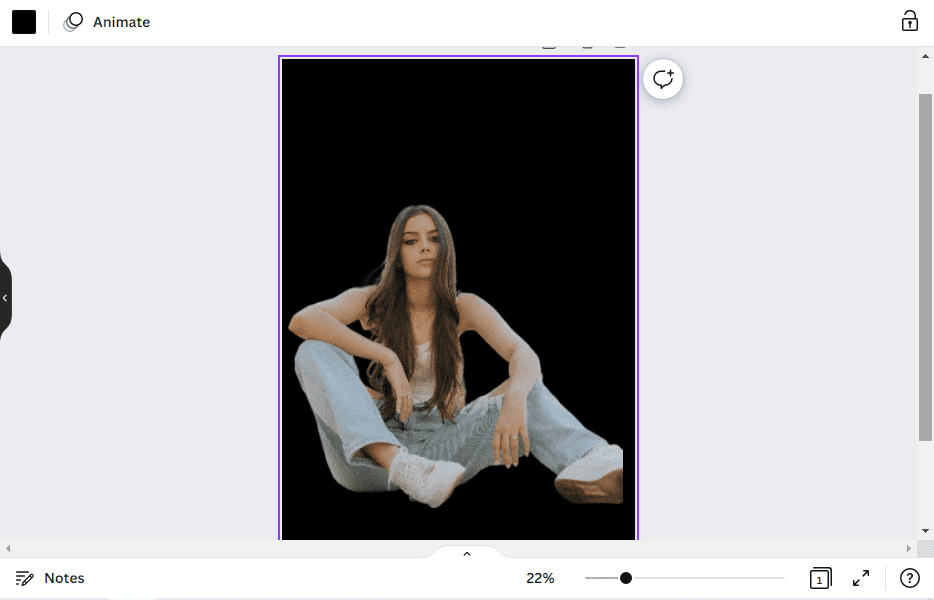
- STEP 5: Click on Background Remover to begin the process of making the image’s background transparent. The background removal may take between 20-40 seconds, depending on your computer hardware. We changed the background to black so you can appreciate how accurate the background remover is.
STEP 6: If the “Background Remover” removes important details from the image, you can restore these details by using the Restore brush (labeled 2).
You can equally use the Erase tool to make the details you don’t want transparent.
Ensure you adjust the brush size (labeled 3) to be as small or as large as the details you want to correct for maximum efficiency.

Make an Element of Your Design Transparent on Canva
You can make some elements of your design fully transparent or opaque, depending on your design needs.
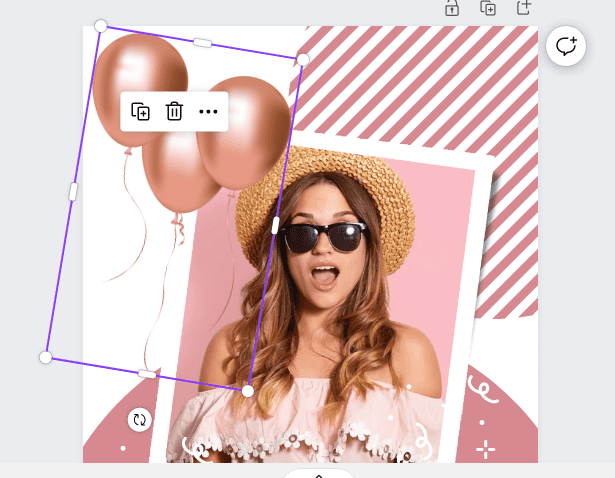
If you were working on the graphics below and wanted to make the balloons opaque, you would follow the steps below.

STEP 1: Select the element you want to make opaque. In this case, it’s the balloons.
When you select an element, it will be surrounded by blue lines, as shown below.
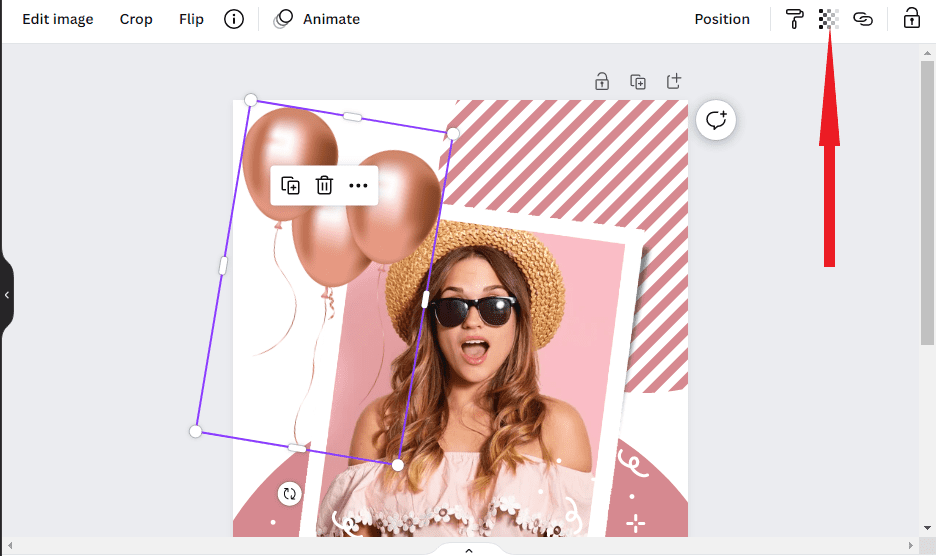
STEP 2: After selecting an element, you’ll see some new features pop up.
The Transparency tool looks like a chessboard. Click the transparency tool.
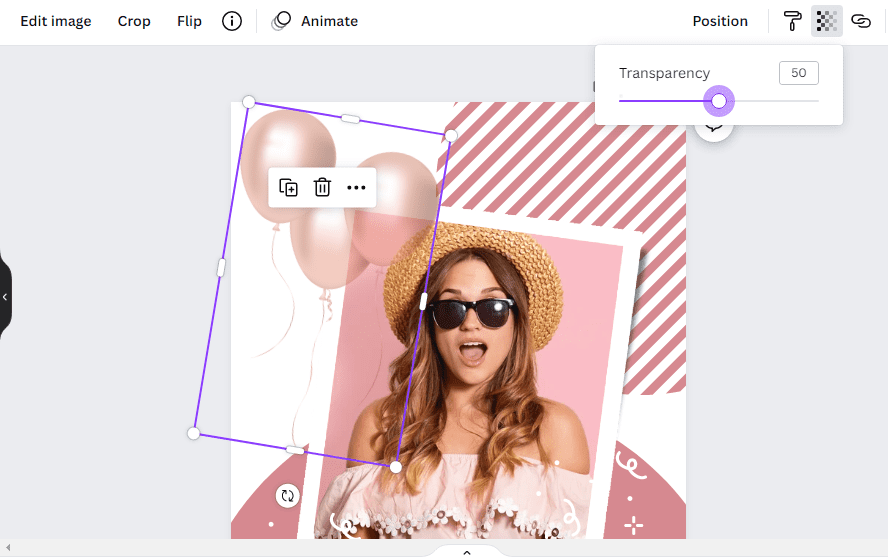
STEP 3: Adjust the transparency tool until you’re satisfied with the opacity level.
No transparency is quantified by 100, and full transparency is quantified by 0.
The image below is with the transparency tool at 50.
STEP 4: Download your image as a PNG (more on this below).
Downloading your Design as PNG
In both scenarios shared above, you’ll need to download the images as a PNG file.
The main reason people make an image transparent is that they want to be able to reuse the image or graphic in multiple places.
Because of this reason, the image will likely be in designs with varying sizes.
Downloading the image in PNG makes it easy to edit without losing quality.
To download an image as PNG, follow the steps below.
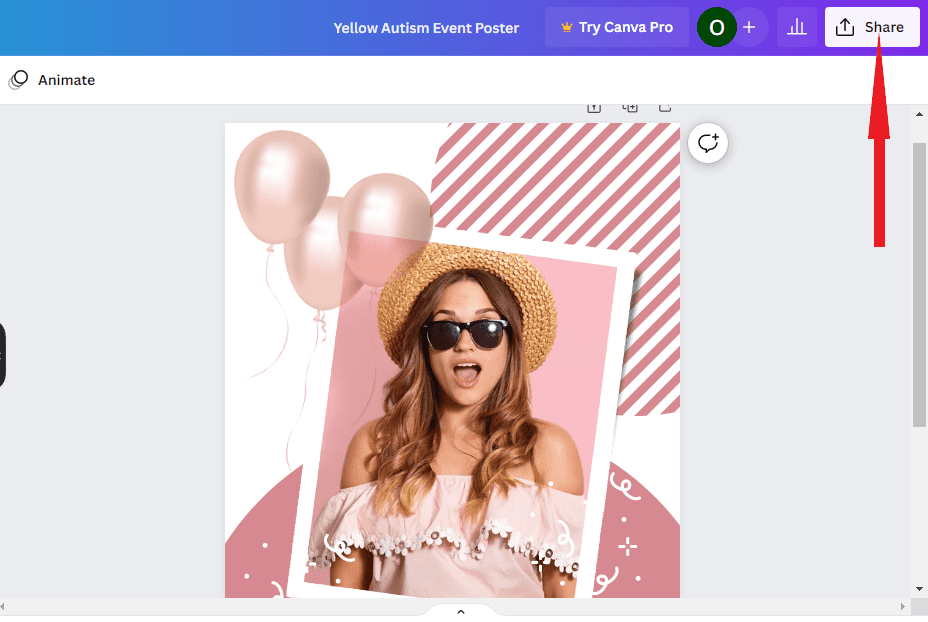
STEP 1: Click the “Share” button at the top right corner of your screen.
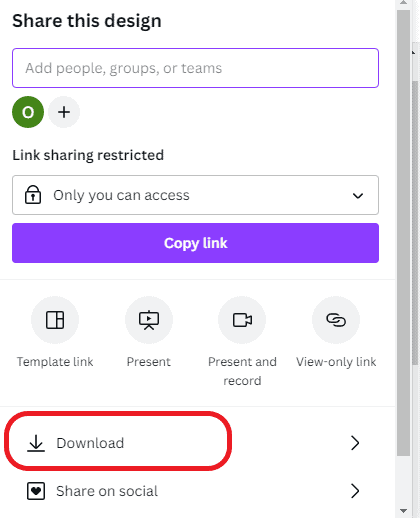
STEP 2: Click “Download” from the mini window.
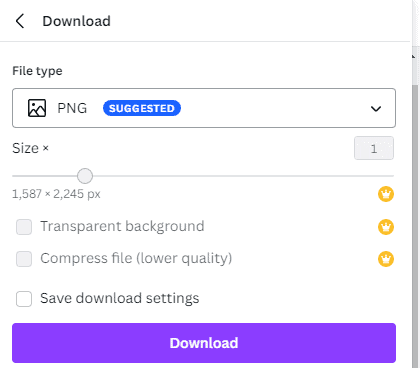
STEP 3: Make sure the file type is “PNG,” then click “Download.”
There are instances where you can select other options.
For example, if you want to share the image with your friends, you may use the “JPG” option.
Also, click the “Transparent background” option checkbox after using the “Background Remover” before clicking download.
Other Tutorials Similar to Adding Transparent Background to an Image on Canva
The tutorials listed below will help you master the different features of Canva.
- How to Draw on Canva: Drawing is a relatively new tool on Canva. This guide will show you when it’s needed and more importantly, how to master the tool.
- How to Use Gradients in Canva: Learn to create an inspired graphic design by blending two or more colors with the gradient tool in Canva.
- How to Curve Text in Canva: This guide breaks down everything you need to know about the curved text generator and how to be creative with it.
Creating Transparent Background on Canva: Summary
Making the background of an image transparent is one of those pieces of knowledge you never know you need till the need suddenly hits you.
Thankfully, Canva makes it easy to remove the background of an image and make an element opaque or slightly transparent, and this tutorial spells out all you need to do.
We hope you enjoyed this tutorial as much as we enjoyed writing it for you.
If you have questions regarding this guide or other blogging-related issues, let’s know in the comments.
We’ll reach out ASAP.


