
Let’s start with why you need lazy loading on WordPress.
When it comes to optimizing WordPress for performance, speed is the first area to look.
If your website takes more than 3 seconds to load, 40% of people will abandon your website.
On top of that, speed is one of the core web vitals used by search engines to rank websites.
So a slow-loading site loses out on traffic as it does on customers. One of the most effective ways to speed up websites is to add lazy loading to WordPress.
This article will show you how to implement WordPress lazy loading and what it means for your website.
- Frequently Asked Questions
- What You’ll Need to Add Lazy Loading to WordPress
- WordPress Lazy Loading
- 3 Methods to Implement Lazy Loading on WordPress
- Method #1: Upgrade WordPress to Version 5.4 or Higher
- Method #2: Add Native Lazy Loading to Browsers
- Method 3: Use a Plugin to Add Lazy Loading to WordPress
- More Helpful WordPress Tutorials:
- Wrapping up
Frequently Asked Questions
Does WordPress Enable Lazy Loading By Default?
It depends on the version of WordPress you are using.
For WordPress 5.5 and above, lazy loading is enabled by default using the native HTML loading attribute, which became a web standard in 2020.
It saves bandwidth on servers and browsers and improves server-side performance.
Is Lazy Loading Good for SEO?
If done right, lazy loading is an SEO practice. You want to make sure search engines can still crawl your lazy-loaded images.
Also, adding Alt text to all your website images is extremely important for search crawlers to access them.
What You’ll Need to Add Lazy Loading to WordPress
- WordPress Admin Access: To use the default WordPress lazy loading feature, you need to upgrade WordPress to a version higher than 5.4. You can do this via the admin dashboard.
- A WordPress Lazy Loading Plugin: Some WordPress SEO plugins allow you to activate lazy loading on your website. We’ll show you some of these plugins and how to use them to implement lazy loading on WordPress.
- Your Hosting Account Cpanel: If you cannot upgrade WordPress from your admin dashboard for any reason, your web host will likely have a solution. Some of the best hosting providers have a one-click WordPress update feature as part of their services.
WordPress Lazy Loading
Before we delve into implementing lazy loading on your WordPress website, it’s good to have an idea of how lazy loading works. And It’s simple.
When a visitor lands on your web page, their browser downloads all the content of the page before displaying them.
The process takes significant time for web pages with many high-resolution visual contents.
Lazy loading is an optimization technique that delays loading images on a web page until the users get to them.
Thus, increasing page loading speed and improving performance.
Now that you understand what lazy loading means and its benefits let’s see how to implement it on WordPress.
3 Methods to Implement Lazy Loading on WordPress
- Method #1: Upgrade WordPress to Version 5.4 or Higher
- Method #2: Add Native Lazy Loading to Browsers
- Method 3: Use a Plugin to Add Lazy Loading to WordPress
Method #1: Upgrade WordPress to Version 5.4 or Higher
The easiest method to add lazy loading to a WordPress website is to upgrade to one of the newest versions.
There’s a default lazy load functionality in WordPress starting from version 5.5.
So upgrading to any of the latest versions means automatically implementing lazy loading on your site.
Updating WordPress is a straightforward process that involves a few clicks in minutes. Here’s how.
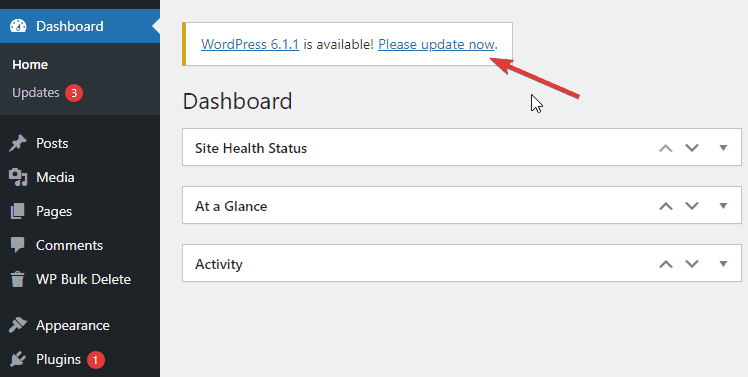
Log in to your WordPress admin dashboard. At the top of the page, you’ll see the latest version of WordPress available.
Click the link that reads “please update now.”
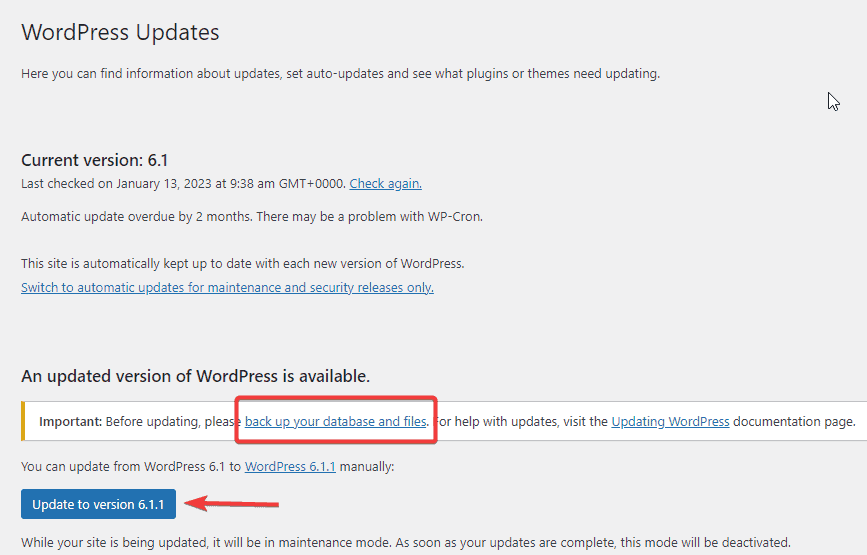
This will open the update page. Make sure you back up your WordPress files and database before you update.
Scroll to the bottom of the page and click the Update to Version X.X button.
WordPress will start updating. Once done, you’ll see a success message and details about the version update on your dashboard homepage.
And that’s all. You’ve activated automatic lazy loading in WordPress.
After updating WordPress, remember to update your themes and plugins to ensure they are compatible with your new version of WordPress.
Check out this guide for more information on how to safely update WordPress.
Method #2: Add Native Lazy Loading to Browsers
Nowadays, browsers integrate lazy load functionality to improve website performance.
This feature is available in popular chromium-based browsers like Chrome, Firefox, Brave, and Opera.
To add native lazy loading to WordPress, you only need to add the <img loading= “lazy”> attribute to the images you want to lazy load.
Doing this one by one can be time-consuming. Luckily, the Native Lazyload plugin developed by Google automates the process.
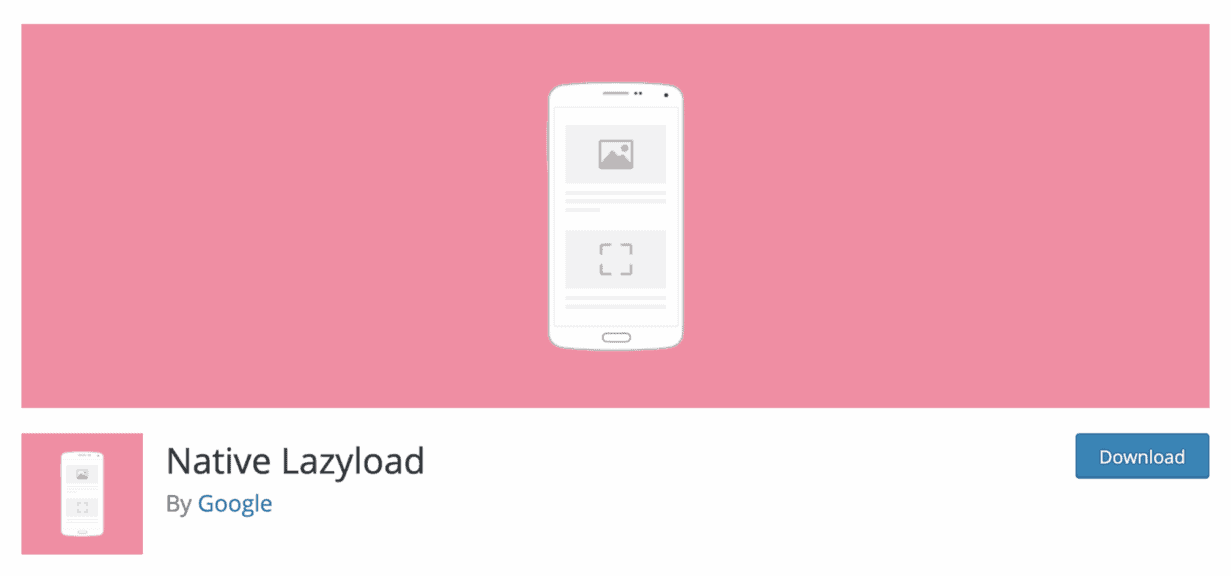
The plugin doesn’t require any configuration.
Once you install and activate it, it automatically adds the lazy load attributes to all images and iframe tags on WordPress.
Method 3: Use a Plugin to Add Lazy Loading to WordPress
While the two methods above are pretty straightforward, they don’t give the flexibility of configuring lazy loading to your preference.
To take control of how lazy loading works on your WordPress website, you need to install a WordPress lazy loading plugin.
There are several plugins you can use to achieve this purpose. We’ll show you 2 of the best and how to use them.
1. a3 Lazy Load
a3 lazy load is a free advanced lazy loading plugin with over 100,000 active installations.
This plugin speeds up website performance by lazy-loading all images, videos, and iframes that are not lazy-loaded by WordPress.
With a3 lazy load, you can altogether disable WordPress Core Lazy Load and configure where and how lazy loading works on your website.
Using a3 Lazy Load plugin to Add Lazy Loading to WordPress Step by Step
a3 Lazy Load is available in the official WordPress plugin directory.
The first step is to install and update the plugin. This guide can help.
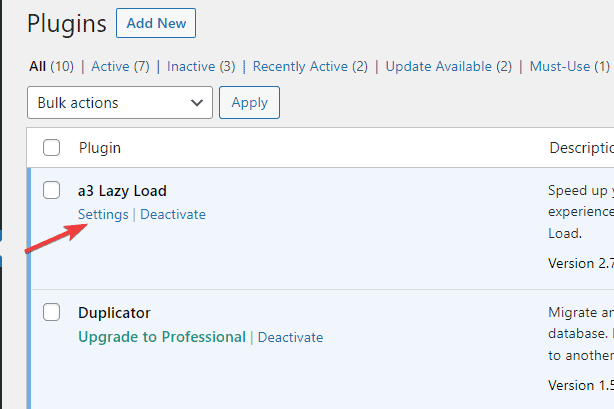
Once you activate the plugin, click on Settings under the plugin.
It will take you to the plugin configuration page, where you’ll customize the plugin functionality.
There are different sections on this page. You have to open each to set them up.
There’s nothing much to do here, just a few radio buttons to toggle.

By default, a3 lazy load will automatically apply to all elements missed by WordPress core lazy load.
Likewise, all the features of the plugin will be activated.
You can later enable or disable any feature. Let’s look at a few.
To disable WordPress default lazy loading functionality, expand the Lazy Load Activation section and Toggle off the WordPress Core Lazy Load radio button.
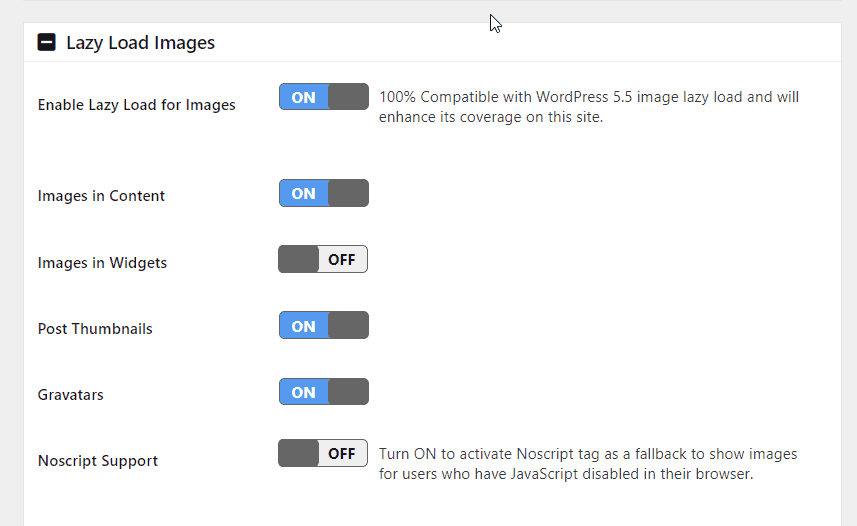
Under the Lazy Load Image section, you can enable or disable lazy loading images in the content.
Widgets, thumbnails, and Gravatars by toggling the radio button next to each.
You can enable lazy loading video content on WordPress from the Lazy Load Videos and iframes section.
Toggle on or off to lazy load video in pages, post content, and in different widget types.
Continue to customize each section until you are satisfied with your settings. Once done, click the Save Changes button to apply your settings.
That’s it. You’ve completed adding lazy loading to WordPress with a3 Lazy Load plugin.
2. Image optimization & Lazy Load by Optimole
Image optimization & Lazy Load by Optimole is a freemium plugin for lazy loading and optimizing WordPress images and videos.
This image optimization plugin helps scale images to fit perfectly to visitors’ screens to enhance the browsing experience.
You can lazy load and optimize up to 5,000 images with a free version.
You’ll need to upgrade to the pro version to get unlimited image optimization. Let’s see how to use the plugin.
Using Image optimization & Lazy Load by Optimole on WordPress Step by Step
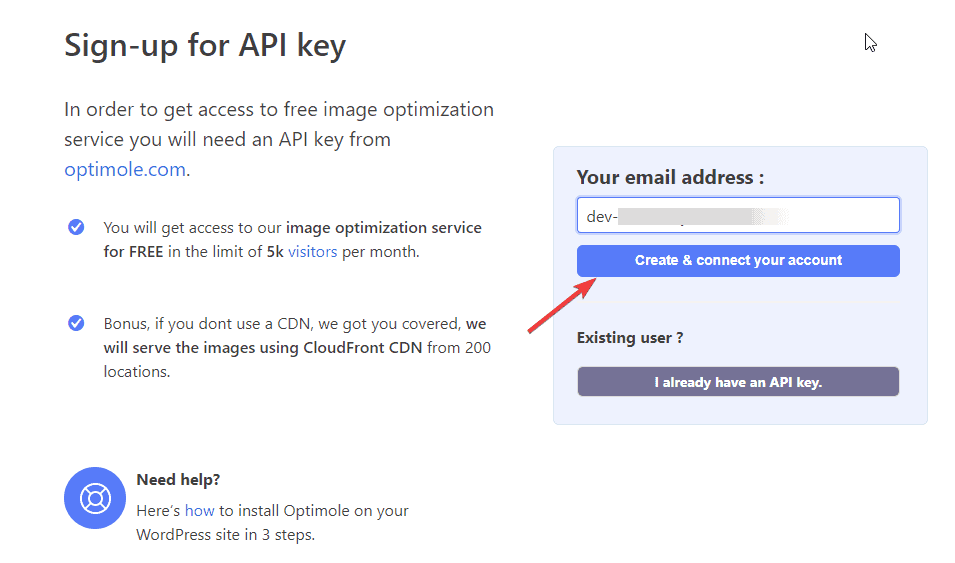
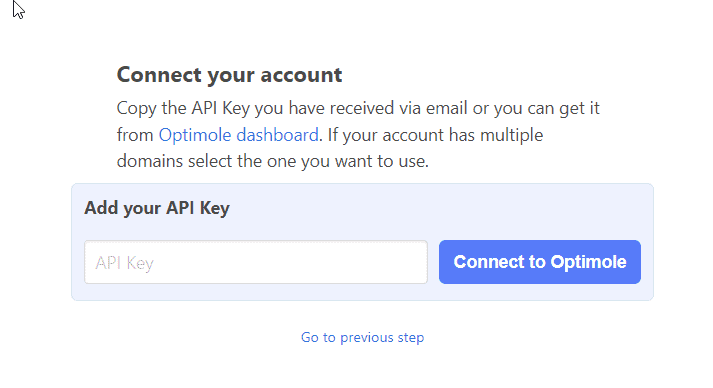
After installing and activating the plugin, you’ll be prompted to Sign up for API key.
Enter your email address and click the Create and connect your account button.
You’ll receive the API key in your email. On the next screen, enter your API key and click the Connect to Optimole button.
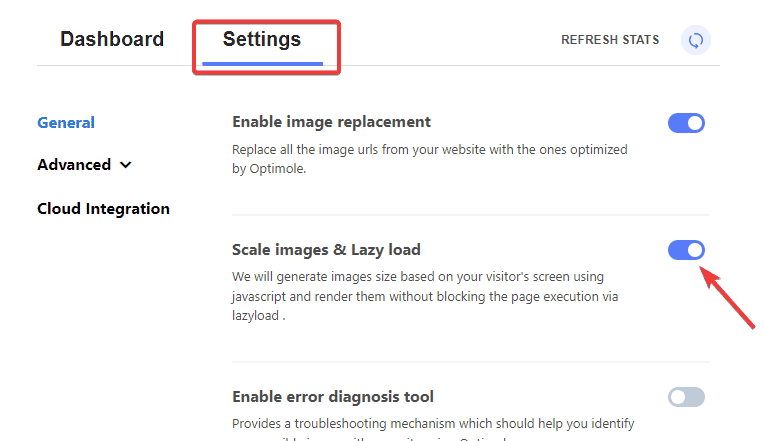
Once you are in, switch to the Settings tabs and toggle on the Scale images & Lazy load radio button.
This feature automatically adapts images to visitor screen sizes and executes lazy loading.
Next, switch to the Advanced tab and choose Lazyload from the menu.
Here you can start customizing your website’s lazy loading behavior.
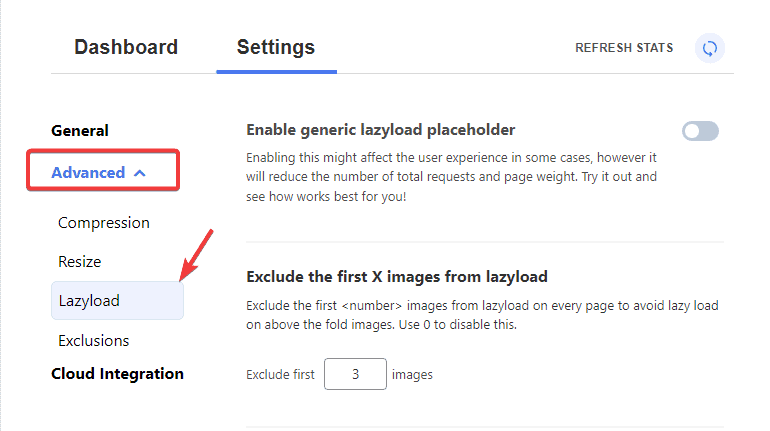
For instance, you can use the Exclude the first of X images from lazyload to disable lazy load for images at the top of the page.
This excellent lazy loading practice ensures images above the fold are always displayed.
If you want to enable lazy load for all images, simply set the value to zero.
You can go ahead to Enable lazy load for background images and embedded videos by toggling on the radio button next to each.
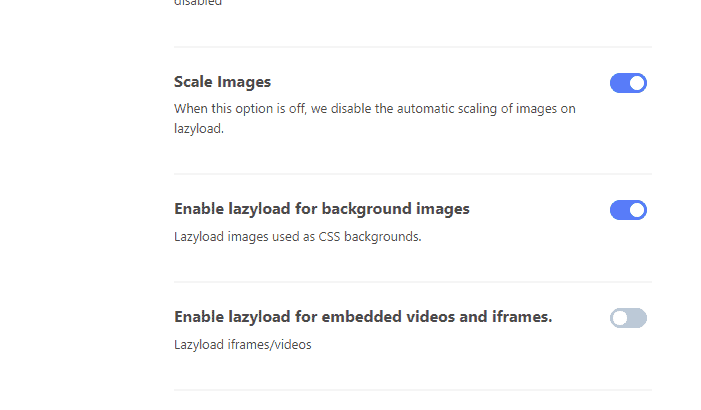
You have a lot to play around with in this plugin.
Once satisfied with your configuration, click the Save Changes button at the bottom.
You can now check your website to see the plugin in action.
More Helpful WordPress Tutorials:
- How to Speed Up WordPress: Want to speed up your WordPress website? There are a million things you can do. This article covers the beginner-friendliest approach to improving WordPress speed.
- How to Resize an Image without Losing Quality: Tired of poorly resized images? Learn tips and tools you can use to instantly resize your images without rendering them blurry and pixelated.
- How to Fix WordPress Maintenance Mode Stuck: When you see “Briefly Unavailable for Scheduled Maintenance” for too long, it means WordPress is stuck in maintenance mode. Fix it with this guide.
Wrapping up
Implementing lazy loading on WordPress minimizes bandwidth consumption, reduces server response time, improves SEO, and improves users’ experience.
While all websites would benefit from lazy loading, it’s crucial for websites with visual-heavy content.
Hopefully, this article will help you enable lazy loading on your WordPress website.
If you are interested in optimizing WordPress images better, check out our image optimization guide for WordPress.
Have further questions? Reach out via the comment section.


