
Are you looking to enable push notifications on your WordPress website?
Push notifications, also known as web push notifications, have become widely accepted by online marketers for drumming up engagement and driving repeat website traffic.
While email marketing remains the most rewarding marketing channel overall, push notification is gradually taking the accolade for the most effective means of driving returning traffic to websites.
From a short clickable pop-up to a rich engagement medium, it has become a potent tool for website owners to retain and convert subscribers to customers.
Adding push notifications to WordPress is quite simple. In this tutorial, you’ll learn how to enable WordPress push notifications step by step.
Frequently Asked Questions
Can Push Notifications Be Automated?
Yes, you can automate Push Notifications.
Once you set up your account with a provider and connect your WordPress website, you can configure what message to automate. For example, you can automate Push Notifications for every blog post you publish.
Also, you can send an automated welcome message to every new subscriber.
What is the Best Way to Add Push Notifications to WordPress?
The best way to add push notifications to WordPress is to use a push notification plugin.
Several plugins make implementing push notifications on a WordPress website a breeze.
In the coming section of the guide, we’ll show 2 of the best push notification plugins and how to use them.
What You’ll Need to Enable WordPress Push Notifications
- Push Notification Account: To enable WordPress push notifications, you first must register your website with a push notification service provider. PushEngage and OneSignal are two of the leading solutions out there.
- Email Address: You need an email address to set up a push notification account with any provider. You can quickly create an email here.
- A Push Notification Plugin: After registering your website with a provider, you need to install and activate their plugins on WordPress to connect your website with the service provider server.
- WordPress Admin Access: You also need access to the admin dashboard to add push notifications to WordPress. You need an admin or super admin WordPress role to have this access.
How to Add Push Notifications to WordPress
When it comes to WordPress push notifications, there’s an abundance of great options to choose from.
However, Onesignal and PushEngage are two of the most sought-after services on the market.
Both companies support Push Notifications on all major browsers, including chrome, firefox, safari, Opera and Microsoft Edge.
On top of that, they offer powerful user analytics and segmentation features to help businesses make informed marketing decisions.
OneSignal has a 100% free plan for unlimited subscribers.
However, PushEngage is a freemium service. You need to upgrade to a paid plan after 200 subscribers. This guide will show you how to add push notifications to WordPress.
Let’s start with OneSignal.
How to Enable WordPress Push Notifications Using OneSignal
- Step #1: Create Your Onesignal Account
- Step #2: Install OneSignal Push Notification Plugin
- Step #3: Connect WordPress to OneSignal with the API key
- Step #4: Customize WordPress Push Notifications
Step #1: Create Your Onesignal Account
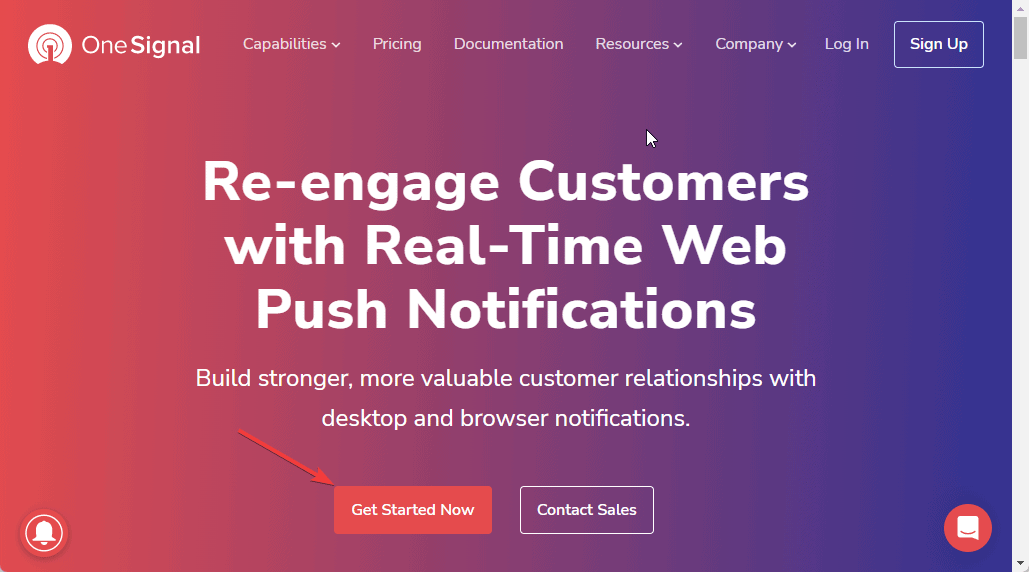
Visit the OneSignal web push registration page and click the Get Started Now button.
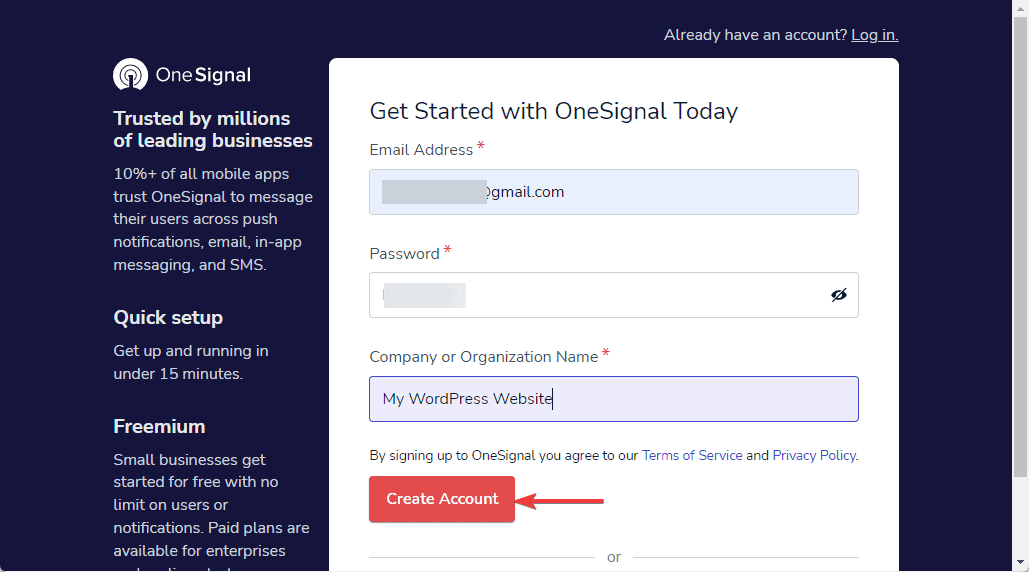
On the next screen, you’ll be asked to provide your Email Address, Password and Company Name.
Enter the required information and click the Create Account button.
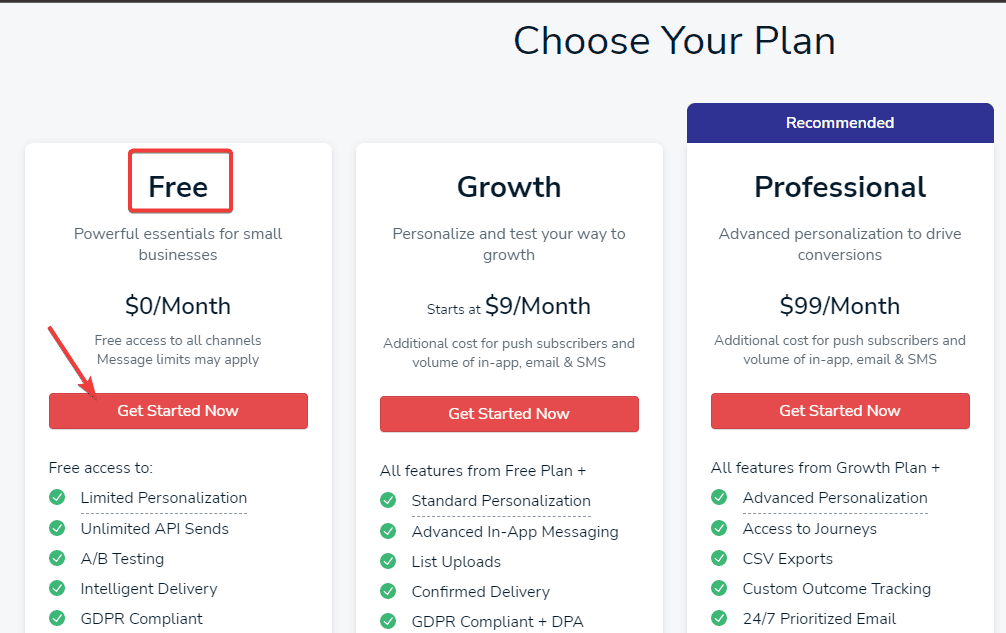
You’ll be prompted to Choose Your Plan. For this tutorial, we’ll select the Free plan.
So click the Get Started Now button under it. You can upgrade to a paid plan later.
Next, you are to verify your email. OneSignal will send you a verification email with the subject Confirmation instructions.
Open the mail and click the Confirm Your Account button.
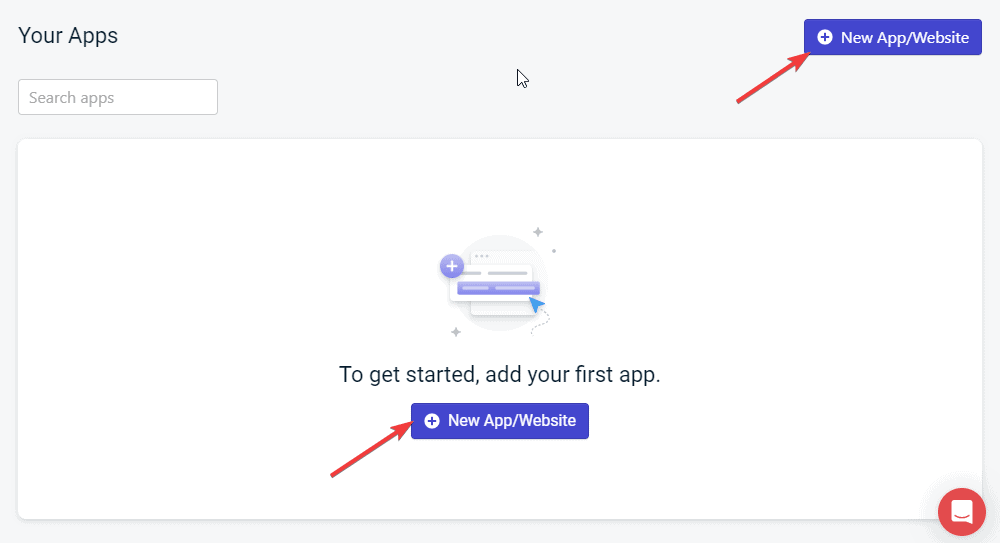
After that, you’ll be taken to your OneSignal dashboard. Click the New app/Website at the centre or top right of the page.
Next, enter your website name and select the push notification type you want to set up.
Here, we’ll select browsers’ push notifications. You can set up others later.
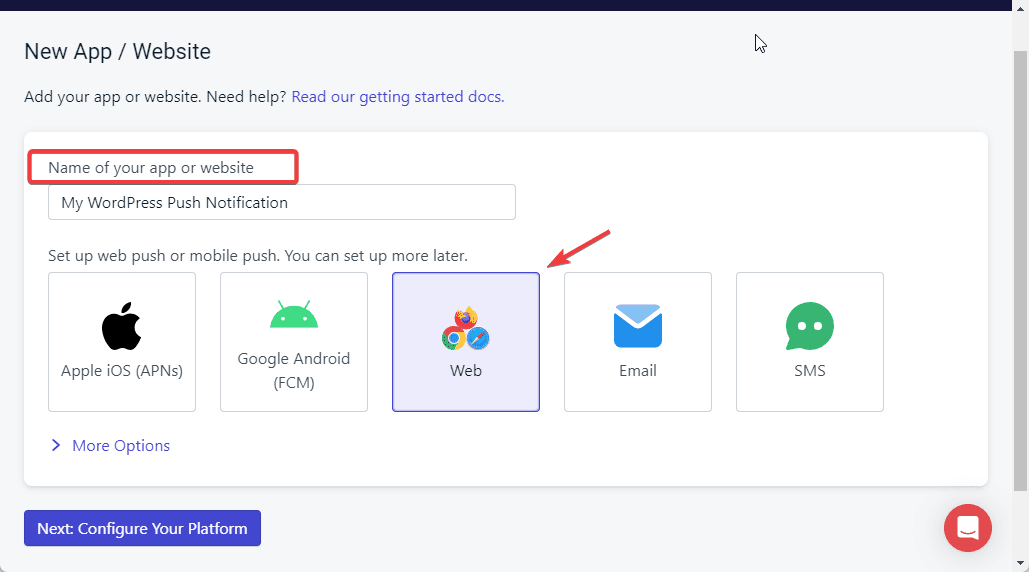
After that, click on the Next: Configure Your Platform button to continue.
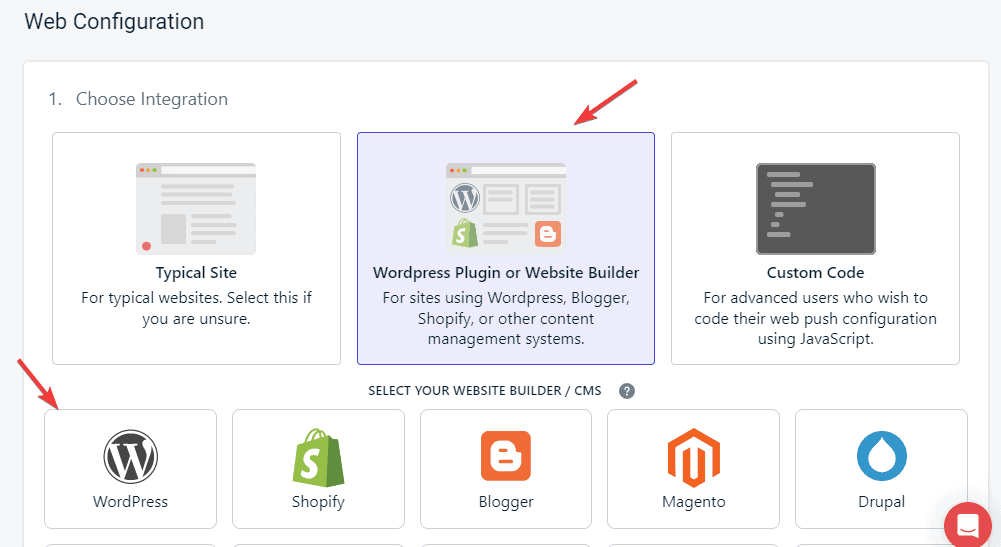
On the Web Configuration screen, choose WordPress Plugin or Website Builder as the integration medium and select WordPress from the list of website builders that pop up.
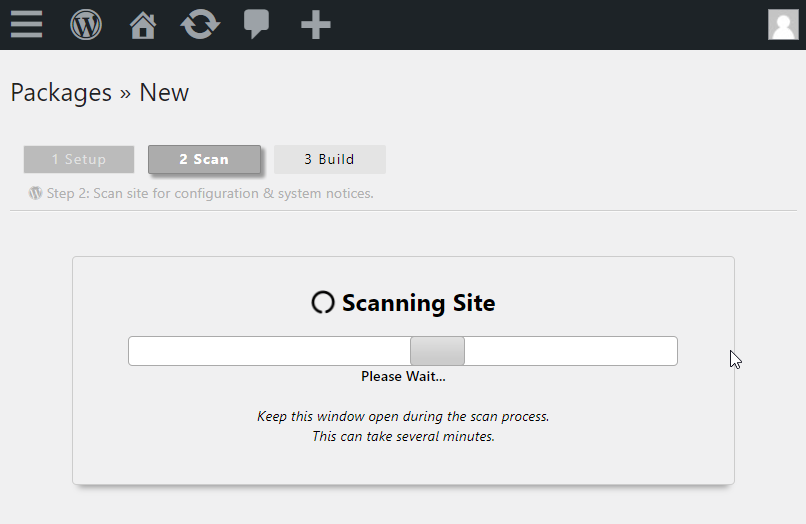
In section 2 of the page, fill out the SITE NAME and SITE URL, i.e. your root domain name, and upload your site icon.
You can use your website logo here. If you don’t upload any logo, your push notification will carry the OneSignal logo.
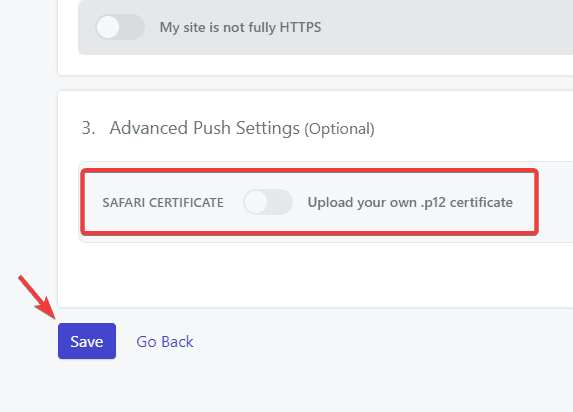
Once you are done, leave the SAFARI CERTIFICATE radio bottom off and click the Save button.
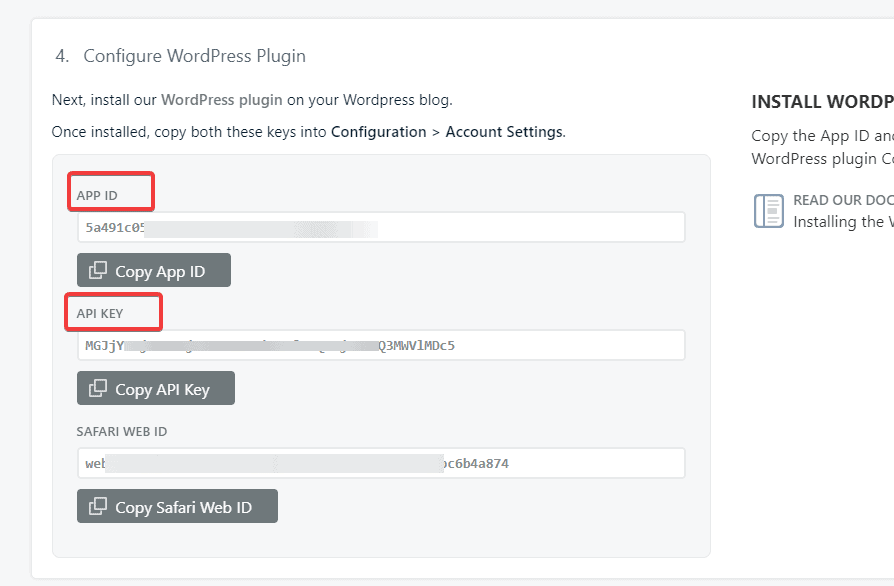
On the next screen, you’ll see your APP ID and the API KEY to connect OneSignal to WordPress.
Copy and paste the ID and the key in a safe place or leave the tab open as you’ll need them in a moment.
So the next step is to install the OneSignal push notification plugin.
Step #2: Install OneSignal Push Notification Plugin
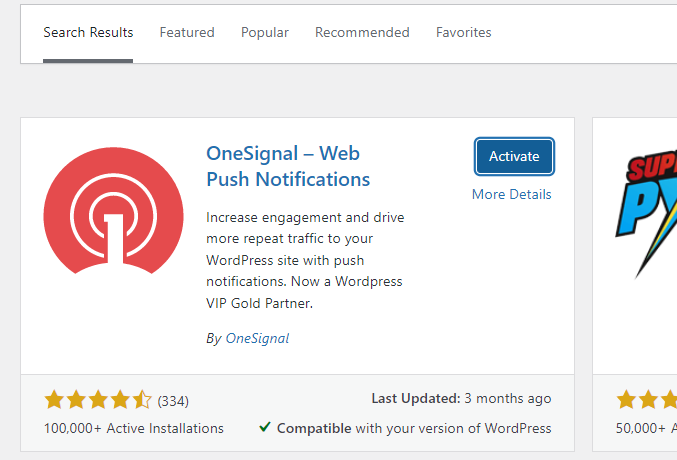
Log in to your WordPress admin dashboard, go to the Plugins on the left panel and select Add New.
Search for OneSignal Web Push Notifications.
Once you find the plugin, click the Install Now button.
Wait for the installation to complete, then click on the Activate button.
If you need help, you can quickly check out our step-by-step guide on installing WordPress plugins.
Now that you’ve installed the OneSignal plugin, the next step is to connect WordPress using the APP ID and API KEY Above. That’s step #3.
Step #3: Connect WordPress to OneSignal with the API key
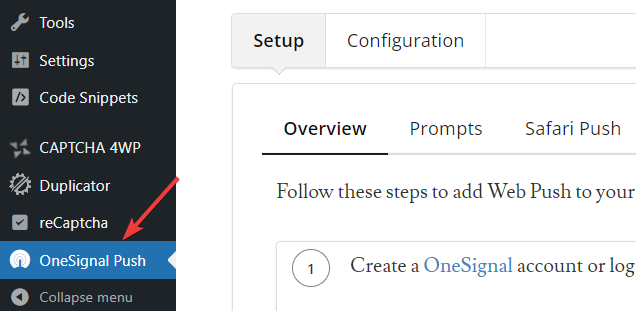
On your WordPress admin dashboard, locate OneSignal Push on the left panel and click to open the plugin configuration page.
Switch to the configuration tab. Under Account settings, toggle on My site uses an HTTPS connection (SSL). Ignore it if your site doesn’t.
Next, enter your App ID and REST API Key into their respective fields.
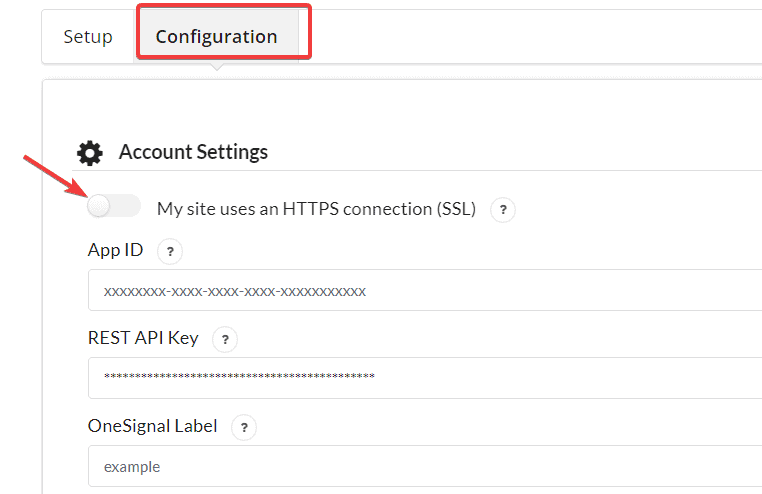
Leave other settings on the page as default for now. Scroll down to the bottom and click the Save button.
And that’s it. You’ve successfully connected OneSignal push notifications to WordPress. Now let’s customise push notifications to your preference.
Step #4: Customize WordPress Push Notifications
Go back to the OneSignal plugin configuration page. There are a plethora of features to play with on this page.
Let’s run through those that concern you the most as a beginner.
Each section on this page allows you to control different aspects of your push notification.
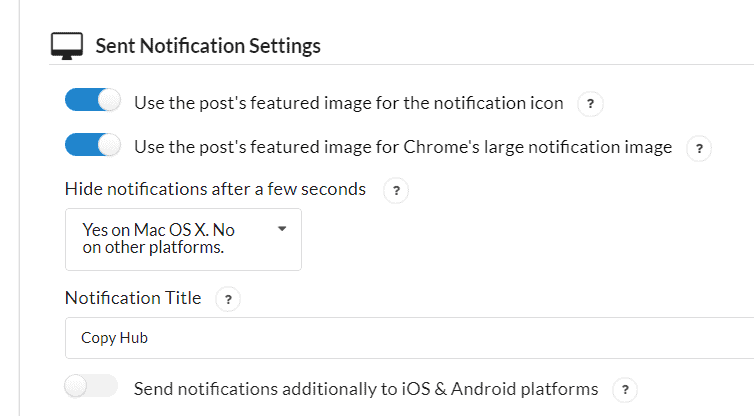
Under the Sent Notification Settings section, you can specify the Notification Title your visitors will see on your push notifications.
You can also enable or disable featured images as notification icons for posts.
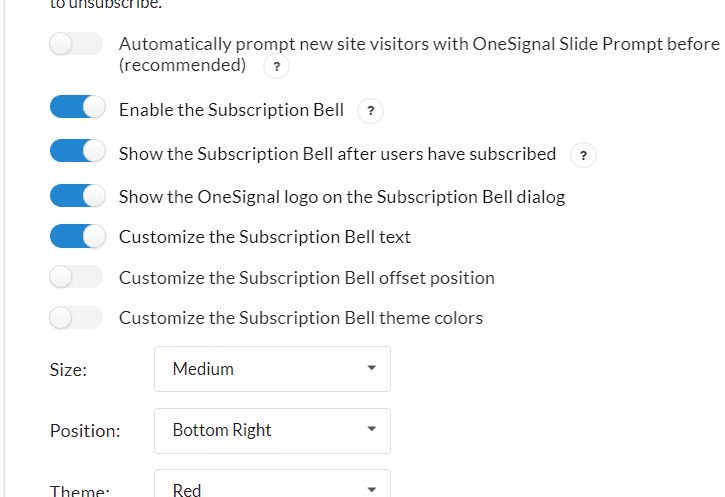
You can use the Prompt Settings&Subscription Bell to control how your users are prompted to subscribe.
For instance, you can automatically prompt new site visitors and customise subscription bell text, theme and colour.
Under the Automatic Notification Settings, you can enable automatic push notifications for every blog post you create in the WordPress block editor.
Likewise, from a third-party plugin.
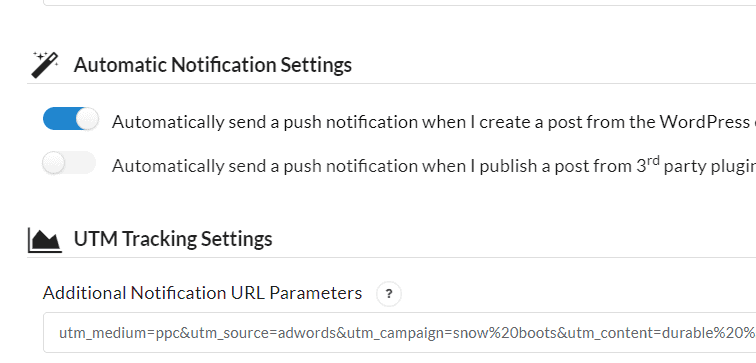
You have a handful of other features and settings to check out.
Once satisfied with your configuration, always click the Save button at the bottom to apply your changes.
And that’s all. You’ve successfully enabled WordPress push notifications.
Now you can browse your website to confirm that push notification works as you configured it.
How to Enable WordPress Push Notifications Using PushEngage
The second push notification solution we’ll show you how to use is PushEngage. Here are the steps involved.
- Step #1: Set up Your PushEngage Account
- Step #2: Install PushEngage Web Push Notifications Plugin
- Step #3: Configure Your Push Notification
Step #1: Set up Your PushEngage Account
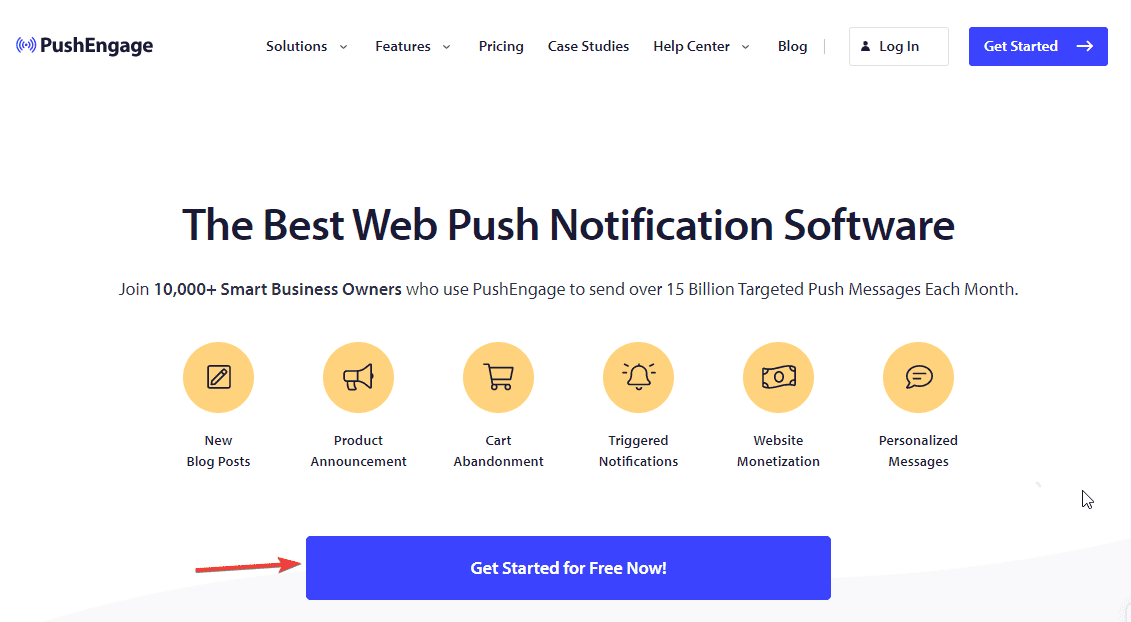
Head to the PushEngage website and click the Get Started for Free Now button.
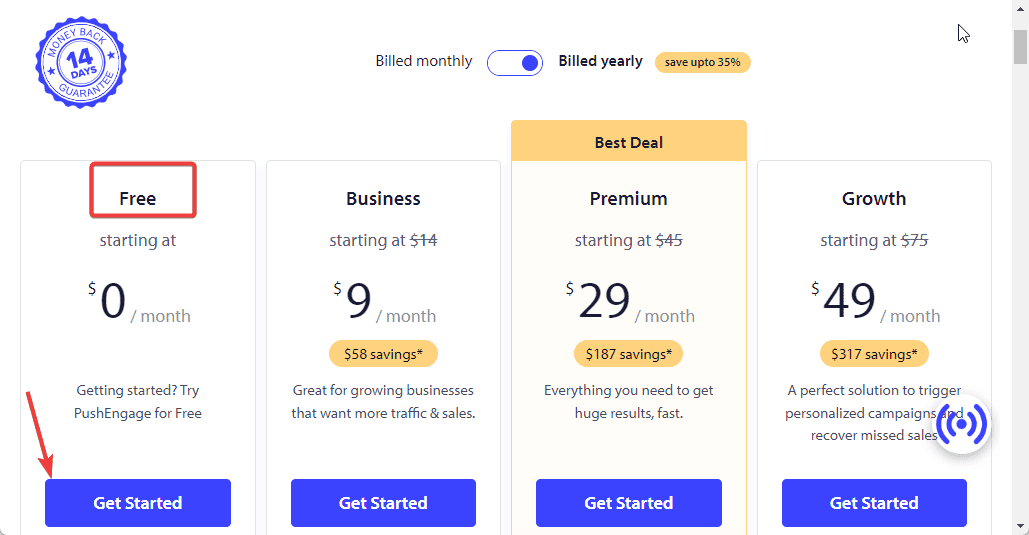
Next, select a plan that best suits your need. We’ll select the free plan for this tutorial.
The free plan allows up to 200 subscribers and 30 notification campaigns monthly.
That should be enough to get you started. You can upgrade when you have more subscribers and need more campaigns.
So, we’ll select the free plan by clicking the Get Started button.
Next, you’ll Create Your PushEngage Account.
Enter the required information and click the Set up Your Account button.
Alternatively, you can register with a Google Account.
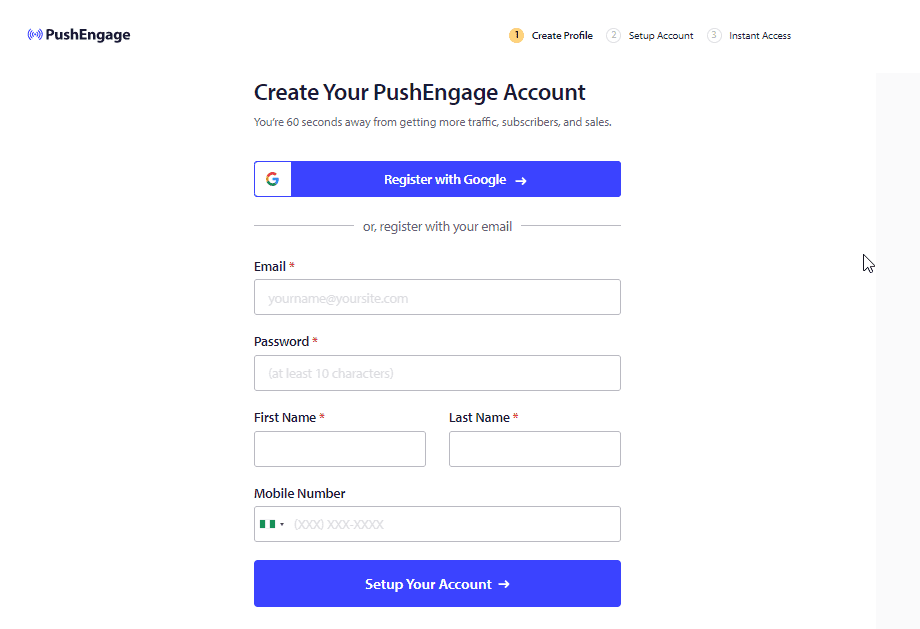
Next, enter your Website Address and follow the on-screen instructions to complete your registration.
Once your account is set up, you’ll be automatically taken to your PushEngage dashboard.
Here, you’ll see some tasks you must complete before you can add push notifications to WordPress.
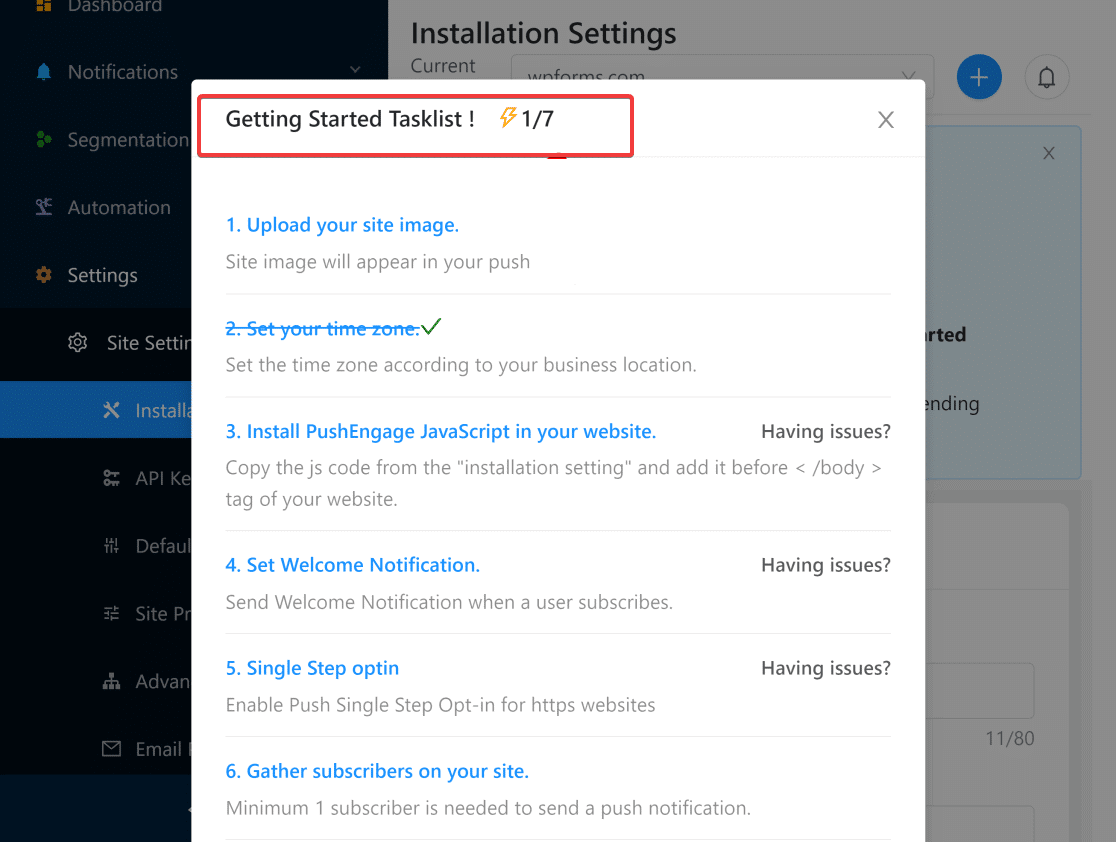
Complete these tasks to get access to the PushEngage service.
Once you complete the task, navigate to Settings> Site Settings > API Keys and click the Generate a new API key button.
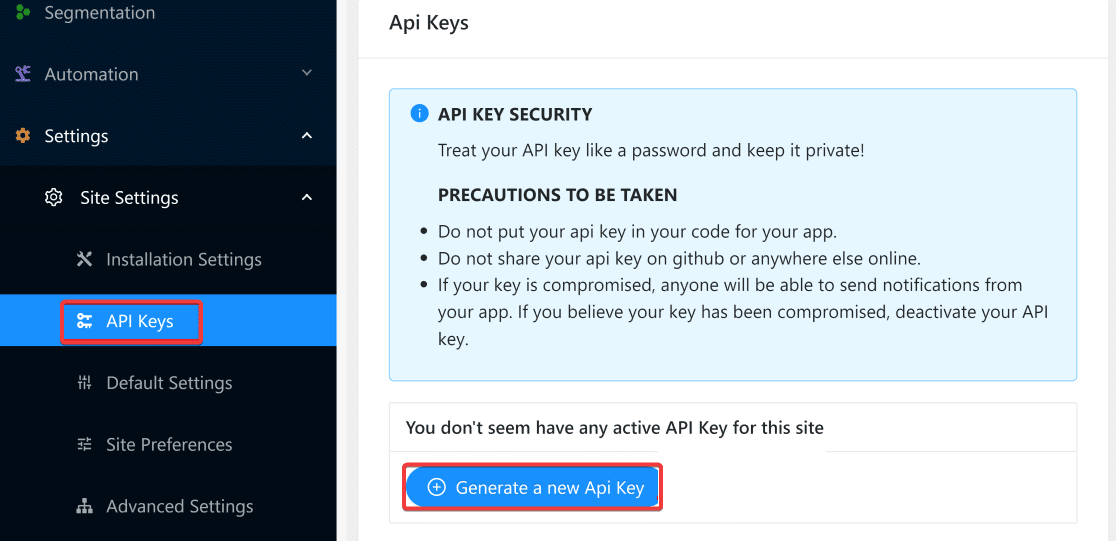
You should see your API key on the next screen. Copy it or leave the tab open. You’ll need it in the next step.
Step #2: Install PushEngage Web Push Notifications Plugin
Log into your WordPress dashboard, go to Plugins and select Add new from the options. In the plugin search box, enter PushEngage.
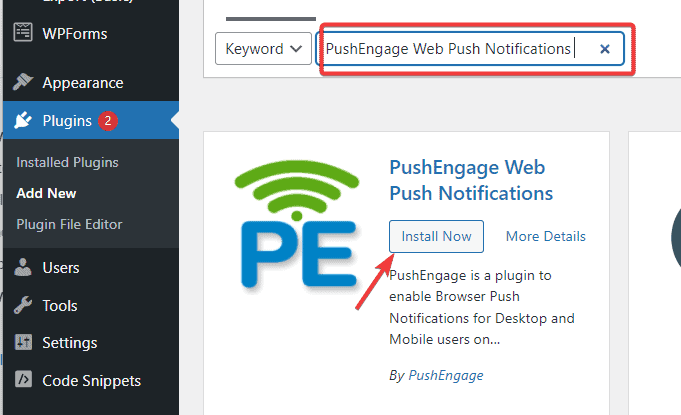
Once you find the plugin, click on the Install Now button.
After installation, the same button will turn to Activate. Click on it to activate the plugin.

Once you activate the plugin, locate PushEngage on the left panel of your dashboard and click to open it.
On the resulting page, switch to the Setup tab. Next, you’ll be asked to Enter Your API Key.
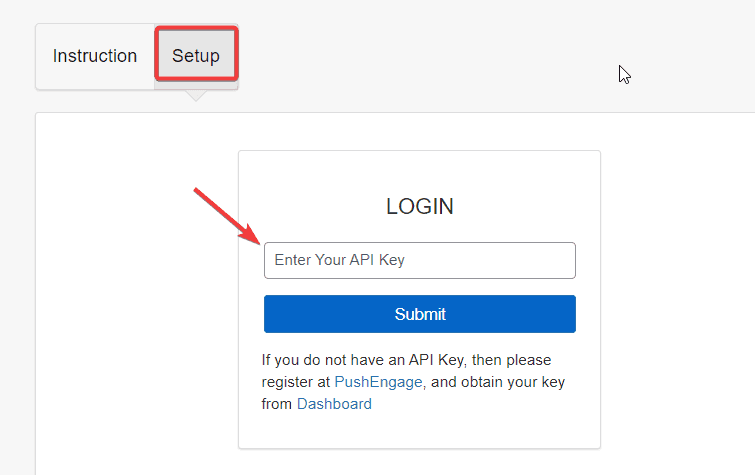
Paste the API key and click on the Submit button.
Done! You’ve successfully enabled WordPress push notifications using the PushEngage API. The next step is to configure your push notifications.
Step #3: Configure Your Push Notification
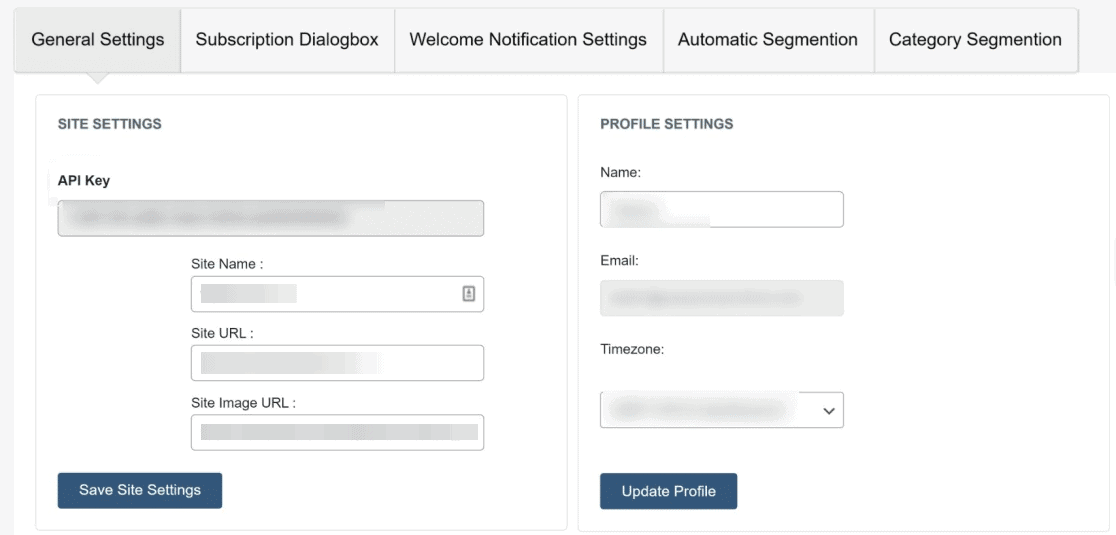
After connecting your WordPress website to PushEngage, you should see the PushEngage general settings page that looks like this.
You’ll need to go through each of the settings to select what you want on your website.
Under General Settings, you’ll first see the Site Settings and Profile Settings.
Confirm that the information on this page is correct or update them.
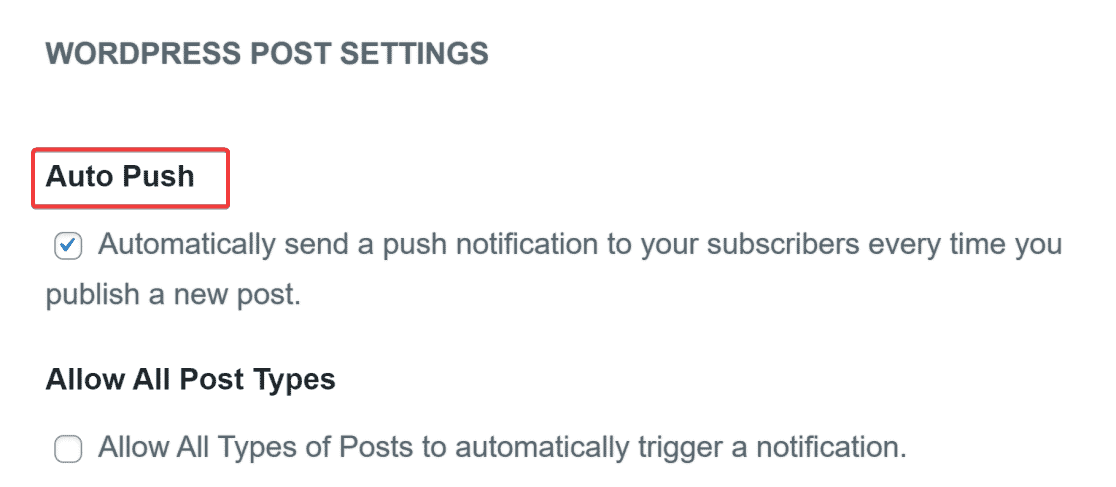
You’ll find the WordPress post settings sections if you scroll down.
By default, PushEngage will send push notifications to your subscribers whenever you publish a new post.
You can disable this feature by unchecking the Auto Push box. There are also other settings with self-explanatory comments on the page.
It’s also possible to add UTM parameters to track how users interact with your push notifications.
Next, use the Subscription Dialoguebox to customise the appearance of the subscription dialogue box and notification request.
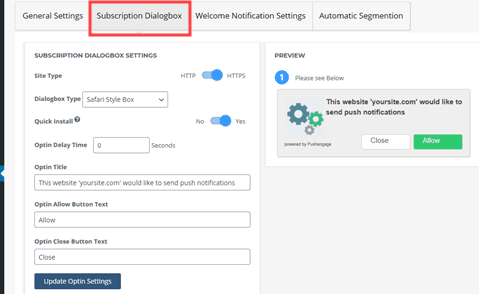
You can choose the type of notification dialogue box, set the opt-in delay time, the default message text as well as the text of the button.
You’ll see the effect in the preview window on the right as you do.
After that, you can go to the Welcome notification Settings tab to set up your welcome notification title, message and URL.
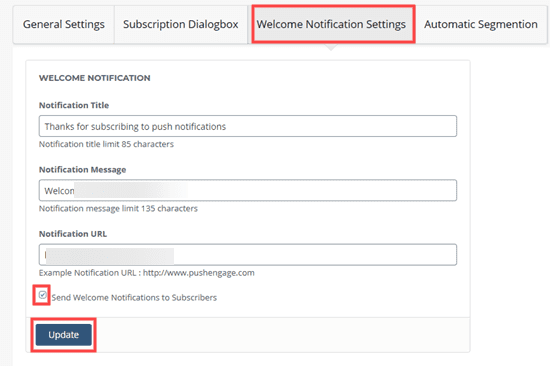
Once you are done, click the Update button to apply your settings.
Finally, you should test that your push notification is working.
So visit your website on a new device or an incognito tab.
You should see a dialogue box asking for your permission to send push notifications.
Once you see that, you’ve successfully added push notifications to your WordPress website and can start sending push notifications to your subscribers.
More Helpful WordPress Tutorials:
- How to Use Schema Markup With WordPress: Do you want to add schema markup data to your WordPress site but need help figuring out how? This article explains in depth what schema markup is and how to add it to WordPress.
- How to Launch a WordPress Site: Do you want to know how to launch a WordPress site easily without wasting a lot of time and money? Then, check out this fluff-free tutorial for answers to all your questions.
- How to Submit a Website To Google: Is your website or any webpage not appearing on Google SERPs? Learn to manually submit your website to Google and fast-track indexing and ranking.
Wrapping up
Now you see it. Enabling WordPress push notifications is a walk in the park.
We’ve shown you 2 push notification solutions and how to use them to add push notifications to your WordPress website.
If you’ve been looking for ways to grow website traffic and increase engagement, you should try push notifications. Let’s leave you with 3 push notification best practices.
- Too many push notifications will push subscribers away. Keep it moderate.
- Brevity and clarity make push notifications more engaging and actionable. Avoid heavy texts and design overkill.
- Don’t do it for the sake of it. Instead, set clear and measurable goals for your push notifications.
Do you find this article helpful? Let us know in the comment below.
Meta Description: Push notifications effectively increase website traffic and customer engagement. Learn how to enable WordPress push notifications in under 5 minutes.


