
WordPress is the leading webpage creator platform in the world.
With an abundance of themes and plugins to choose from, it allows users to build a website from the ground up and to their specifications.
But, to manage a site, you need to know where and how to use WordPress to the fullest.
In this article, you’ll find out everything you need to know about the functionality of the WordPress Admin Dashboard, how it works, and the options available.
What Is the Admin Dashboard?
The Dashboard is a control panel for your website that allows you to create and manage all your website’s content, add and remove plugins, change themes, and a lot more.
After installing WordPress and logging in, you’ll be greeted by the Dashboard, which is always the starting point for all your WordPress projects.
How to Log Into the WordPress Dashboard
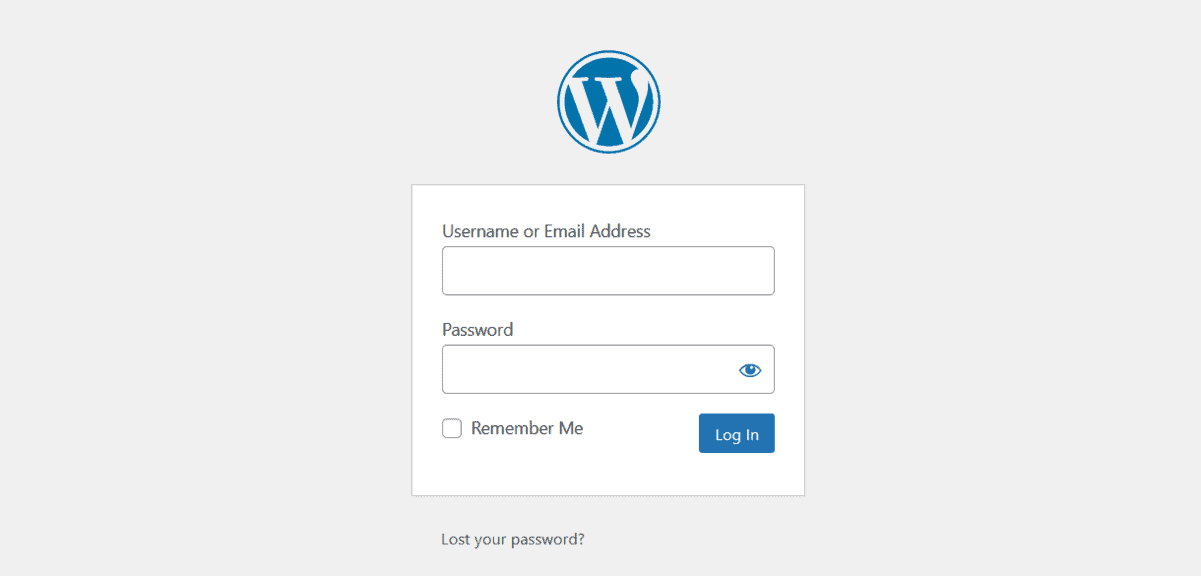
There are two different ways to log into the WordPress dashboard – using a username and password, and using a direct link.
For most WordPress setups, you’ll use a username and password, unless you’re using a third-party security plugin that offers access via direct link.
WordPress Login via Username-Password
This is the default method to log in to your WordPress dashboard.
Follow the steps outlined below to log in through this method:
1. Navigate to your WordPress login page
To log in you first need to navigate to the login page of your WordPress website.
You can do so either by directly firing the login URL from your computer’s address bar.
Or else, you can also click a Login link on your website (if it’s included in the footer or some other place).
This will be essential after you’ve moved from WordPress.com, because you may face difficulty remembering the new login URL.
Therefore, we’d suggest that you don’t remove this link from the footer.
2. Enter your WordPress username and password
Once you’re on the login page of your WordPress dashboard, you need to enter your username and password.
Keep in mind that the password is case-sensitive while the username is not.
If you’re logging in from your personal computer, you can also check the ‘Remember me’ checkbox so you are not asked to enter these details repeatedly whenever you want to visit the dashboard.
But keep it unchecked if you’re using a public computer.
Otherwise, someone else may be able to access your dashboard after you’ve left the computer.
3. Save your login credentials
Web Browsers also provide a method nowadays to help you log in easily.
They ask you to save your login details in them so they can be entered automatically the next time you want to log in.
If you do this, it would ensure that you never again have to enter your login details manually. Your choice!
4. Hit ‘Log in’
That’s it — hit the Log in button now, and you’ll be taken to your WordPress dashboard if your username and password combination was right.
Once you’re logged in to your dashboard, what you see will be based on your WordPress role.
If your username and password combination was wrong, and you get an error message, you need to verify your credentials and re-enter them to try again.
WordPress Login via a Direct Link
Some web hosting service providers also allow you to log in to WordPress via a direct link.
cPanel, Bluehost, Hostinger, and many others allow you to access your WordPress dashboard with the click of a single button or link.
The exact process to log in through this method varies across different hosts.
However, it always requires logging in to your Hosting dashboard first to authenticate your identity.
Given below are the links to some articles explaining this method of logging in on some of the popular hosting service providers:
- Direct link login through Bluehost dashboard
- Direct link login through Hostgator
- Direct link login through cPanel
- Direct link login through Godaddy Managed hosting dashboard
Troubleshooting: I’m getting the “Username or password is incorrect” error. What’s wrong?
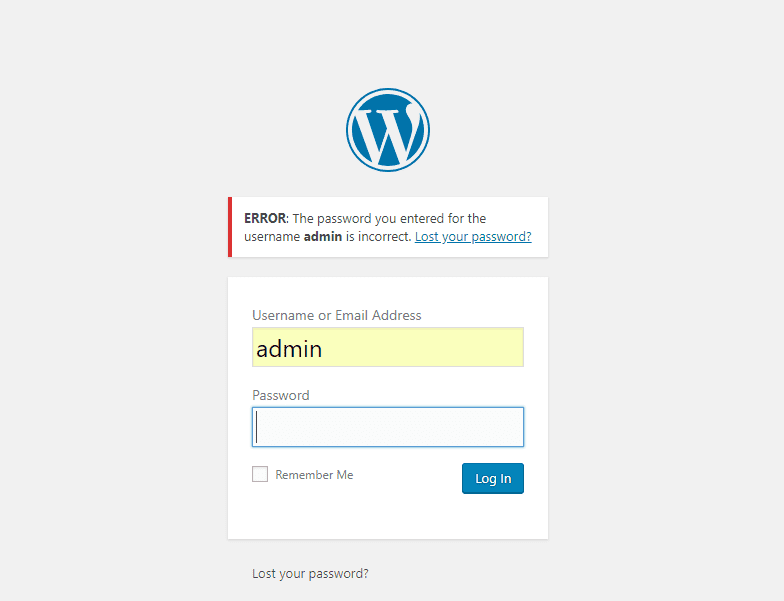
If you’re getting this error then as it says, the password you entered is incorrect.
If you think you’re entering the right username and password, make sure the Case is correct because the password is case-sensitive.
If you still get the error, try resetting your password.
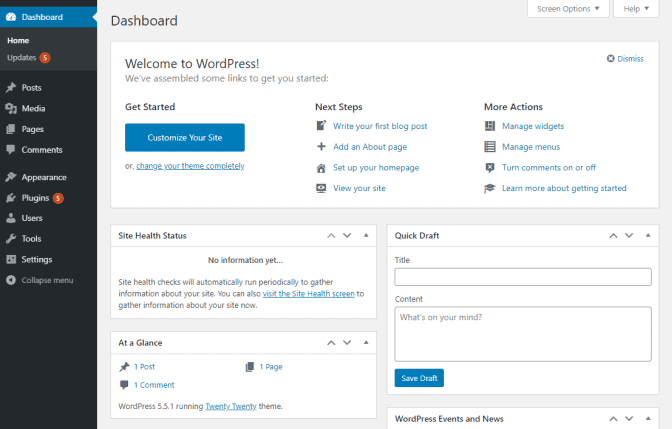
The Dashboard Layout
Once you open your WP Dashboard, the default view shows all the important options and details regarding your website.
It has thee essential parts:
- A sidebar on the left
- A toolbar on top
- Central part
What Can You Find in the Sidebar Menu?
The sidebar menu gives an overview of some of the vital services and options needed to create a website.
There you’ll be able to access:
- Posts
- Media
- Pages
- Comments
- Appearance
- Plugins
- Users
- Tools
- Settings
The Center of Your Dashboard
In the central part, you can see your website’s Activity, Quick Drafts, At a Glance info, Stats, What’s Hot, and WordPress Events and News page.
1. At a Glance – A Quick Brief
This module gives a quick look at your pages, comments, theme, and potential spam, and it helps you keep track of the activities happening on your website.
If you want to see new comments, just tap on the icon and you’ll be taken to the comments section.
2. Quick Draft
When you have a good idea for a new post, and you want to write it fast – this is your go-to tool.
You can write posts from your WP dashboard, add a few photos, and go through as many drafts as you want in just a few minutes.
3. Activity
This option allows you to see all your comments and decide if you want to keep them on the profile or not.
You can reply directly from the Dashboard or see the history of that user’s comments.
If you get a comment, you can dislike it, reject it, mark it as spam, or send it to the trash right where you are.
4. WP Events and News
Did you know that WP organizes events?
If not, this is the place where you can find out all about the latest marketing conferences, blogging networking opportunities, or WordPress-related events.
If you’re not interested in seeing this kind of information on your Dashboard, you can easily remove it.
5. What’s Hot
If you’re interested in recent posts from the WP News blog and official WP blog, this section is where you can get all the latest info.
6. Your Stuff
The Your Stuff module is an activity log that displays your recent activity on the WP platform.
Whether you commented, updated your post, or wrote a new one, you’ll be able to keep track of all the changes made.
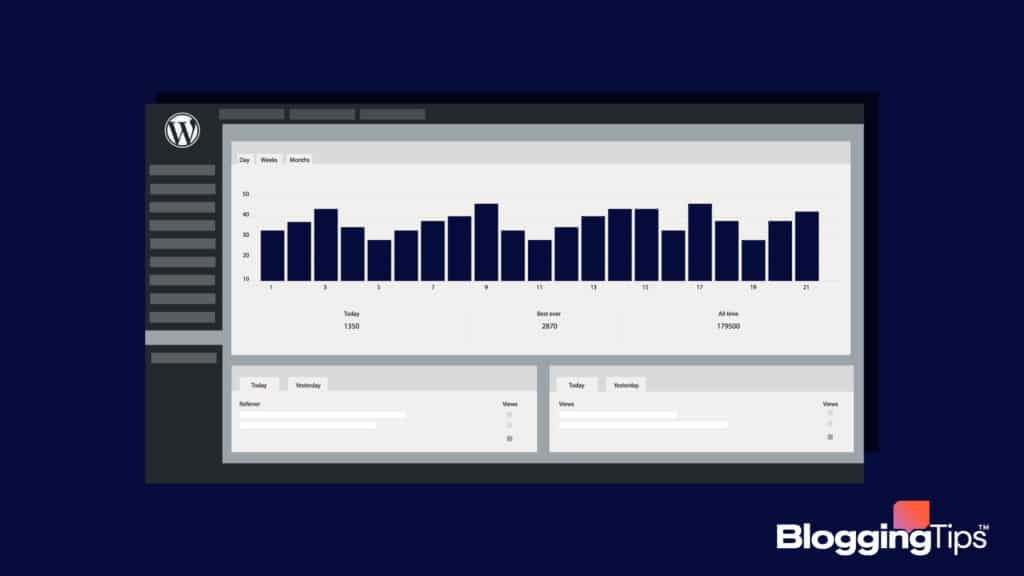
7. Stats
The Stats module is one favored by many users as it informs you of your website’s traffic.
There you can access your daily, weekly, monthly, and yearly numbers, and the two main traffic measurements are based on views and unique visitors.
When you open the graph, you can access daily traffic and pages or posts that got the reader’s attention.
How to Modify Your Dashboard Layout
If your WP Dashboard doesn’t have a functional layout, you can quickly adapt it to your needs. Here’s an easy way to do it:
In the upper right corner of your Dashboard, you’ll find ‘Screen Options.’
When you tap on it, you can check and uncheck boxes depending on what module you want to see on your Dashboard screen.
However, if this didn’t do the trick, have in mind that almost everything you see is changeable.
You can add branding elements like a logo and a new color palette to your Dashboard.
Also, it’s possible to generate new custom menus, hide the WP toolbar, or you can find a plugin that’ll do all the work for you.
The Difference Between a Dashboard and Toolbar?
Beyond the Dashboard, WP also has a feature called WordPress Toolbar that lets you access key admin functions on the website’s front-end.
Regular site visitors can’t see it, but you’ll always have it on top of the screen.
The Toolbar is located above the Dashboard, and it shows:
- Quick links to information about WordPress, help and home buttons
- Quick links to create a new post, page, and link
- Quick links to add new user, review comments, and show update alerts
If you wish to turn off the Toolbar, you can do it with the following few steps:
- Open the ‘Users’ option on the left sidebar menu.
- Go to ‘Your Profile.’
- Uncheck the box for ‘Show Toolbar when viewing the site.’
Put Your Dashboard in Action − Create a New Blog Post
One of the first steps for most users in WP is to make their first blog post, usually followed by many others. Here’s how to make it happen:
- Click on ‘Posts’ in the left menu.
- Click on the ‘Add New’ option.
- A new ‘Add New Post’ screen will open.
- Now you need to enter a title and write your blog post.
- On the bottom right, you’ll see formatting options and options to add images, videos, links, quotes, or audio files to your blog post.
- Once you’ve finished, on the right side of the screen you can decide whether to ‘Save Draft,’ ‘Preview,’ or ‘Publish’ your new post.
Plenty of Reasons to Master Your WP Admin Dashboard
All WP functions are located in the Dashboard, and you should get accustomed to it to use the platform to its fullest.
The more time you spend on your Dashboard, the faster you’ll get around your pages and your performance will skyrocket.