How To Sell On Facebook: Simple Steps & Tips For Success


Are you looking to sell on Facebook but can’t figure out how?
Around 72% of online shoppers in the US use social media to decide on their purchases.
And despite all the negative PR, Facebook dominates the social media industry with a whopping 266 million monthly active users.
Moreover, you can sell various items on Facebook, from toys to home decor, and you don’t even need a website.
But without the correct steps and strategies, you’ll hardly make a dime.
So in this detailed explainer, I’ll explain the entire process of selling on Facebook shops and marketplace for all beginners.
Frequently Asked Questions
Before we get into our deep dive, let’s answer two of the most frequently asked questions:
Can You Sell Directly Through Facebook?
Yes, you can directly sell your products on Facebook and Instagram through Facebook Shops.
However, you must have a business page and catalog to create a Facebook shop in Commerce Manager.
There are no registration or monthly fees.
Customers can checkout using three methods: messaging, your business website, or Facebook and Instagram.
If you opt for any of the first two options, you’ll be charged with no extra selling cost.
However, if you choose to checkout through the third option, you’ll be charged 5% per shipment or a flat fee of $0.40 for every $8 shipment or less, including taxes.
Do You Need a Seller’s Permit to Sell on Facebook?
Generally, you don’t require a seller’s permit or license to sell digital products on Facebook.
However, this general rule changes with changes in product type or sales volume.
For example, if you sell regulated products like real estate, you need a business license to ensure your products adhere to government standards.
In addition, if your sales surpass the transaction limit, say $150K a year, you’ll need to register as an LLC.
It’s best to study your country and local government rules and consult a legal expert if you want to deal with regulated goods.
What Can You Sell on Facebook?
You can sell a wide variety of stuff on Facebook, so no matter whatever niche you’re in, you’ll find buyers on Meta.
Here’s the list of 10 best-selling items on Facebook Marketplace:
- Furniture: Facebook is one of the best places to sell your new and old furniture, provided you keep your prices low and ensure reasonable quality. You can sell small furniture items like chairs and big stuff like hutches.
- Clothing: You can sell branded apparel, shoes, and other clothing items on Facebook in new or used condition.
- Home Decor: You can sell your existing home decor items like antique clocks, portraits, carpets, and mirrors on the FB marketplace under the home goods category.
- Tools: You can sell home improvement tools like drill tools, home tension poles, pro ladders, and vacuum cleaners in new and refurbished condition.
- Building Materials: You can sell roofing, flooring, and door material at wholesale prices in shops and the marketplace. Lamps: A home decor item, you can sell floor, table, and bedroom lamps in new or old condition.
- Toys: You can sell action figures, dolls, robots, and educational toys to different age groups, provided they are safe for children.
- Cars: Like toy cars, you can sell your old cars in the vehicles category provided you are transparent with price and delivery method.
- Baby Items: You can sell baby toys, toddler car seats, and strollers in the Baby & Kids Items category.
- Appliances: You can also sell new and old electronic devices like refrigerators and stoves in the FB marketplace.
All the above categories of items can be sold via Facebook buy and sell groups which we’ll discuss later.
You can always check out other great websites for selling things.
What Can You Not Sell on Facebook?
Facebook is clear and explicit about the items you can’t sell via their platform.
Some of them (like alcohol or illegal drugs) are obvious, but others aren’t.
Here’s the complete list:
- Services: You can’t sell professional services like house cleaning and legal consultation on the Meta platform.
- Anything With a Description That Doesn’t Match the Photo: If your product description doesn’t match the photo, your listing will be disqualified for sale.
- Animals: You can’t sell pet animals or ask for adoption via the Facebook marketplace.
- Anything With a Before and After Picture: Commonly seen in weight loss programs, you can’t sell services with before and after pictures on Mark Zuckerberg’s platform.
- Weapons: You can discuss and strike a firearms deal on Facebook, adhering to local laws but can’t sell arms and ammunition directly on the platform.
- Illegal Drugs and Drug Paraphernalia: You can’t sell unlawful drugs anywhere, let alone on Facebook and Instagram.
- Alcohol and Tobacco Products: Facebook Commerce policies strictly ban the sale and promotion of alcohol, tobacco, and other related addictive substances.
- Adult Products or Services: You cannot sell or run ads on adult products or services on Facebook or other Meta platforms. Reproductive health products can be sold, provided they do not “focus on sexual pleasure.”
- Human Fluids or Body Parts: As per Facebook Commerce policies, you cannot sell any body fluid or part.
- Digital Products: Although you can sell digital devices and video CDs, you can’t sell downloadable content (like PDFs) and digital accounts on Facebook.
- Currency: You “may not” sell or promote fiat or cryptocurrency on the Meta marketplace.
- Documents: Like currency, selling real or fake papers isn’t allowed.
- Items That Promote Gambling: You can’t sell digital gambling content but may promote your gambling app or website subject to prior permission and guidelines.
- Anything discriminatory: You can’t add commercial listings which discriminate against buyers based on religion, country, gender, and so on.
- Historical Artifacts: Facebook banned the sale of historical artifacts in 2020 after reports of looters misusing the platform.
Who Should Sell on Facebook?
Anyone from small businesses, entrepreneurs, and brick-and-mortar store owners to casual sellers trying to exchange their old stuff for cash can sell on Facebook.
With such a large audience, anyone is sure to find their target audience on the Meta platform.
Facebook allows you to interact and sell with prospective customers in a simple and customizable manner.
You can run targeted ads and sell without any upfront costs or fees.
How Much Does it Cost to Sell on Facebook?
There are no setup or recurring costs to open your Facebook shop and sell items on the platform.
Opting for checkout via messaging or your e-commerce website will make selling on Facebook virtually free.
However, if you opt for a check out on Facebook and Instagram (available only in the US), you’ve to pay a 5% selling fee per shipment or a flat $0.40 for orders of value $8 or less.
This selling fee includes taxes and payment processing costs.
How Do You Avoid Facebook Marketplace Fees?
You can easily avoid the 5% Facebook selling fee by opting for checkout via your e-commerce website.
However, that will mean you must create and operate separate payment forms and cater to after-sale service.
Alternatively, you can choose the messaging option to allow buyers to check out.
How Do You Get Paid By Selling on Facebook?
To get paid, mark the item as “shipped” and enter a tracking number within three days of the purchase.
The payout is made within 15 days after your marking to the bank account you added while creating the listing.
It takes five days for the payout to reach the bank account.
If you’ve opted for checkout on Facebook and Instagram, the platform will deduct a 5% selling fee or $0.40 for sales less than $8.
You can check your next payout in the “Your sales” section of the Facebook Marketplace.
What is the Best Way to Sell on Facebook?
There are three methods to sell various items on Facebook: by opening fully integrated shops, via the marketplace, or through buy and sell groups.
Facebook shops are best for small businesses to grow their brand by leveraging the large user base of the social media platform.
Customers can browse and buy items directly without going outside the Meta interface.
Buy-and-sell groups and FB marketplace are good for locally selling old and used items.
How to Sell On Facebook
Now, we’ll outline the different methods to sell on Facebook in 2023.
We’ll start with the following:
How to Sell on Facebook Shop
Follow the process mentioned below to sell various items to customers from the Facebook app directly:
Set Up Your Account
You must set up your account with Commerce Manager to create a shop on Meta:
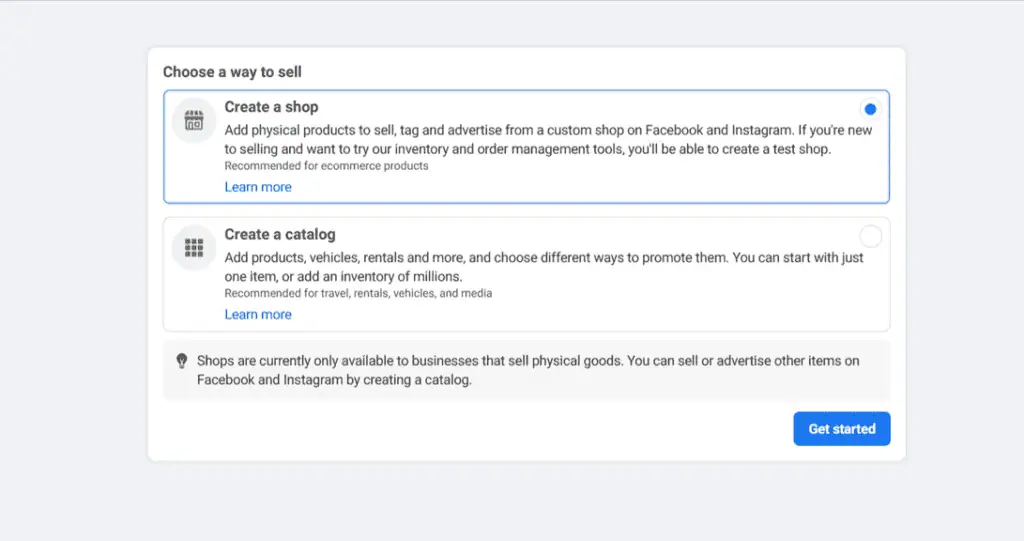
- Go to https://business.facebook.com/commerce_manager/get_started/ and click on the blue “Get Started” button.
- Choose “Create a shop” and click “Get started” again.
- Click “Get Started For Facebook,” and you’ll see a list of requirements to open the account, like a US Bank Account and Tax information.
- Click “Next” and “Set Up” under Business Information.
- Enter your business name as the name for your commerce account and click on “Next”.
- You need to connect the commerce account with an existing business page. If you don’t have one, refer to the section below. Then, again, click on “Next”.
- You must also link the commerce account to the “Meta Business Manager Account”. If you don’t have any, refer to the next section. Finally, click “Finish Setup”.
Make Sure You Comply With Policies
Meta conducts a daily account health evaluation to ensure adherence to their seller performance standards and commerce policies.
You must also follow Facebook community standards to keep your status “Good”.
Here are some crucial points to consider:
- Do not sell prohibited items through Facebook shops.
- Keep your inventory up-to-date to ensure customers know if the product on the listing is out of stock.
- Mark orders as “shipped” for timely payments.
- Ensure timely delivery.
- Stand true to your return policy.
As a Facebook shop owner, you are responsible for customer experience.
Always respond to any user query and update them with real-time product tracking.
Create a Business Page
To create your commerce account, you need a business page.
Here’s how to do it on a desktop:
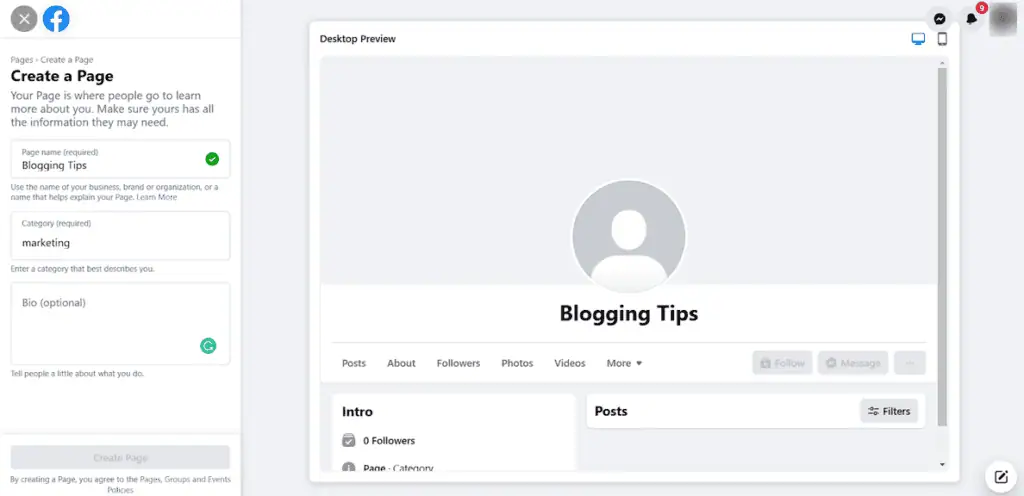
- Log into your Facebook profile and head over to https://www.facebook.com/pages/.
- Click on “Create new page.
- Enter your business name as the page name.
- Type in your category (like Marketing).
- Write a bio that best describes your business.
- Click on “Create Page”.
You can add contact information, invite your friends to like the page, and include a profile and cover photo to boost awareness and engagement.
Set Up A Commerce Manager
We’ve already created a commerce account in the commerce manager.
Now, it’s time to add catalogs and set up payouts to start selling on Facebook.
Here are the steps to follow:
- Return to the “Create Your Commerce Account” page and click on the blue “Get Started” button under Products and Settings.
- You’ll see a list of catalogs. Select any one of them or create a new one and then click “Next”.
- Enter shipping options to deliver products to your customers. You can create different shipping profiles for various products, but it can’t be later than three business days post-order. Then, click “Next”.
- Set a return policy of 30 days or higher, and enter your customer service email to respond to queries within two business days.
- Click on “Save”.
You can alter these settings anytime in your Commerce Manager account.
Now, it’s time to set up payouts to receive payment for each sale on your Facebook shop.
Follow the steps mentioned below:
- Go to “Create Your commerce account” again and click “Get Started” under Payouts.
- Provide your business email ID and physical business address. Click “Next”.
- Choose your business category from Merchant Category Code (MCC) and click “Next”.
- Select the states where you operate and provide State Tax Registration Number for each. Then, again, click “Next”.
- Don’t forget about taxes to receive payments as per US laws. You must also provide the name of your business representative who will manage your shop. Click “Next”.
- Link your bank account to receive payments. You can’t change this information later, so be careful while entering your account number.
- Click “Finish Setup”.
With these steps, you opted for checkout with Facebook and Instagram, so you’ve to pay a 5% selling fee for each successful transaction.
Connect it to Another Online Store
To avoid a 5% selling fee, you can integrate your Facebook shop with another online store like Shopify.
Here are the steps to follow:
- Log into your Basic Shopify account.
- Click “+” on the left side menu next to Sales Channels.
- You’ll see a list of sales channels. Select “Facebook”.
- Click “Update Sales Channel” to see a list of tools to integrate your Shopify store on Facebook.
- Under “Sell Your Products,” click “Start Setup” to open the Set Up Facebook Shop screen.
- Select “Connect Account” and choose your business FB page to sync your Shopify Store with Facebook.
- Click “Finish” to complete the process.
How to Sell on Facebook Without A Website
You can sell goods on Facebook without any e-commerce website using Facebook shops (or stores) and Facebook Marketplace.
Use Facebook Shops
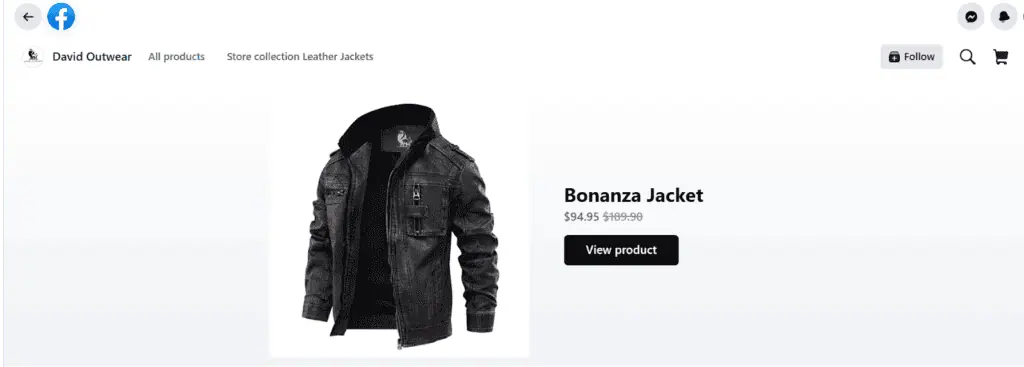
Facebook shops is a mobile-first store upfront to sell products directly to customers for free.
Users can browse different products, compare prices and make purchases.
In the previous section, we’ve outlined how to set up a Facebook store with “Facebook and Instagram” checkout for direct purchases without a company website.
You should promote your store and business page to increase engagement and conversion.
Facebook contests are highly effective in increasing page visits and store checkouts.
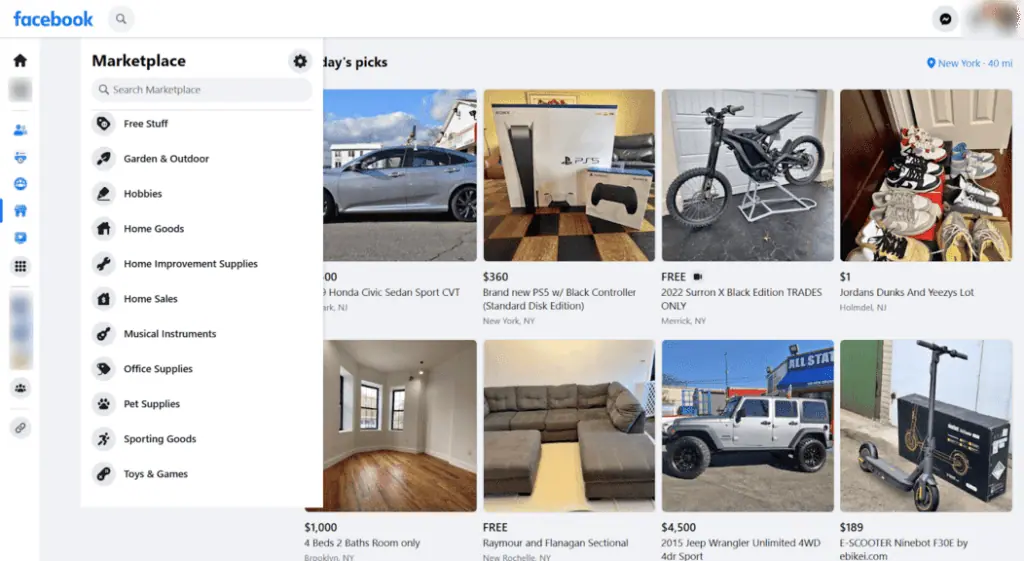
Use Facebook Marketplace
Facebook Marketplace recorded over a billion users in the first quarter of 2021.
It’s the best place to sell items locally without any website.
Here are the steps to follow:
- Log into your Facebook account and tap “Marketplace” in the left-hand corner.
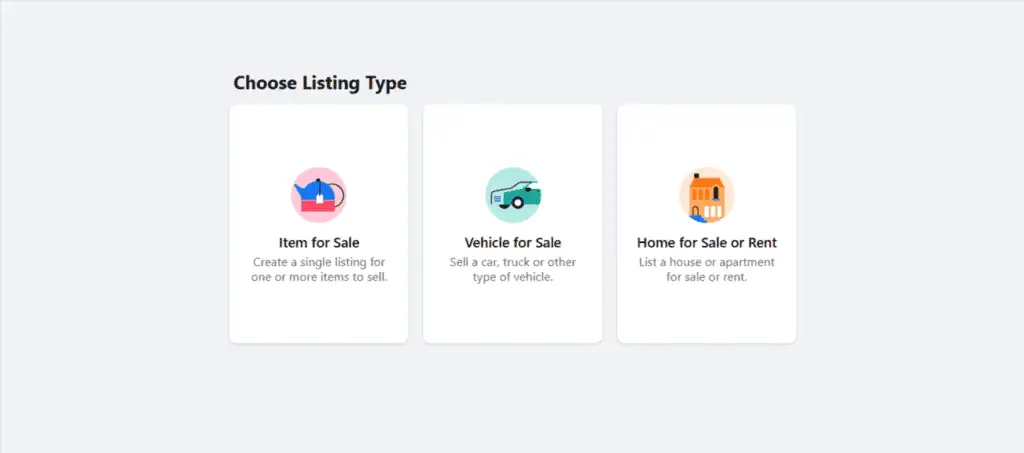
- Click “Create new listing” in the left-hand corner.
- Select among the three listing types shown in the screenshot best describes your item for sale.
- Enter the product name as the title, mention the price, and choose the correct category from the dropdown menu. Choose the product condition (new or used) and type your physical location.
- Upload original product photos and write a detailed product description that matches the image.
- Click “Publish”.
You can edit your listing later to notify of any changes to product condition, etc, and mark it as “sold” if you’ve found a buyer.
How to Sell on Facebook Free
You can create your Facebook store, publish your marketplace listing or use buy-and-sell FB groups to sell items for free.
Facebook doesn’t charge any setup or maintenance costs from businesses.
We’ve already detailed the process to create your Facebook shop or sell via the marketplace.
Refer to the section below to know how to sell goods in buy and sell groups.
How to Sell on Facebook Groups
You can post in Facebook groups with the buy and sell feature enabled to direct interested local buyers to your FB store for purchase.
It can be an effective way for local businesses to build a relevant audience and for casual sellers to convert their old stuff with hard cash.
Here are the steps to follow:
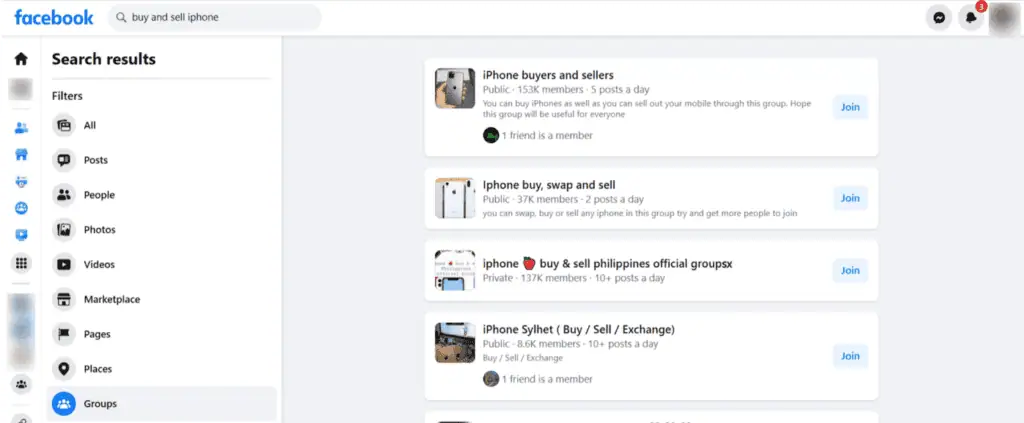
- Go to https://www.facebook.com/groups/category/buy-sell/ and search for a relevant buy-and-sell group for your niche.
- Join the group by agreeing to its policies and rules.
- Click “Sell something” on top of the group page.
- Write details of the product you are selling, such as product image, description, and physical location, and click “Next”.
- You can choose to “Add Your Listing” to the Marketplace and share your listing in other buy and sell groups of which you are a member.
- Click “Publish” to complete the process.
Like the Marketplace listing, you can edit your posting in each buy-and-sell group and mark it as sold once the transaction is complete.
How to Sell On Facebook Marketplace Locally
Like Craigslist, you can sell items locally on Facebook Marketplace for free.
Anyone, including local businesses, Amazon sellers, and brick-and-mortar stores, can use it to establish their online business with no money or time investment.
You connect with buyers personally on Messenger and leverage the large user base of Meta to kickstart your e-commerce journey.
Follow the steps outlined in the earlier section to get started on Marketplace.
However, before you make your listing live, don’t forget to conduct market research and analyze demand, profitability, and competition.
Wrapping Up
Facebook is one of the best ways to start selling goods for free in 2023 and build and grow your e-commerce brand.
You can directly sell by creating your business page and open your Facebook store by carefully adding your business and tax information.
There’s a wide variety of niches to choose from, and you can integrate your FB listing with your online store to avoid a 5% selling fee.
Responses