
If you use WordPress for your business, you must be using its media upload feature.
It’s a great tool for uploading images, but sometimes the files can be too large for the default limits.
If you’re uploading longer videos, you’re likely to run into problems because they are simply too big.
This article will show you how to increase the upload size limit in WordPress and help you fix any issues with uploading files.
Why Does This Happen?
By default, WordPress has a limit on file uploads of somewhere between 2 and 150MB, and usually at the lower end of the range, which is good enough for the average WordPress user.
But you’re here because you’re above average and need a higher limit for the amazing content you need to upload.
Increase Limit in a Multisite Install
If you’re running WordPress in a multisite installation, you can easily increase this size limit.
Be aware that this will not override the server-side settings.
For example, if your server’s limit is 15MB you can only increase your upload size limit to that, and going over that will have no effect.
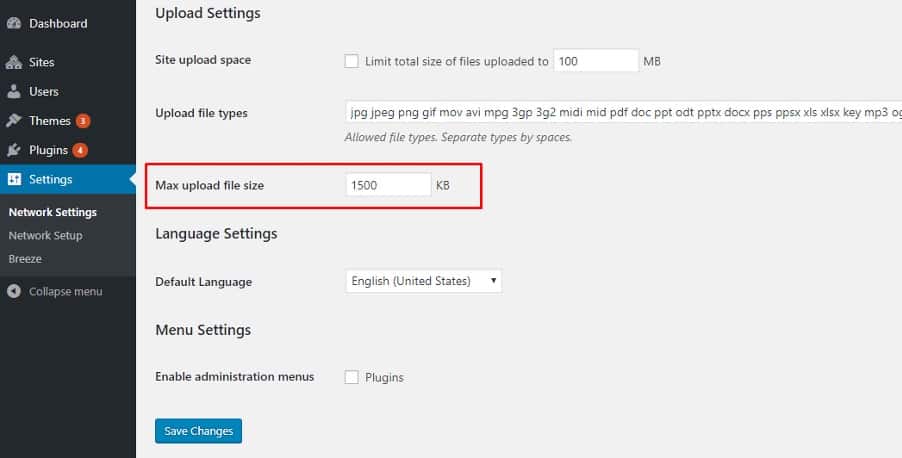
To increase the upload size limit in a multisite installation follow these steps:
- Open your WordPress Dashboard.
- Under My Sites, click on Network Admin, then go into Settings.
- Scroll down until you find the “Max upload file size” section.
- Change the number to something higher.
- Click “Save Changes.”
- Change PHP Settings
One way of easily changing your upload size is directly going to the php settings of your WordPress.
The relevant data that needs to be changed here is:
- post_max_size
- upload_max_filesize
- memory_limit
These should be higher than your intended file size.
For example, if you want to upload 15MB, these should be around 20M, 18M, and 23M respectively, just to make sure that everything will fit once the files have been uploaded.
Also notice that while the sizes of the files are in KBs and MBs, these only use M instead of MB.
Now that you know what to modify, here are some ways to do it.
Change PHP Options in cPanel
If your WordPress host uses a cPanel, follow these steps:
- Go to Software, then open “Select PHP Version.”
- Click on “Switch to PHP Options.”
- Once there, look for the aforementioned properties.
- Click on each property and change its values as needed.
- Click “Save” and exit cPanel to confirm the changes.
Use a php.ini File
These files by default will control how PHP operates in the server.
The files might not be found on your file list, so you can skip this section if you can’t find it.
To change your php.ini file, you need to access your server through an FTP client.
Once you open your server’s root directory with FTP, find the php.ini file or create one yourself.
Then, find (or add) the following lines:
- upload_max_filesize = 18M
- post_max_size = 20M
- memory_limit = 23M
You can change the values as needed, according to the guide above.
Some hosts will require you to change your .htaccess file as well for these changes to go through.
Find the .htaccess file in the same root directory and add the following lines:
- <IfModule mod_suphp.c>
- suPHP_ConfigPath/home/yourusername/public_html
- </IfModule>
- Directly Update the .htaccess File
If you can’t locate the php.ini file and don’t want to split changes between several files at once, you can put your settings directly into the .htaccess file instead.
Again using the FTP client of your choice, log in to the root directory and add the following lines to the file:
- php_value upload_max_filesize 64M
- php_value post_max_size 128M
- php_value memory_limit 256M
- php_value max_input_time 300
- php_value max_execution_time 300
Again, change the values to whatever you need.
The latter two values represent time in seconds.
Remember to save the changes you made after adding any code.
You can use a text editor of your choice to make these changes, such as Notepad++.
If you happen to receive an Internal Server Error after implementing this change, revert it and try another solution.
Update the functions.php File
Unlike the previous two, this file can be accessed directly via your WordPress Dashboard:
- Go to Appearance.
- Open Theme Editor.
- On the list to the right, find functions.php.
- Choose the file to open it.
- Near the end of the file, add:
- @ini_set( “post_max_size”, “64M”)
- @ini_set( “upload_max_size” , “64M” )
- @ini_set( “max_execution_time”, “300” )
You can change the settings to suit your needs.
The upload sizes are again listed in megabytes.
Save the changes made by pressing the Update File button.
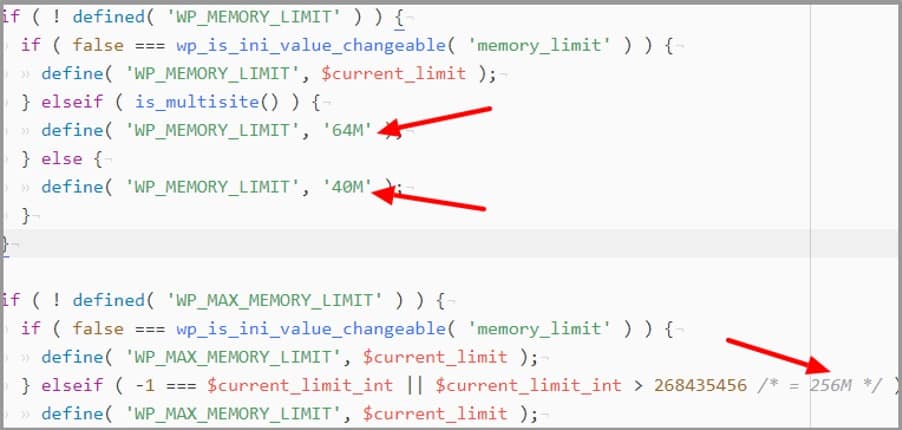
Define Settings in the wp-config.ini File
If none of the above works for you, this might.
Using an FTP client to access the root, find wp-config.ini file, open it with a text editor, then add the following lines, changing the values as needed:
- @ini_set( “upload_max_size” , “12M” );
- @ini_set( “post_max_size”, “13M”);
- @ini_set( “memory_limit”, “15M” );
This is the last resort when it comes to changing your PHP settings, after that you will have to try another method.
Use a Plugin
If you’d rather not make direct changes to the code of your server, there is a safer option at your disposal.
You can download this plugin to directly alter the upload size limits through it without manually changing any settings.
Once you download and enable the plugin, simply choose from the dropdown menu the size that you want to change to.
As a bonus, the plugin will notify you if the changes you intend to make are possible through your host.
Do note that you’re using third-party plugins at your own risk whenever you download them.
Contact Your Host
If you can’t change your upload size limit, your host can.
Contacting your host directly will also allow you to circumvent any tinkering with code in files, and your host can remove the limit imposed on their end quickly.
This is probably the quickest option, but it does require a third party to do it for you.
More Content for Your Users
Once you’ve successfully increased your upload size limit, you can upload more and hopefully better content for you and your WordPress audience.
Knowing where to look was the hardest part of this tutorial, but we’re certain that you can do it.


