
Need to export your entire WordPress website or just a part of it? Welcome to where you’ll learn all about exporting WordPress.
Whether you are migrating your site to a new server or host, moving it to a new domain or keeping it as a backup, there are more than one way and tool to export a WordPress site.
Regardless of your reason, exporting a WordPress website is relatively easy. From the basic WordPress native exporting functionality and the robust plugin-aided export to the more advanced manual export process, this guide covers it all.
- Frequently Asked Questions
- What You’ll Need to Export a WordPress Website
- How to Export WordPress Site: 3 Methods
- Method #1: Export WordPress Site With the Native Export Feature
- Method #2: Export WordPress Site with Duplicator Plugin
- Method #3: Export WordPress Site via FTP Client and phpMyAdmin
- More Helpful WordPress Tutorials:
- Wrapping up
Frequently Asked Questions
Can a WordPress Site Be Transferred?
Of course, you can transfer a WordPress website to another server or host and even migrate it to a new domain.
Since It’s a common request, most hosting providers now have built-in WordPress export tools that allow self-hosted site owners to transfer their site to other hosts.
But if your host doesn’t have that option, this guide is for you.
What is the Easiest Way to Export a WordPress Site?
The easiest way to export a WordPress site is to use a WordPress export plugin.
These plugins support complete WordPress exports, from themes to plugins, media and databases.
For this purpose, Duplicator is a free and efficient plugin that makes the process a breeze even for non-techy WordPress users.
What You’ll Need to Export a WordPress Website
- WordPress Admin Access: You can hardly do a thing on a WordPress website without the admin dashboard. To export a WordPress site, you must have an admin or super admin role on the WordPress website in question.
- Web Hosting Cpanel: You can export your WordPress website from within your hosting account dashboard. Also, you need the FTP credentials on your Cpanel to connect FTP software to your website server.
- FTP Client: An FTP client is software that allows you to modify files on your website server. You can export your WordPress website by connecting an FTP client to your server. You’ll learn how in this guide.
- WordPress Export Plugin: If you choose to use a plugin as it’s the easiest method to export WordPress sites, you’d have to install a WordPress export plugin. We recommend Duplicator and will show you how to use it.
How to Export WordPress Site: 3 Methods
Before you start exporting your site, It’s better to know the option that best suits your purpose.
For instance, if you are migrating your site to a new host or server, it’s good to check if there’s any help your web host can offer.
Some web hosts offer website migration for free or for a small fee. So check with them and save yourself the stress.
Also, if you just want to keep a backup of your WordPress post, using the native WordPress export feature should suffice.
Going through the rigour of exporting your entire WordPress site is of no point.
Now you understand that there’s no one size fits all approach to exporting WordPress sites, let’s explore all the options you have one at a time.
- Method #1: Export WordPress Site With the Native Export Feature
- Method #2: Export WordPress Site with Duplicator Plugin
- Method #3: Export WordPress Site via FTP Client and phpMyAdmin
Method #1: Export WordPress Site With the Native Export Feature
The first method we’ll look at is exporting WordPress with built-in export features.
While this method is straightforward and requires fewer steps than other methods, it only exports WordPress database options such as posts, pages, comments, tags, categories and menus.
The native export feature is only useful for moving and backing up WordPress site content.
You can’t use it to export your themes and plugins. Instead, you’ll have to use one of the other methods in this guide. Let’s see how to use it.
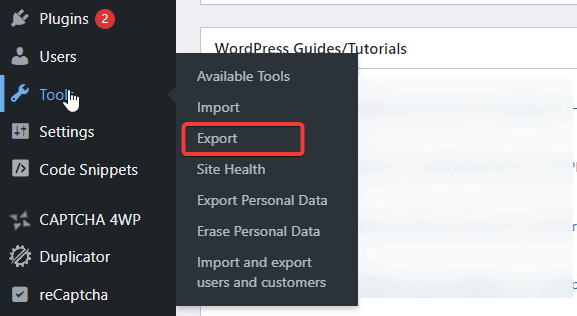
Log in to your WordPress admin dashboard, go to Tools on the left panel and select Export from the popup menu.
Under Choose what to export section, select All content to export all your WordPress content.
However, If you’d like to export a specific type, say Post or Pages, select it from the options.
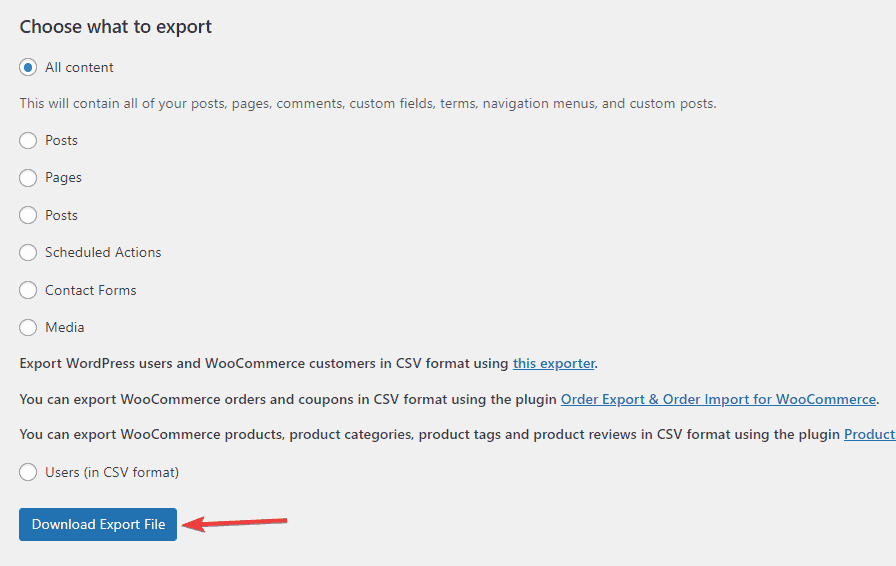
Next, click the Download Export File button. WordPress will start preparing your export file. This may take a while, depending on the size of the export.
Once the file is ready, it automatically downloads to your device storage. The file will be in an XML format.
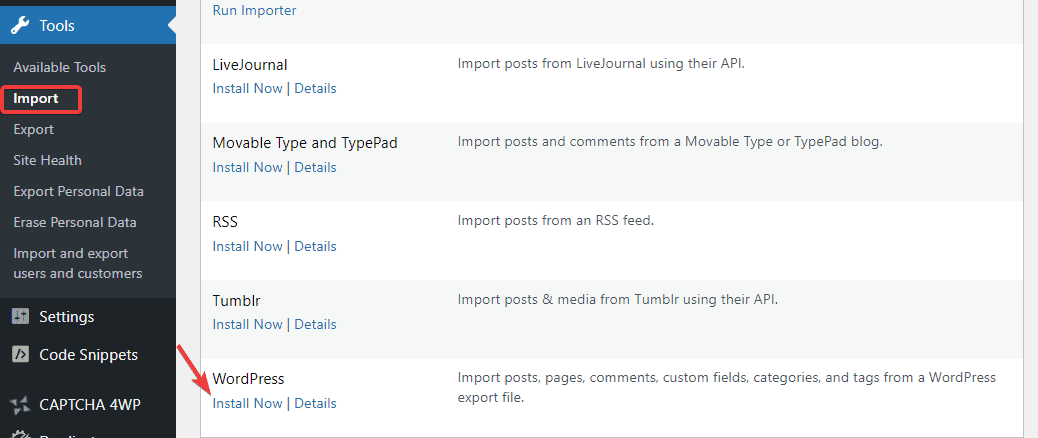
To upload this export file to another WordPress website, log in to the website’s admin dashboard and go to Tools>Import.
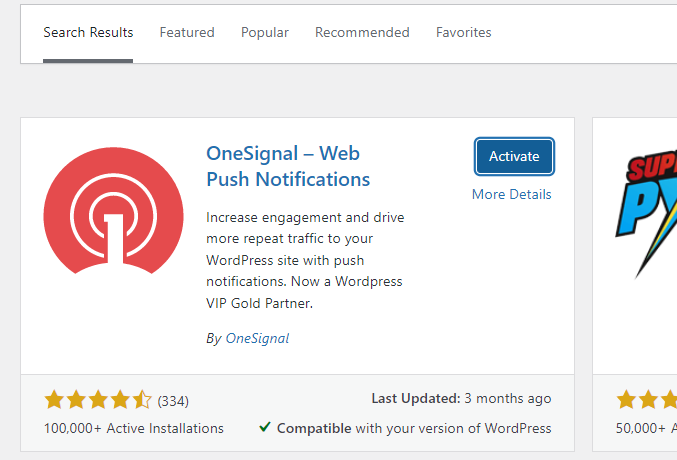
On the next screen, you’ll have to install WordPress Importer. Scroll down to WordPress and select Install Now to run the importer.
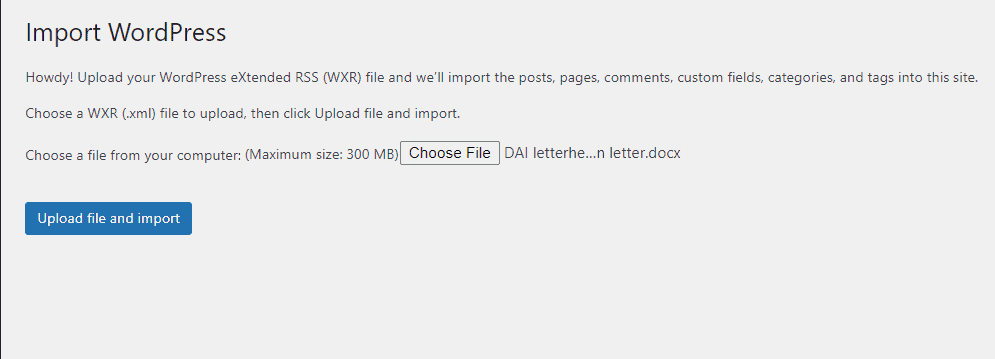
Click the Run Importer link. You’ll be redirected to where you’ll upload the export file.
Select the Choose File button. Once the file is loaded, click Upload file and Import.
And that’s all. You’ve successfully exported your WordPress site content.
Note: This method will only import your media files if the original site is online. This method will not work if you want to move your entire WordPress website. Instead, you’ll have to use either of the other 2 methods.
Method #2: Export WordPress Site with Duplicator Plugin
Duplicator is a great WordPress cloning, duplicating and exporting plugin.
It offers a full suite exporting option, including your WordPress files, themes, plugins and database.
To use this plugin, you first need to install and activate the plugin. Once done, follow these steps to export your WordPress website.
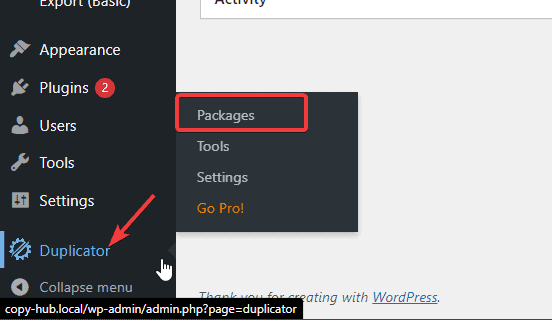
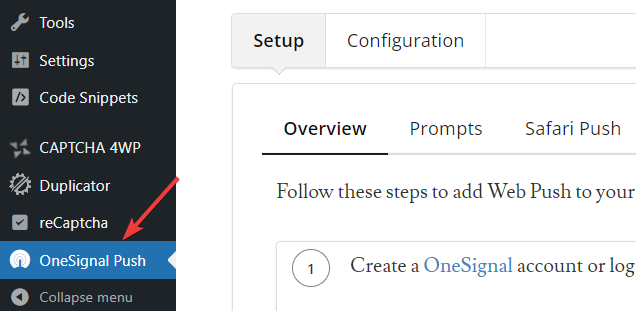
On the left sidebar of your admin dashboard, navigate to duplicator and choose packages from the pop-up menu.
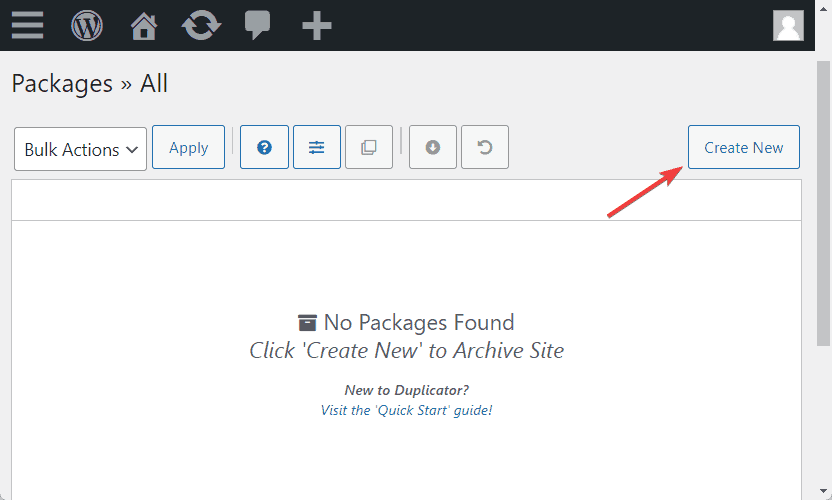
On the Duplicator Packages page, click the Create New button at the top right corner.
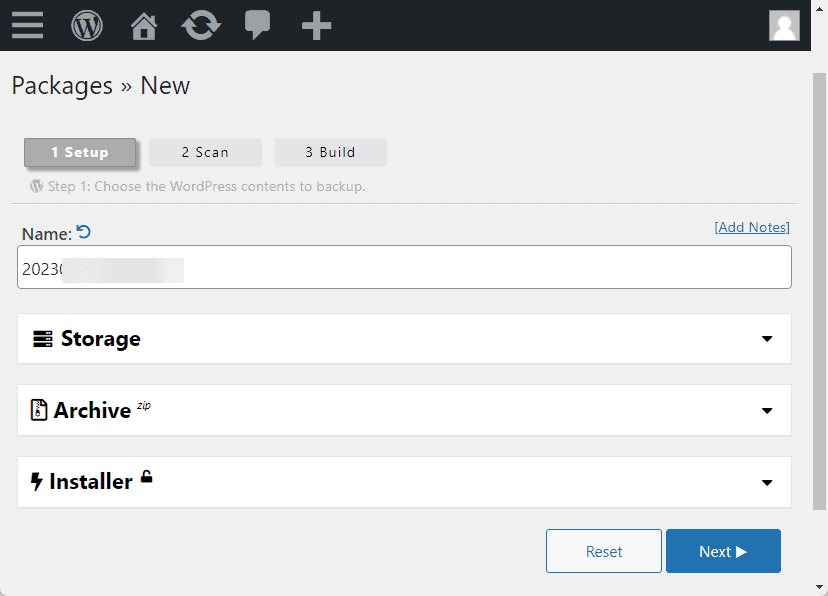
Once the package setup page opens, type in a name for your duplicator package. You can use any name.
Under it, you can select storage for your package. The default storage location is your computer.
But if you like, you can save to Google Cloud, DropBox or OneDrive.
Since you want to download the entire WordPress files and a database, you don’t need to touch anything under Archive and Installer.
So click the Next button at the bottom right to proceed.
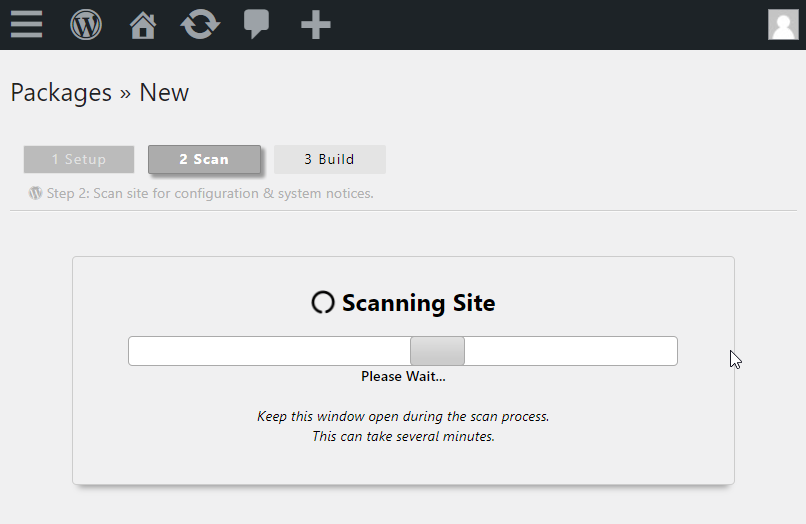
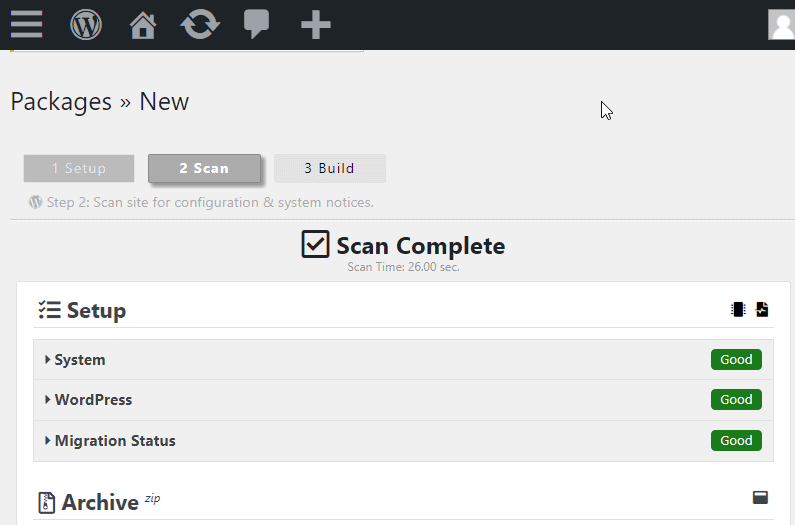
Next, Duplicator will start scanning your website for potential issues.
It might take a while, depending on the size of your package. If there is any issue, you’ll have to resolve them for Duplicator to proceed.
Once you’ve resolved the issue, if any, you’ll see Scan Complete at the top of the page.
Now, scroll down the page and check the box next to “Yes, continue with the build process!”. Then, click the Build button under it.
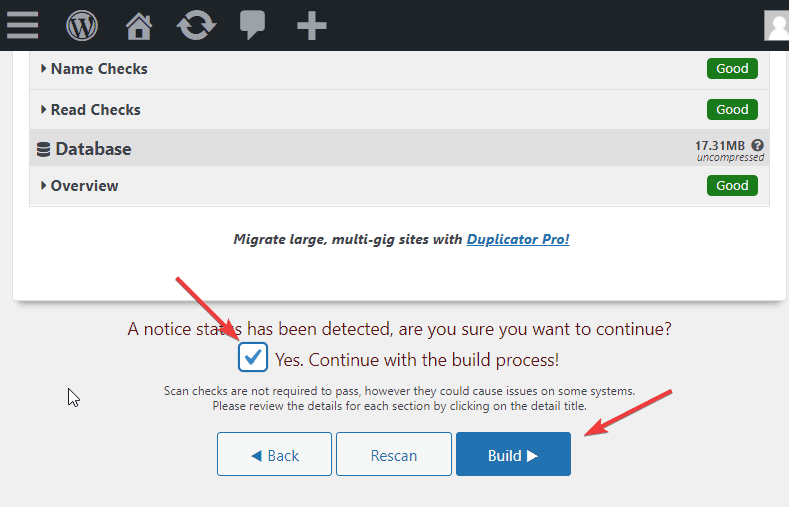
Duplicator will commence the build process. You’ll see Building your Package.
Depending on the size of your site, it may take a while for the package to be ready.
Once It’s complete, you’ll see the Installer and Archive package files.
Under it, click the Download Both Files button. Now the downloading process will start.
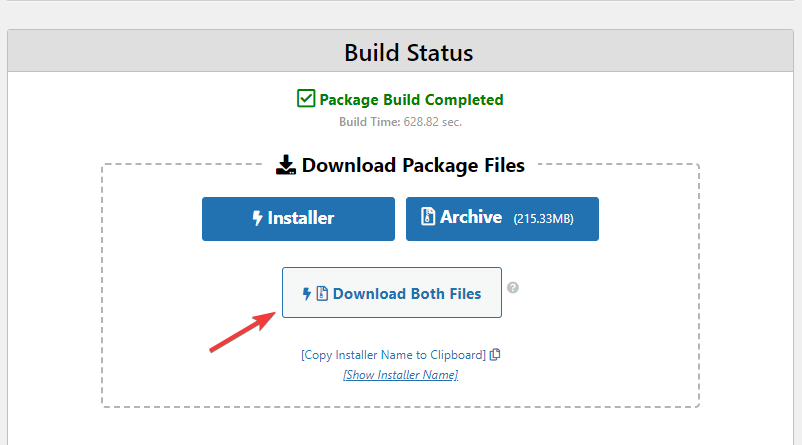
Once complete, you’ll have your WordPress export file as a zipped folder alongside the Installer file on your computer or in the storage location you select.
And that’s it. You’ve successfully exported your WordPress files and database.
You are done if you just want to keep a backup of your site.
However, you may want to migrate your site to another server.
In that case, you’ll create a new database on your destination server and then upload your exported WordPress package and the installer file using an FTP or your web host file manager.
For more information, our WordPress cloning guide shows every step to use the Duplicator plugin to move your site to another server.
Method #3: Export WordPress Site via FTP Client and phpMyAdmin
The third method we’ll explore in this guide is more advanced and involves more steps.
So if you are a beginner, stick to methods 1 and 2 above. But if you can follow instructions closely, You’ll make light work of it.
There are 2 parts to this method:
- Part 1: Export Your WordPress Files Using an FTP Client
- Part 2: Export Your Database via PHPMyAdmin
Let’s start
Part 1: Export Your WordPress Files Using an FTP Client
The first step is connecting an FTP client with your website server.
There are several FTP software out there, and they all operate the same. Filezilla and Cyberduck are great options.
We’ll use Cyberduck for this example. You can use this link to download Cyberduck.
After setting up Cyberduck on your device, launch it and click on Open Connection at the top left corner.
A window will pop up where you’re to provide your FTP credentials, Port, Username, and Password.
You should find these credentials in your hosting account Cpanel.
The location may differ from host to host. But hosting providers often put these credentials under Files>FTP Accounts.
If you can’t find it, contact your host support for help.
Once you locate the details, fill out the connection window form and click the connect button.
Cyberduck will establish a secure connection to your site server in a few seconds.
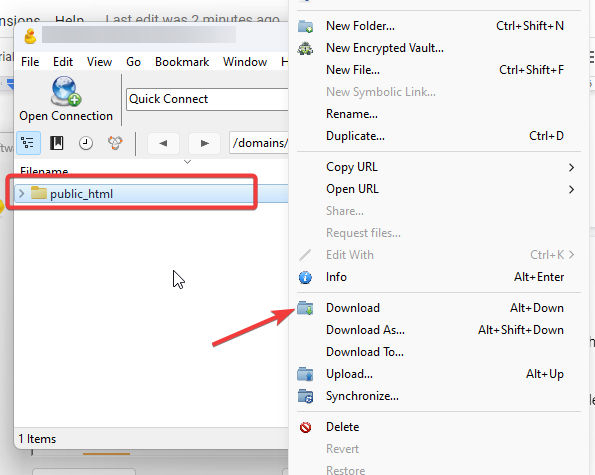
Once connected, navigate to domian> yourwebsite.com>public_html folder inside Cyberduck.
Once you are in, you’ll see every file that makes up your WordPress website. Then, you can either download it or select what you want to download.
For this example, we’ll download the entire website file. So right-click on the public_html folder and select Download from the options.
That’s it. You’ve successfully exported all your WordPress files.
To export your database, you’ll have to access your website phpMyAdmin.
Part 2: Export Your Database via PHPMyAdmin
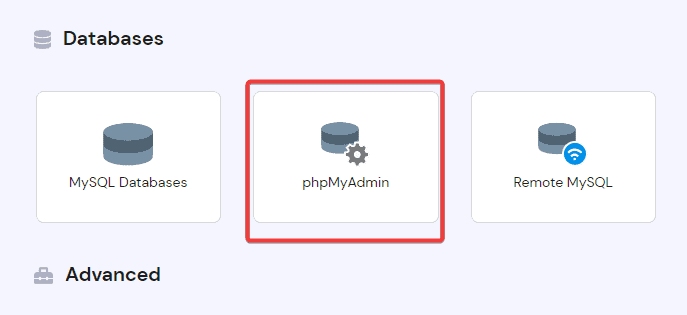
Log in to your hosting dashboard and navigate to Databases.
Based on your hosting provider, there may be more than one database type in your Cpanel. Select phpMyAdmin from the options.
Once phpMyAdmin opens, switch to the Export tab on the top menu and choose SQL as the database format.
Next, click on the Go button at the bottom right. phpMyAdmin will start exporting your database.
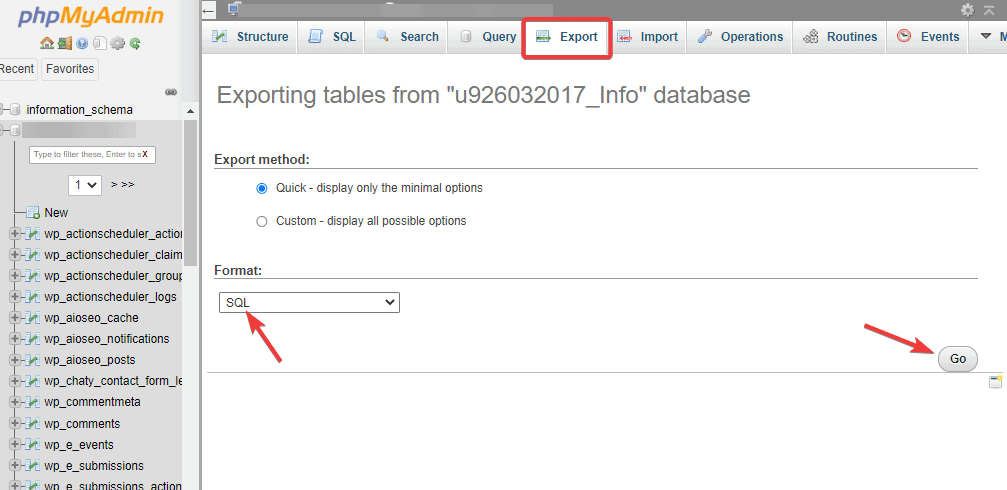
Once the download is complete, you have successfully exported your WordPress database.
With that, you now have both your WordPress files and database exports.
More Helpful WordPress Tutorials:
- How to Restore WordPress From Backup: Problem with your WordPress website? Rest easy. Here’s how to restore WordPress from backup without any hassle. Read. Follow. And Enjoy
- How to Reset a WordPress Password: Looking to change WordPress passwords? This detailed guide explains different methods to reset WordPress passwords in a beginner-friendly way.
- How to Clone a WordPress Site: Do you need to clone a WordPress site quickly? Check out the easiest ways to do it. This tutorial will walk through the process with easy-to-follow instructions.
Wrapping up
With the steps above, you know know how to export a WordPress site using the native export feature, duplicator plugin and FTP Software and phpMyAdmin.
We hope this guide is helpful. If you need further information on exporting WordPress sites or other related topics, don’t hesitate to drop us a line in the comment section below.


