
If you’ve built your website or blog on Squarespace and want to migrate to WordPress, things may not be straightforward.
We know this because we’ve been in your shoes before.
So have many others.
Squarespace and website builder alternatives like Wix make it hard to migrate your website elsewhere.
Thankfully, there are ways around this, and the steps are easy to follow.
This guide provides all the steps you’ll need to migrate your website from Squarespace to WordPress error-free.
- Frequently Asked Questions
- What You’ll Need to Migrate from Squarespace to WordPress
- Step-by-Step Instructions on How to Transfer Your Content from Squarespace to WordPress
- Convert Squarespace Website to WordPress Website: Similar Tutorials to Check Out
- Wrapping up: How to Transfer Your Content from Squarespace to WordPress
Frequently Asked Questions
Some of the frequently asked questions we’ve encountered on this subject include:
Is it possible to migrate from Squarespace to WordPress?
Yes, it is possible to migrate to WordPress from Squarespace.
While you won’t get the same website, you’ll be able to automatically copy stuff like all pages (home, about us, blog), all your blog posts, and text and image blocks as an XML file.
Is there a plugin to migrate from Squarespace to WordPress?
Plugins are one of the basics of using WordPress.
There’s a plugin for migrating from Squarespace to WordPress.
However, this is a paid service.
The cost depends on how many pages and categories are on your website.
CMS2cms is an example of a Squarespace to WordPress migration plugin.
What You’ll Need to Migrate from Squarespace to WordPress
To follow this tutorial and successfully transfer your website to WordPress from Squarespace, you’ll need to:
- Buy a web hosting plan: WordPress.org is self-hosted, which means you need a place to download and install WordPress for your website. You also want to choose a provider with managed WordPress hosting.
- Buy or transfer your existing domain: You can buy a new domain, preferably from your hosting provider, if you do not have a custom domain attached to your Squarespace website. If you already have a custom domain, then you can transfer the same to your new web host.
- Set up and install WordPress.
Step-by-Step Instructions on How to Transfer Your Content from Squarespace to WordPress
There are about six steps to transfer content from your Squarespace site to WordPress.
These steps are:
STEP 1: Export content from your Squarespace website as an XML file.
It is worth pointing out that this is a semi-automated process, and you’ll still manually need to copy the rest of your content, such as images.
Some of the things you cannot automatically copy through this method include:
- Video and audio files
- Pages and posts saved in draft
- Templates, custom CSS, and other style changes
- Product pages, etc.
To export your content from Squarespace,
- Visit “Settings” on your website.
- Next, click “Advanced” and “Import/Export” afterwards.
- Now, select the “Export” button.
- A popup window will appear bearing the WordPress logo. Click the logo to begin exporting the content of your Squarespace site.
- Once the export process is complete, click the “Download” button to save the XML file to your device. Make sure to choose a file name and location you’ll remember.
STEP 2: Importing Squarespace Content to WordPress
Now that you have downloaded the content of your Squarespace website and saved it as an XML file, you can import it using the WordPress importer..
Here’s how:
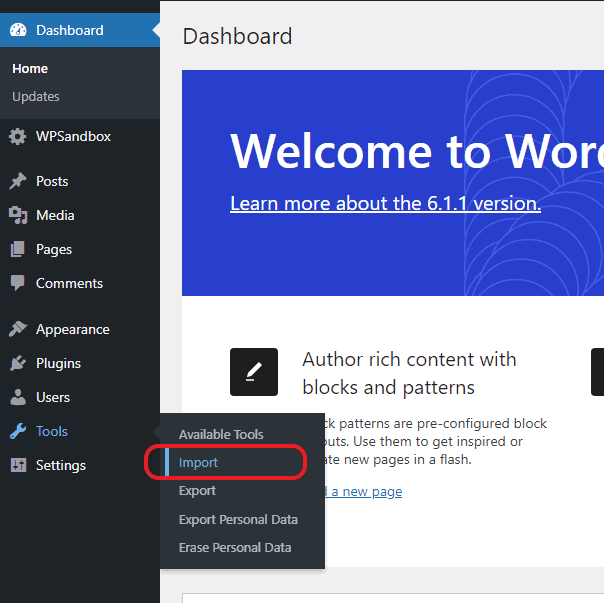
From your WordPress dashboard, hover your cursor on “Tools” and click “Import.”
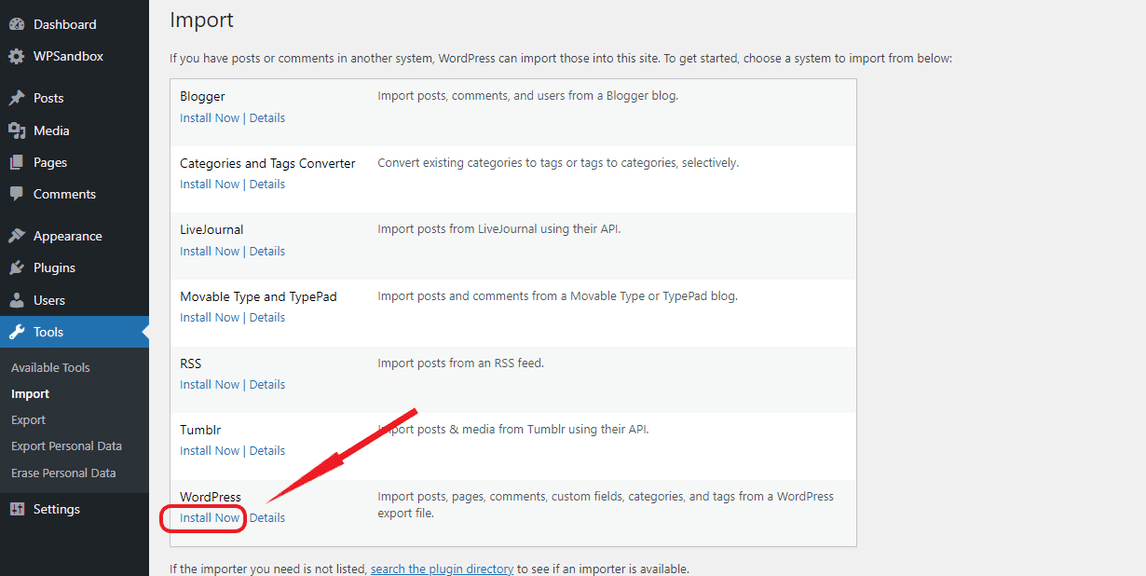
Under the WordPress option in the next window, click “Install Now.”
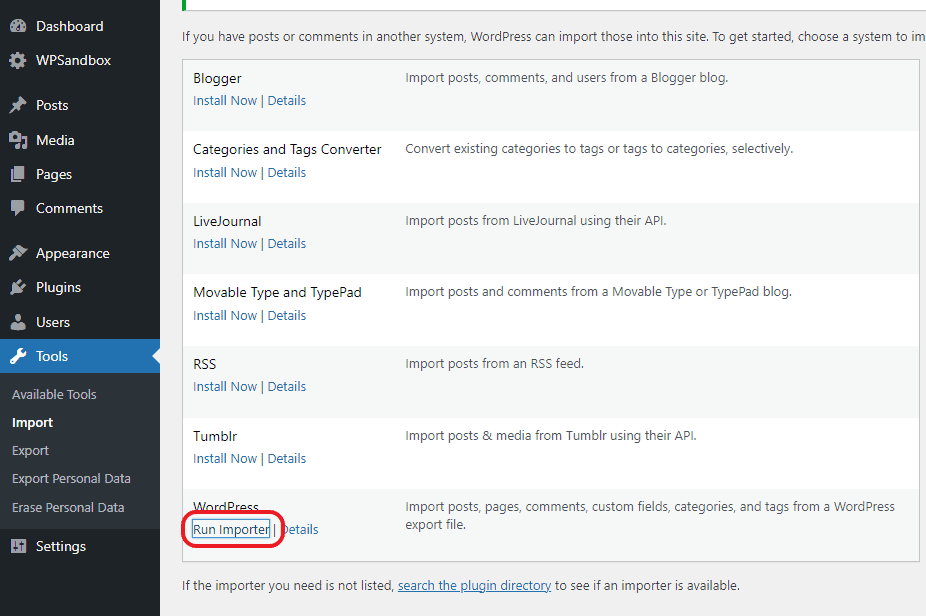
After installing, the “Install Now” button changes to “Run Importer.” Click the new button to continue.
Click the “Choose File” button to select the XML file you saved from Squarespace earlier.
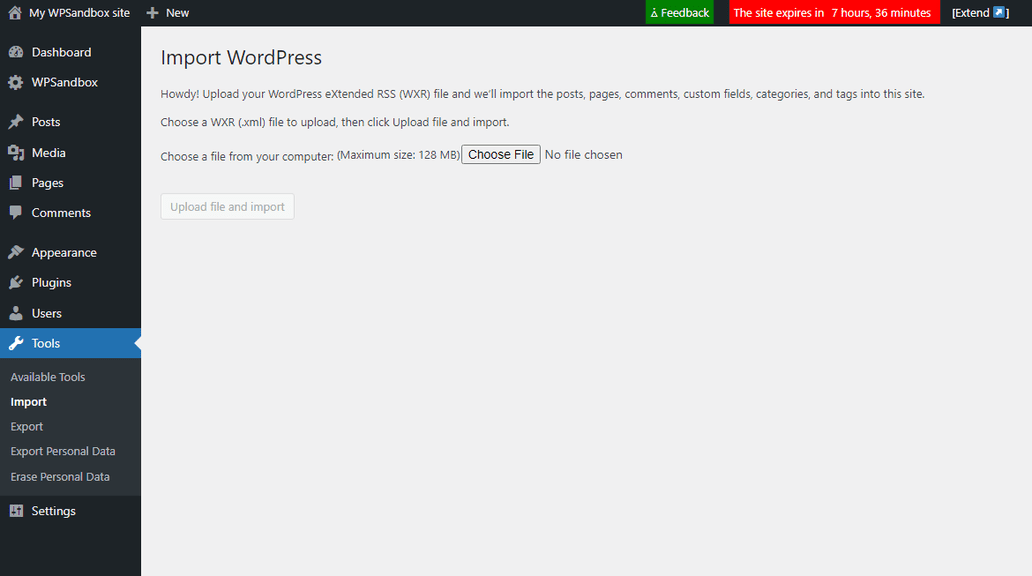
Click the “Upload file and import” button to upload the XML file.
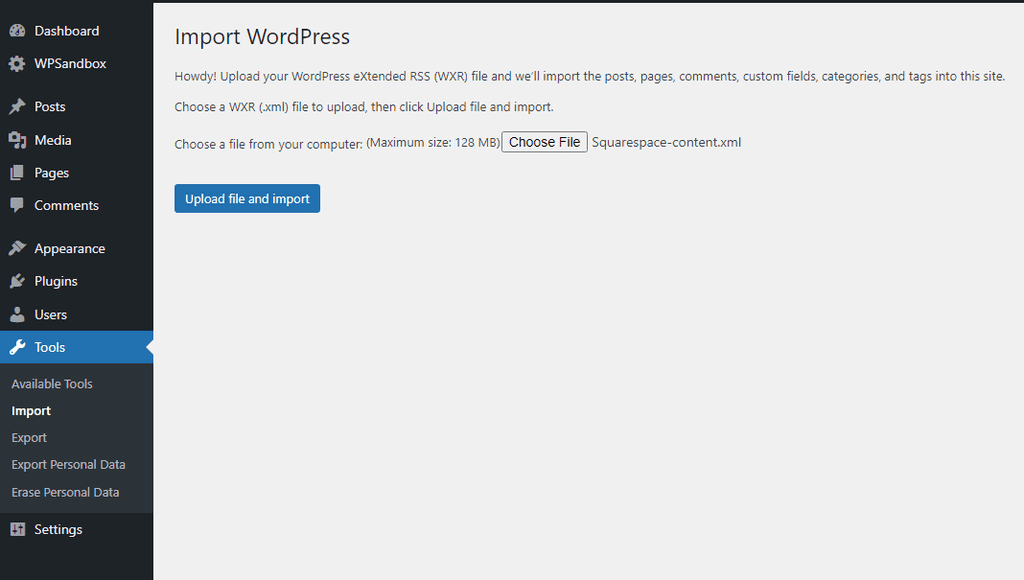
On the new window, ensure the “Download and import file attachments” checkbox is selected. Click “Submit” and wait for WordPress to complete the process.
When the import process finishes, you should get an “All Done. Have fun” message.

You can examine WordPress posts and pages to see if all your pages and posts from Squarespace have been copied.
STEP 3: Import Images from Squarespace
While the posts and pages you imported will have the images they had on your Squarespace site, these images will not appear in your new WordPress website media library.
Your WordPress site attached the images by referencing their location on your Squarespace website.
The images will disappear once you delete your Squarespace website.
Hence, it is necessary to import these images to your WordPress website.
You can do this manually, if you want, but some plugins can scan your posts and pages and import the external images into your media library.
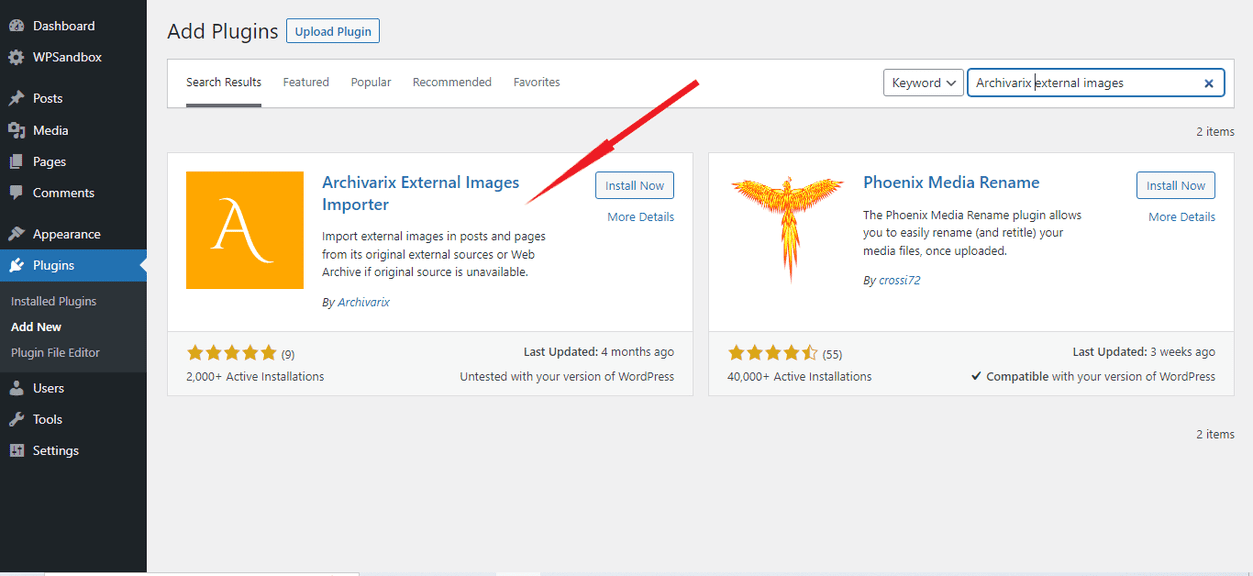
The tool we’ll be using here is the “Archivarix External Images Importer” WordPress plugin.
To begin, search for the plugin and install it. Once done, activate the plugin.
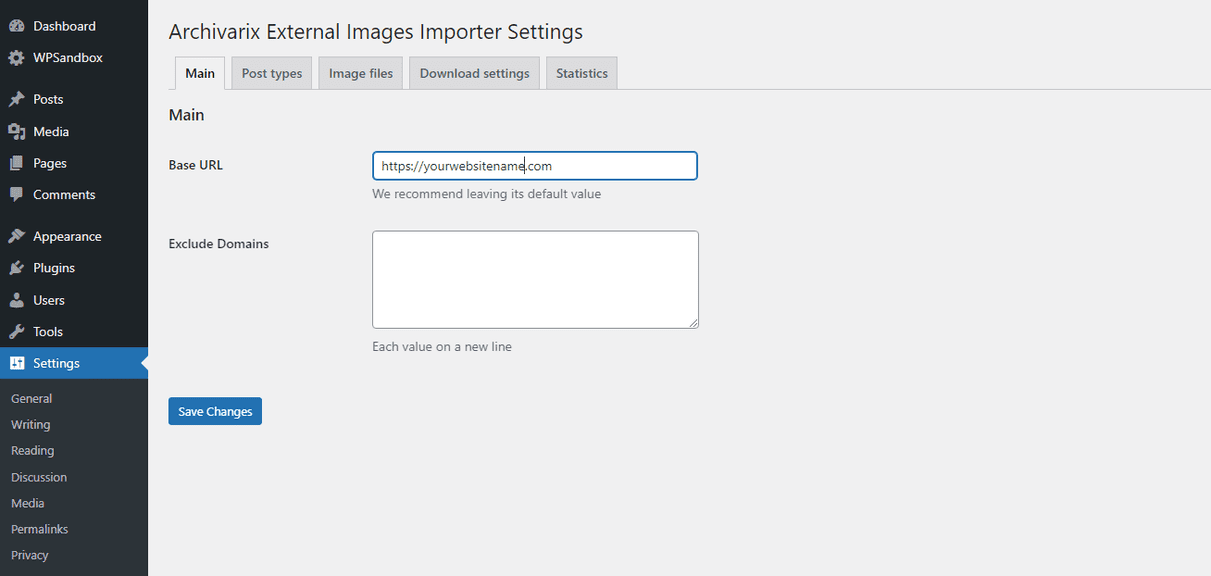
From your WordPress dashboard, hover over “Settings” and click on “Archivarix External Images Importer.”

On the next window, switch between the tabs to set your preferences. The first tab is the main tab. We suggest you leave this as it is.
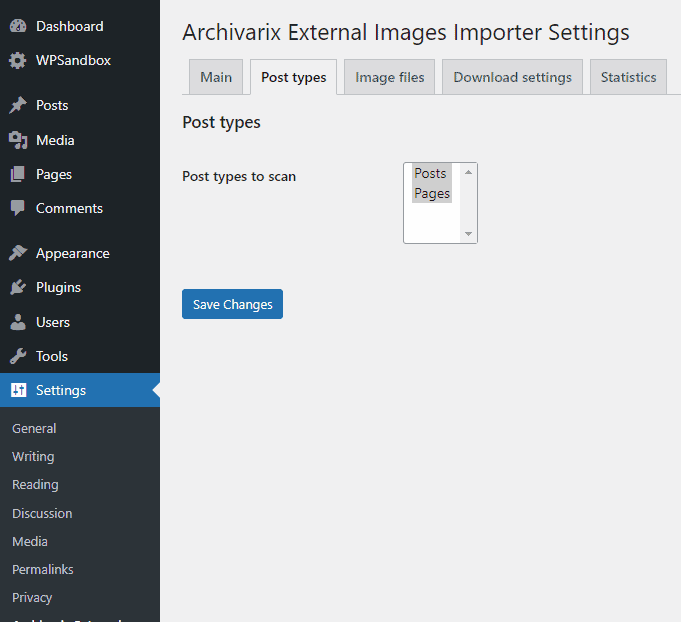
On the “Post types” tab, you can select if the plugin should import photos found on posts or pages or both.
On the “Download settings” tab, you can change what happens when the external file is no longer available and enable or disable the plugin from automatically importing images.

Click the “Save Changes” button. Next, click the “Run background processing” to begin the import process. You can click on the “Statistics” tab to see the progress report.

Other plugins you can use, include GL Import External Images, Auto Upload Images plugin, and Import External Images.
STEP 4: Changing Permalink Structure
Why’s this important?
Without changing your WordPress website permalink to mirror that of Squarespace, users visiting your new WordPress site will likely receive 404 Not Found errors anytime they try to access a page.
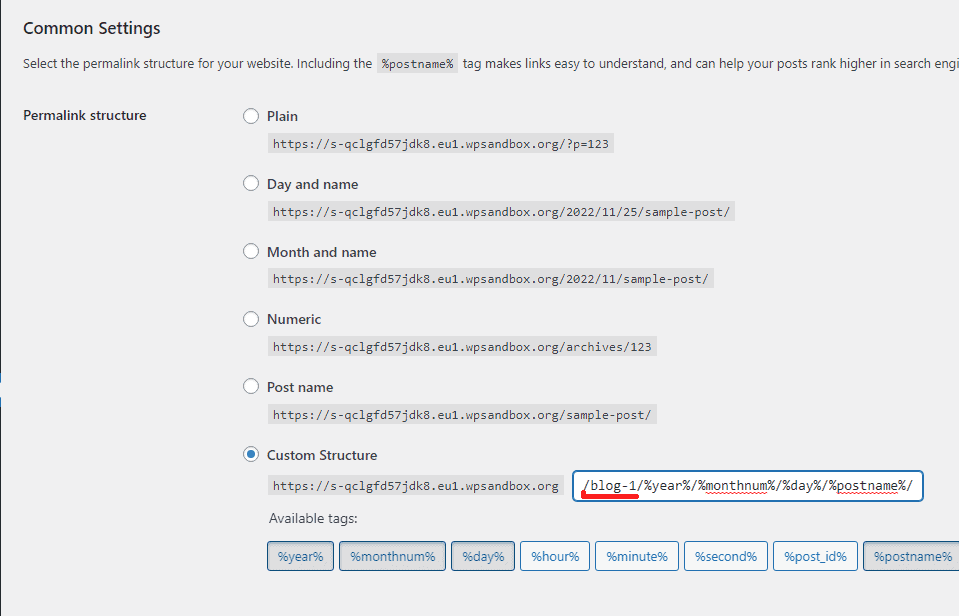
The default Squarespace URL structure is https://yourwebsitename.com/blog-1/2019/10/3/post-title, that is, year/month/day/post-name.
To make your WordPress website permalink mirror this template, do the following:
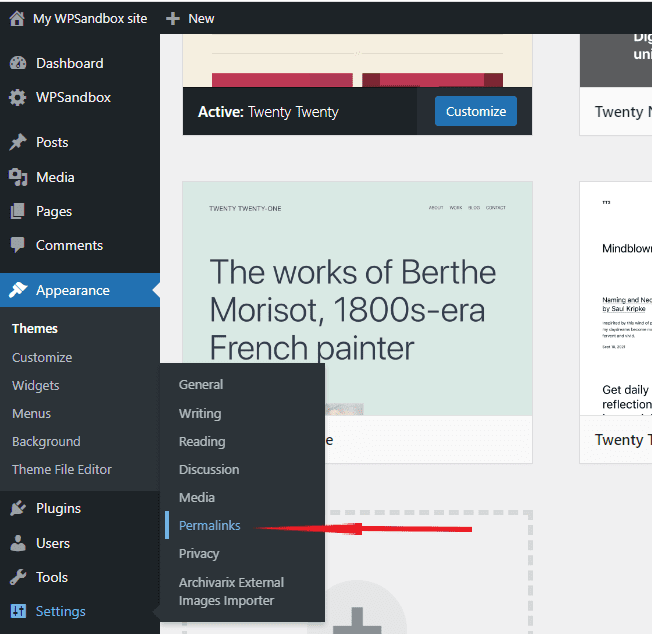
From your WordPress admin dashboard, navigate to Settings -> Permalinks.
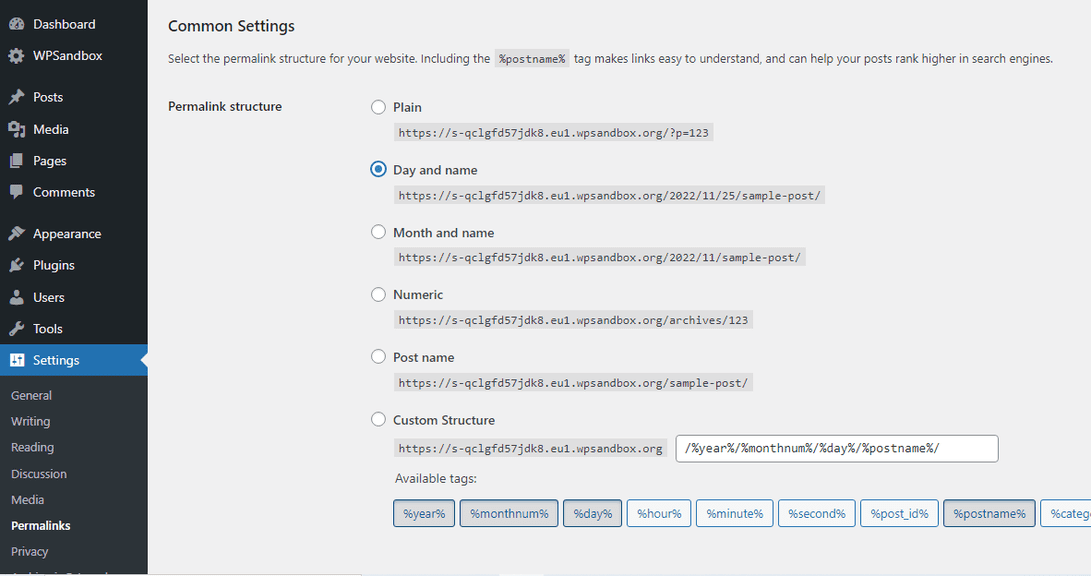
Choose “Day and Name” as your preferred option.
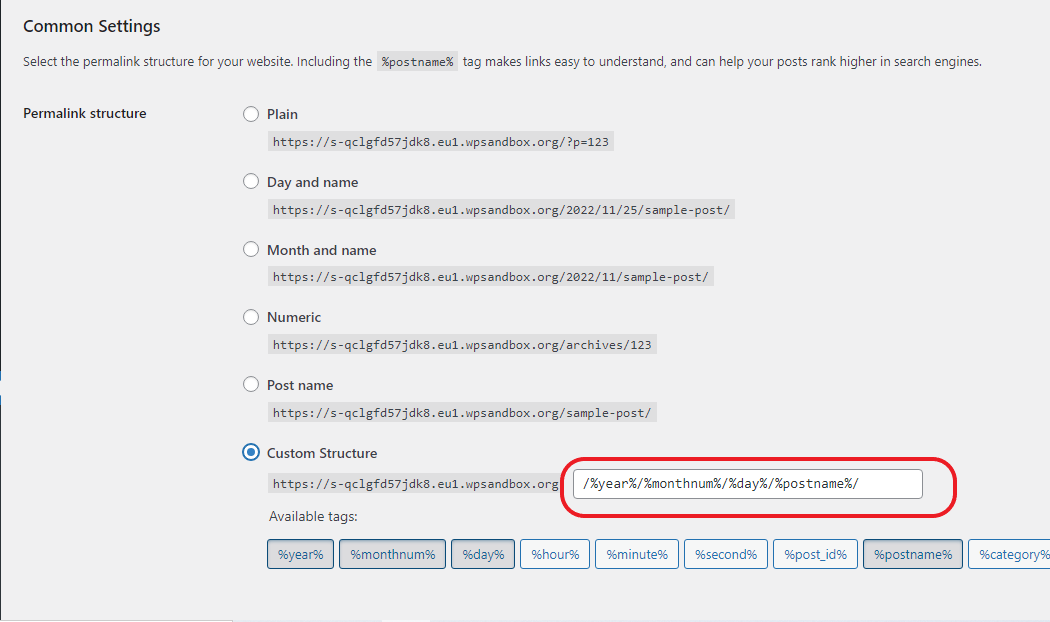
Edit the “Custom Structure” textbox to include the “/blog-1” prefix that Squarespace URLs have.
Scroll to the bottom of the page to click the “Save Changes” button.
Once done and you’ve transferred your domain name, all links automatically come to your WordPress website.
While this process minimizes the risks of 404 not found errors, you want to be proactive by installing a redirect plugin to monitor 404 error pages and properly set up redirects.
Redirection and 301 Redirects are good redirect plugins for WordPress SEO.
STEP 5: Transferring your Domain
The steps to transfer a domain from Squarespace elsewhere (preferably your hosting provider) include:
- From the home menu in your Squarespace account, navigate to “Settings” and then click “Domains.”
- Select the domain you’d like to transfer if you have more than one.
- Click the “GET TRANSFER KEY” button, but ensure the “Lock Domain” option is unchecked before doing this.
- Copy the generated transfer key and keep it safe. You’ll provide this key to the new domain registrar you sign up with.
It is important to note that once you’ve transferred your domain, you’ll also need to point your Domain Name System (DNS) to the hosting provider you signed up with.
You can do this from your registrar’s control panel. If you have no idea about all these, WordPress developers can help with this.
This process is easier if your hosting and domain registrar are the same.
Some of the best managed WordPress hosts offer free migrations.
Convert Squarespace Website to WordPress Website: Similar Tutorials to Check Out
The three tutorials below are handy for other website transfers involving WordPress.
- How to Migrate a WordPress Site: What if you want to move from WordPress elsewhere? It’s simple, and this guide gives you the A-Z steps needed to make this happen.
- How to Move from WordPress.com to WordPress.org: Are you ready for more hands-on control that WordPress.org offers over WordPress.com? This tutorial will help you complete the transition without hassle.
- How To Migrate From Wix To WordPress: Like Squarespace, Wix makes it hard to move your website elsewhere. This guide shows you how you can convert a Wix website to WordPress.
Wrapping up: How to Transfer Your Content from Squarespace to WordPress
Migrating your website from other platforms to WordPress is quite a chore courtesy of the former.
We hope this tutorial will help you streamline the process of migrating your website from Squarespace to WordPress without losing traffic to 404 not found errors.
Are you having trouble migrating your website from any platform to WordPress? You can drop a comment below, and we would be happy to help out.
Also, if you enjoyed the tutorial as we had hoped, kindly share it with your friends using the social icons to your right.


