
Want to change permalinks on your wordpress website but need help figuring out how?
There are many reasons you may want to change permalinks.
Your website may use a permalink structure that’s not user-friendly, or you’ve discovered that your existing permalink configuration offers no SEO benefit.
You may be rebranding and want your new URLs to reflect it.
Changing WordPress permalinks is straightforward.
But the big question is can you change permalinks in WordPress without breaking your site and blowing up your SEO efforts?
Changing permalinks the wrong way can lead to major issues on your site, such as 404 broken internal links error, search engine inaccessibility and outdated external links.
This article is aimed at helping you change permalinks without inviting regrettable after-effects.
- Frequently Asked Questions
- What You’ll Need to Change Permalinks in WordPress
- How to Change Permalinks in WordPress: The Basics
- How to Change Permalinks Globally on WordPress Without Breaking your site
- Step #1: Decide New Permalink Structure
- Step #2: Back up WordPress
- Step #3: Set up Permanent 301 Redirects
- Step #4: Change WordPress Permalinks
- More Helpful WordPress Tutorials:
- Wrapping up
Frequently Asked Questions
Do Permalinks Affect SEO?
Yes, directly and indirectly, permalinks affect SEO.
First, strategically created permalinks boost search engine optimization.
Permalinks are a great place to insert relevant keywords.
Also, the right permalink can increase click-through rates, indirectly impacting SEO.
What is the Difference Between a Normal Link and a Permalink?
A permalink is a URI (Uniform Resource Identifier) )in a content management system meant to be the permanent home for a piece of content.
A normal link, also called a hyperlink, on the other hand, is what links to a URI in an HTML document, and It’s rendered using anchor texts.
So https://www.mysite.com/myfirstblogpost is a permalink, but this hyperlinked text is a normal link.
What You’ll Need to Change Permalinks in WordPress
- WordPress Admin Access: You’ll need access to the WordPress admin dashboard. You can only change permalinks on a wordpress website where you have an admin or super admin role.
- WordPress Redirection Plugin: After changing permalinks on WordPress, you need to direct users to the new location of the content they are looking for. You can’t do it manually if you already have a dozen pieces of content on your site. That’s where the WordPress redirection plugin comes into play.
How to Change Permalinks in WordPress: The Basics
Each post and page on a wordpress website has a unique permalink called a permanent URL.
The default permalink structure is Plain, which contains your domain URL followed by the post ID to identify the post; https://www.mysite.com/?p=123.
However, this permalink offers no SEO benefits whatsoever and is not in any way user-friendly. That’s why almost all wordpress users change them.
You can change your permalink to other helpful structures regarding SEO and user experience.
WordPress offers several options that you can switch to, as in the screenshot below. You’ll see this if you navigate to Settings>Permalink on your admin dashboard.
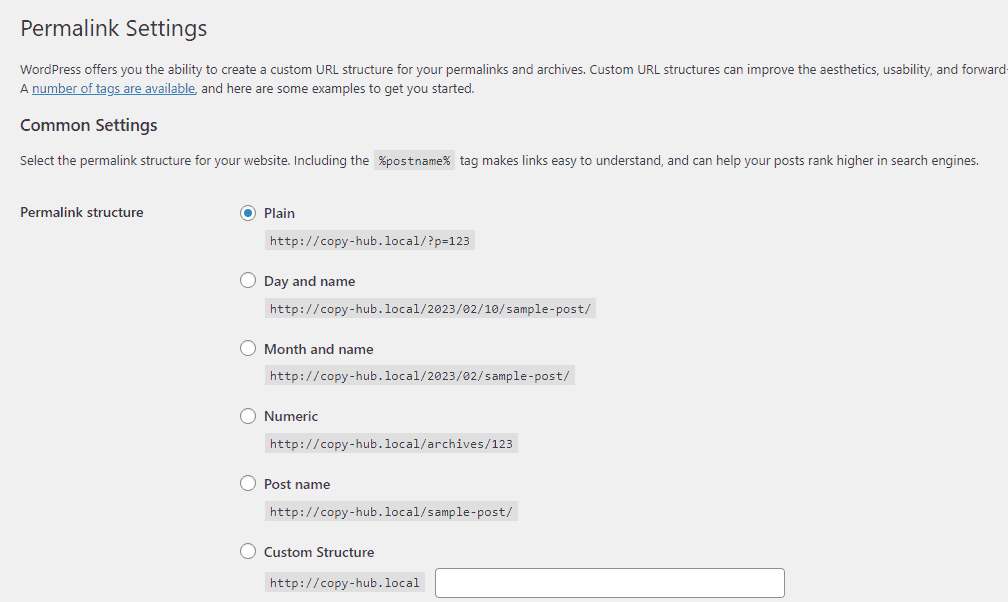
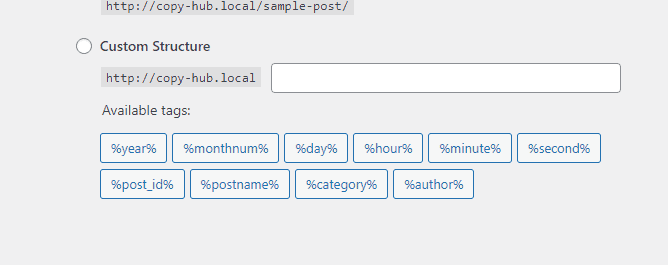
Similarly, if none of the available options work for you, there’s an option to use Custom Structure Permalinks with any of the available placeholders.
Also, you can change the permalinks of individual posts and pages in wordpress.
We’ll show you everything in the coming sections.
If you have a new wordpress website, changing permalinks will have little to no negative impact on your site.
But if you already have a dozen published and search engine-indexed content, changing permalinks is a major undertaking that requires in-depth thought.
Most articles on the internet will show you how simple it is to change permalinks.
But be warned.
You can’t just change permalinks and think all is done. You’ll be doing your website more harm than good.
Follow the steps below to change permalinks safely.
How to Change Permalinks Globally on WordPress Without Breaking your site
Now that you understand what permalinks are and what possible trouble might arise from changing them wrongly.
In the past, changing permalinks without causing links and SEO mayhem to your site required a bit of database and Cpanel knowledge.
You have to modify your wordpress .htaccess file manually. Fortunately, today, you can do away with such a complex process with the right WordPress plugin on your hand.
That’s what we’ll show you here. There are four main steps when it comes to changing permalinks safely in WordPress.
Let’s see.
Step #1: Decide New Permalink Structure
You should first decide what the syntax of your new permalink is before you embark on a permalink restructuring mission.
Your choice of permalinks boils down to the type of website you own, especially the one that works best for your audience and search engines.
While the Post Name (http://copy-hub.local/sample-post/) permalink structure works for most websites, some sites, like news websites, prefer date-based post name URLs on their permalinks.
The choice is yours. Once you’ve decided on the permalink structure, It’s time to back up your wordpress website.
Step #2: Back up WordPress
Changing permalink throughout your entire wordpress site is a major undertaking you shouldn’t take lightly.
You wouldn’t need the backup as part of the process, but you should have it.
If anything goes wrong, you can rest assured you can restore your website in a few clicks.
Backing up your wordpress files and database is simple.
You can do it manually as well as use a backup plugin.
Once that’s set, step 3 is where the real business starts.
Step #3: Set up Permanent 301 Redirects
Unlike the conventional practice where you’ll have to fix broken links after changing URLs, we’ll use a reversed approach to take care of broken links.
Hence, well set up redirection before proceeding to change permalinks.
The benefit of this approach is that, instead of dealing with the fallout of permalink changes, you’ve set up a catch-it-all solution for all instances of link changes on your site.
So you can change permalinks without breaking links whatsoever.
A permanent 301 redirect takes all requests of your old permalinks and directs web browsers to the new URL where the relevant content is.
Also, it notifies search engines of a permanent change on your site.
To do this, you must first install and activate the Redirection plugin.
For more details, check out this guide on how to install wordpress plugins.
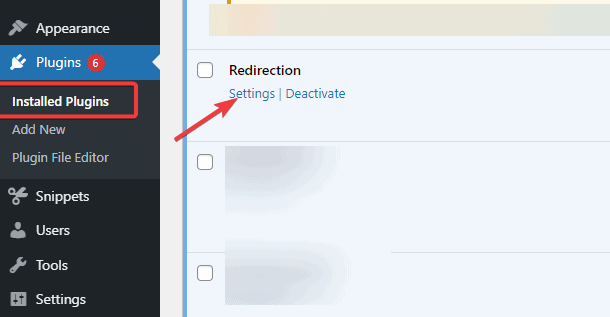
Once you activate the plugin, navigate to Plugins>Installed Plugin on your dashboard.
LOcate Redirection on the list and click the Settings link under it.
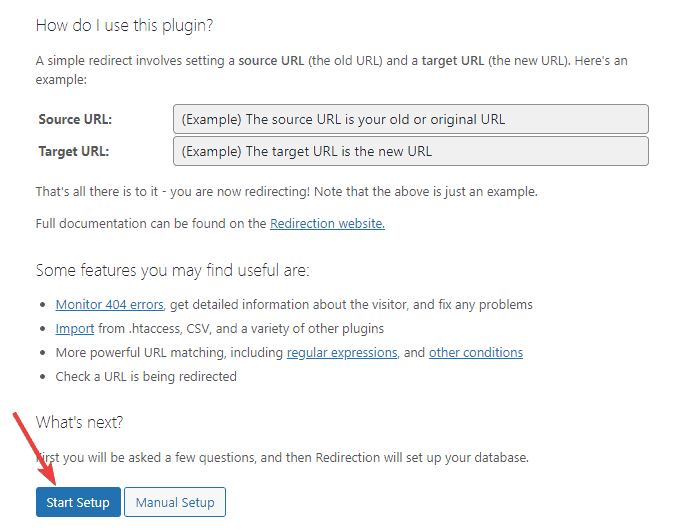
Next, you’ll be taken to the plugin overview page.
Read through and click the Start Setup button at the bottom to continue.
On the next screen, you’ll see the Basic Setup.
Check the box next to Monitor Permalink changes in WordPress posts and pages.

What this does is that it monitors all instances of permalink changes on your site and then automatically sets up redirection.
Thus, you won’t have to redirect any time you change permalinks. Enable any other settings you like, then click on the Continue button.
Next, the plugin will test the connection to the REST API. once the connection is successful, you’ll see a REST API notification changes to GOOD.
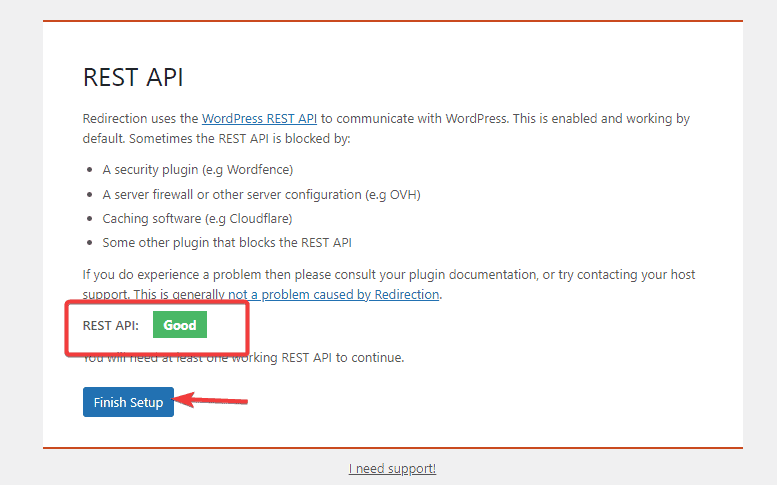
Lastly, click the Finish Setup button.
And that’s all. You’ve successfully set up redirects for permalink changes.
Henceforth, link changes will be automatically detected and redirected to the new link.
Step #4: Change WordPress Permalinks
Now that redirection is in place, we can proceed to change permalinks anyhow we like on WordPress.
In this tutorial, we’ll show you how to change permalinks in different scenarios starting with the sitewide permalink change.
Change Permalinks Throughout Your WordPress Websites.
To change the overall URL structure of your website, follow these steps.
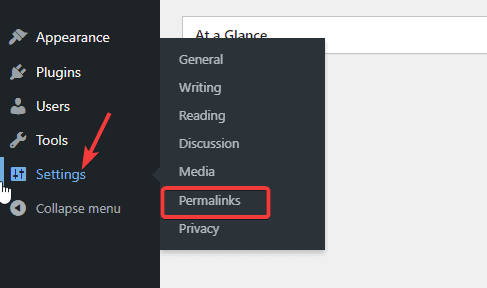
Log in to your admin dashboard, locate Settings on the left panel and choose Permalinks from the options.
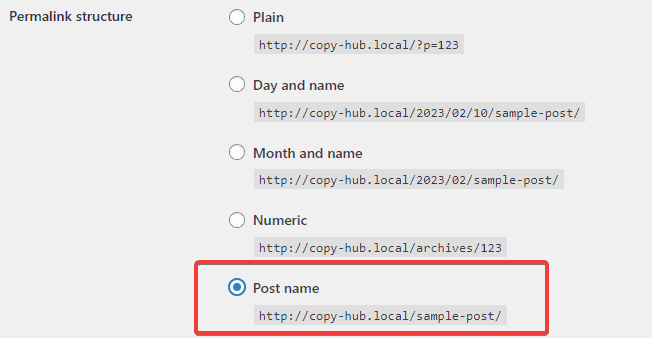
Next, you’ll see all the URL options available with how they look. We’ll choose the Post Name option to proceed.
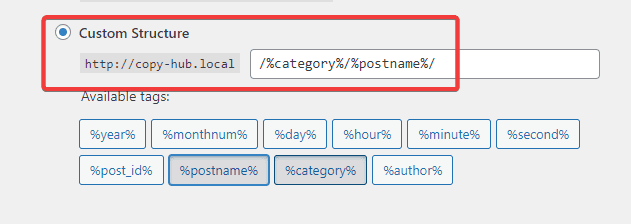
However, you can also create a Custom Structure with any or a combination of the available tags.
For instance, you can use the Yoast SEO recommended custom structure of %category%%postname%. It’s up to you.
After that, click the Save Changes button, and wordpress will update all the permalinks on your website.
Once you successfully make the changes, the redirection plugin will automatically detect the changes in permalinks and then create redirects for all pages.
But if you see that the redirect is not implemented correctly, you’ll need to set up the redirection manually.
How to Change Categories and Tags Permalinks
The default base URL for tags and categories in wordpress is /tags/ and /category/, respectively, as in the example below.
https://mywebsite.com/category/gadgets/
https://mywebsite.com/tags/iphone/
You can change both prefixes on the same permalink settings page.
Scroll to the optional section on the page and enter your desired prefixes into their respective fields.
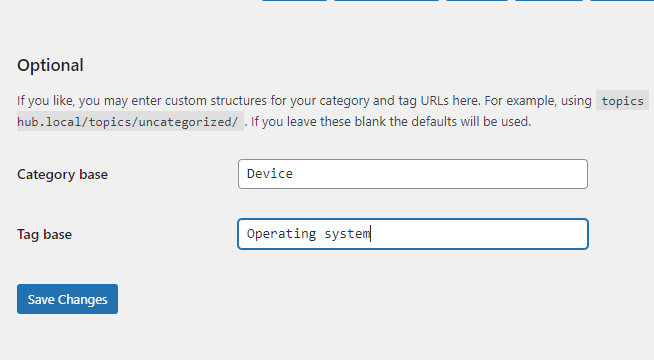
Once done, click the Save Changes button.
Now your category-based and tag-based permalink structure will look like the example below.
https://mywebsite.com/device/gadgets/
https://mywebsite.com/operating-system/iphone/
Change Individual Post or Page Permalinks
The permalink structure you set above will be used for all pages and posts on your website.
However, you can still change the permalinks of individual posts from the URL slug of each post.
To do this, you have to open the post editor.
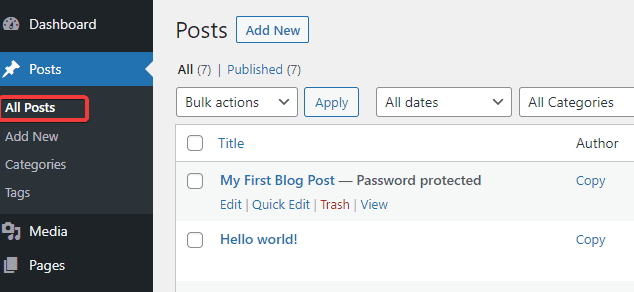
On your dashboard, go to Posts, then All posts.
Next, locate the post where you want to change the URL slug and click the Edit link under it.
Once the editor opens, click on the Settings (Gear) icon at the top right corner and switch to Post on the panel that appears.
Next, locate the Permalink tab and click to expand.
Under it, click on the URL slug, then change the URL slug to a custom permalink.
Once done, click the Update button to save your new permalink settings.
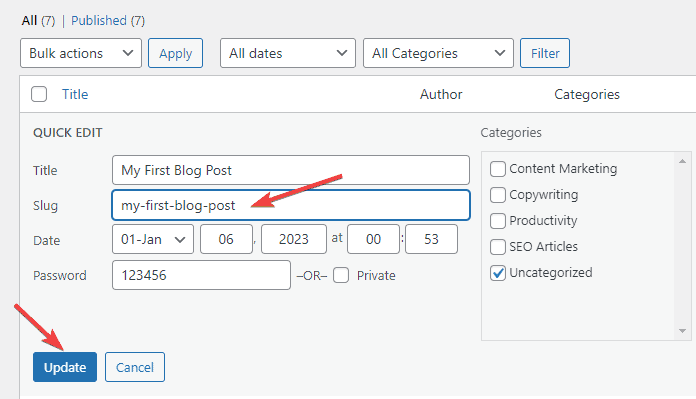
This option may not be in some versions of WordPress, another way to change the permalink for a single post or page is to use the Quick Edit settings. So, click on the Quick Edit link.
Next, input your new permalink in the Slug field and click the update button.
You can repeat these steps for all posts and pages. Once you update the post, the Redirection plugin will automatically redirect from the old permalink to the new one you created.
More Helpful WordPress Tutorials:
- How to Change Font in WordPress: Fonts can make or break your WordPress website. Learn how to change and customize fonts to give your site a soothing visual appeal that visitors can resist.
- How to Change Themes in WordPress: Want to switch themes in WordPress? This article will walk you through every step to remove themes in WordPress safely.
- How to Change WordPress URLs: Learn easy ways to change WordPress URLs, via the admin dashboard, with a plugin, or by code-editing WordPress theme files.
Wrapping up
Changing permalinks in WordPress is a blue moon affair; unless necessary, you shouldn’t change it.
It’s best to have a clear-cut permalink structure before launching a new site. And sticking to it is essential. That’s why it’s called permalinks, meaning permanent links.
If you need to change URLs after your site has been around for a while, then you must be careful to avoid major SEO and usability problems.
When the need arises, if you follow the steps in this guide, you shouldn’t have any disruption to your website’s accessibility to users and search engines.
We hope this guide helps you update your permalink structure without affecting your website search ranking traffic.
Do you have any questions about changing permalinks in WordPress? Are there other ways, plugins or tools that have worked for you? Let’s hear from you in the comment below.


